Saturday, August 28, 2010

Enjoying a Cold One

In the summertime, there's nothing like relaxing with something cold and refreshing. Since some folks don't hold alcohol very well (which is code for, since I don't hold alcohol very well), I often rely on the delicious, tomatoey tang of the classic cold soup from Mexico (where they really know what a hot summer is), home-made gazpacho. If you've had good gazpacho, you know just what I mean. If you haven't, well, today's your lucky day. (This also addresses a promise I made after last week's post to write about something that is both low-fat and not heavily burdened by carbs.)

The recipe, which makes four meal-size portions or six to eight appetizer size portions, follows. As you'll see, the overall approach involves dividing the chopped vegetables into thirds, one of which is pureed to a fine consistency, the second of which is ground to a slightly larger, coarser consistency, and the third of which is used in its basic chopped state without being pureed at all. The resulting combination of textures adds a wonderful dimension to the tasty tartness of the basic soup. The only thing that would make it even better would be to top it with fresh, home-made croutons, so we will. (I have to get some carbs in there, you know.)

The recipe, as you would expect, involves a lot of tomatoes. I use fresh, since this is primarily a summer dish and it's easy to get - or even grow - good tomatoes. (I've never made this with canned tomatoes, but if you do and it works, let me know!) For this reason, a couple of special notes about the tomatoes are in order.

First, I like to use plum tomatoes. In addition to having a delightful taste, their oblong shape makes it easy to seed them by cutting them in half; round tomatoes need to be cut into quarters for seeding. That may not make much of a difference if you're using five tomatoes, but if you're starting with five pounds of tomatoes, as you do with this dish, a few seconds saved on each tomato quickly add up. (If this reminds you even a little of that oft-told story of why a certain famous cartoon mouse has four fingers on each hand instead of five, it's not coincidental. That's where I got the idea.)

Second, you'll note the recipe calls for the tomatoes not only to be seeded, but also peeled. For any readers who are new to peeling tomatoes, it's easier than it sounds. The trick is to blanch them in boiling water for about a minute; once they cool off enough to handle, you'll find the skins remove easily. (I like to quicken the process by blanching the tomatoes in batches of three or four; while each batch is blanching, there's enough time to take the previous batch out of a cooling bath (think blanch-and-shock) and peel them before the newly blanched batch takes their place in the cold water.

A third special note, this one about the red onion you'll be using. Red onions have great flavor but tend to have a nasty bite. You can decrease the onion's bite, while still keeping the flavor, by soaking it in water for five minutes prior to using.

Enough talk...let's make some gazpacho!

As with most things involving tomatoes, use non-metallic bowls.
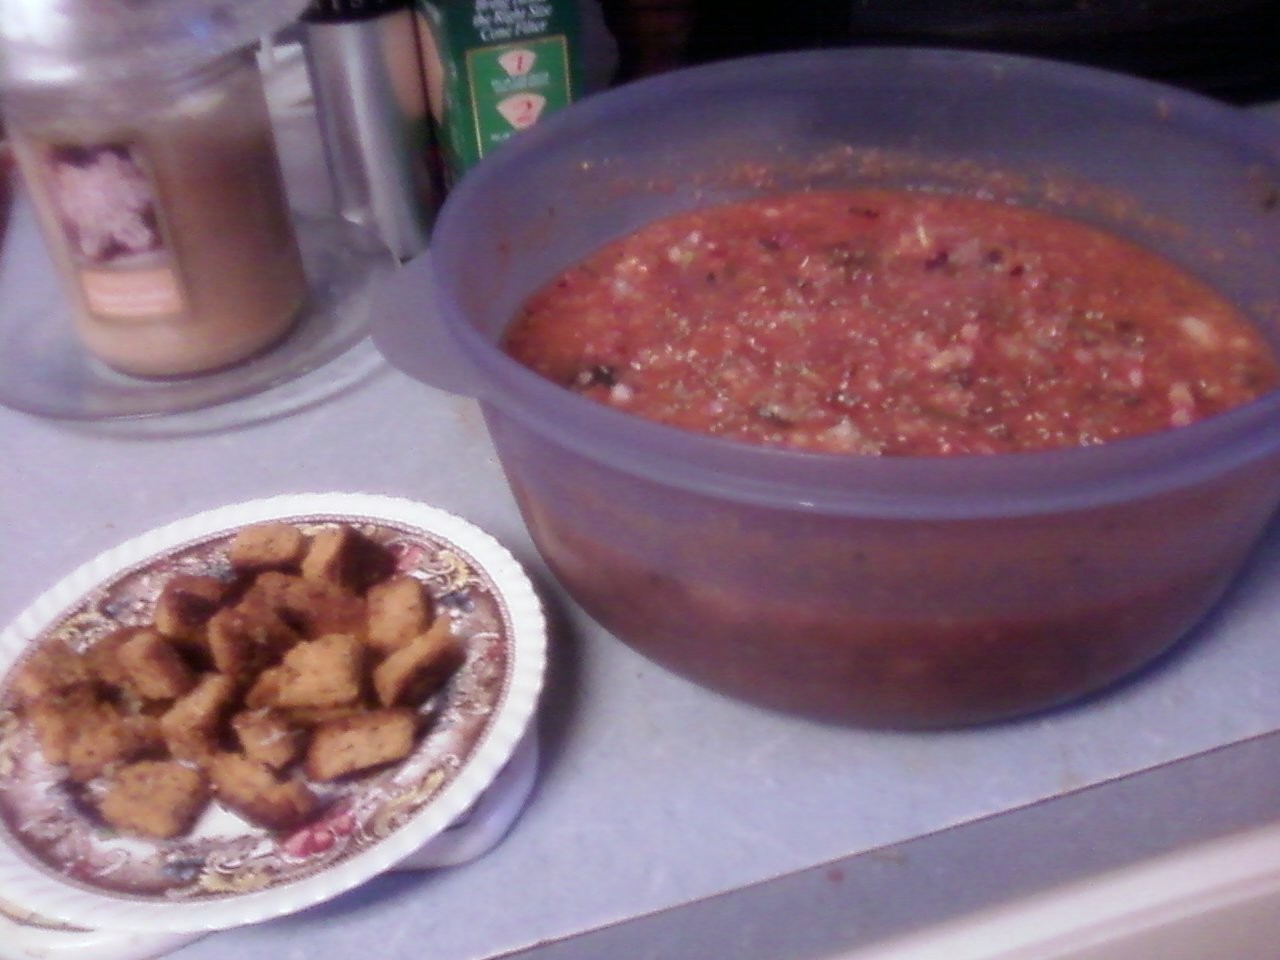
Begin by peeling and seeding five pounds of tomatoes as described above. When they're done, cut them into bite size pieces. Place the pieces into a pot, slowly bring to a boil, then lower the heat to a simmer. After simmering the tomatoes for 15 minutes, stirring often to prevent them from sticking to pot, press them through a food mill (or let them cool and then crush them with your hands), putting the juice back into the pot and keeping the tomato meat for used later in the recipe. Boil the juice for about five minutes, stirring often.
    
While the tomatoes are cooking, combine in a large bowl 1 chopped red onion; 1 peeled, seeded and chopped cucumber; 1 seeded and chopped green or red bell pepper; and 2 chopped stalks of celery. Separate about one-third of the mixture and put it aside. To the remaining two-thirds, 2 tablespoons of chopped, fresh cilantro;2 tablespoons of chopped, fresh chives; and the tomato meat you put aside earlier. Then add 2 minced garlic cloves, 1/4 cup of red wine vinegar, 1/4 cup of olive oil, the juice of 1 lime, 2 teaspoons of sugar, 4 teaspoons of salt, 2 teaspoons of fresh-ground black pepper, and 1 teaspoon of hot sauce.

Mix all these ingredients well and divide that mixture in half.

Using a food processor, finely puree one of the halves and coarse-puree the other half. Once that's done, combine them with the chopped vegetables you put aside earlier, add the tomato liquid you heated, and mix until everything is combined.

You're just about done! Just put hot mixture into a non-metallic storage container, cover tightly and refrigerate overnight to let the soup cool and the flavors blend.
Of course, you'll also need croutons to go with your new gazpacho.
To make the croutons, put 4 roughly chopped cloves of garlic into 1/2 cup of olive oil. Let it rest for as long as possible, to give the garlic a chance to infuse the oil. (If you do this before you start the gazpacho as noted above, the garlic will have time to infuse the oil while you're processing the tomatoes.)

While you're preheating your oven to 250 degrees, brush both sides of three or four slices of firmly-textured bread with the garlic-infused oil. Cut the bread into squares about 1/2" on each side, and spread them out on a baking sheet. Bake for 45 minutes to an hour until the bread is at the desired level of crispness, turning the baking pan half-way through to heat the croutons evenly. When they're done, sprinkle them with fresh parmesan, put in a sealed bag or container, and store until you're ready to use them to top your gazpacho!
For a cookbook style, notebook-ready copy of this or any other recipe from this site, just drop me a line and I'll get it right off to you.

Thanks for visiting! Till next week, stay well, keep it about the food, and always remember to kiss the cook. ;-)

Saturday, August 21, 2010

The Raviolo and I

Raviolo: a word so obscure, even Microsoft Word's spell-checking software doesn’t recognize it. Its better know plural, of course, is ravioli. By either name, though, this wonderful cheesy-stuffed pasta pillow is not only delicious to eat; it’s also easy and fun to make. If you’ve never made it (or any other fresh pasta) before, I invite you to try now; you’re in for a real treat, not to mention a real sense of accomplishment once you’ve seen and tasted what you made. And you won’t need a pasta machine. (I didn’t even own one until earlier this week, but that story’s a future post.)

My introduction to home-made ravioli was a pasta class I took several years ago at the culinary arts school of a local community college.  The pasta chef teaching the course excitedly brought out the school’s brand new restaurant-grade pasta machine, an impressive multi-gadgeted electric device only about the size of a household toaster but costing a couple of thousand dollars. Or at least it was impressive until the machine started shutting down from the motor overheating every time someone tried to use it. A few in the class decided to stay with it, enduring a continuous cycle of press, overheat, wait for it to cool down and then try turning it on again. I opted for the other type of pasta maker, the round wooden kind that never overheats or breaks down, also known as a rolling pin. That’s one of the most encouraging things about making pasta; people did it centuries before any of the fancy kitchen equipment we have today was invented.

Both the pasta dough and the filling are easy to make. The dough described follows a traditional recipe. The filling features Fontina cheese. I wasn’t familiar with it until recently, when I heard Bobby Flay make an off-handed remark on a Throwdown rerun about Fontina being one of the best cheeses there is. Once I heard that, I had to get some and find out what he was talking about. My first taste of its wonderful Italian aura immediately screamed ravioli.

The dough for about two dozen ravioli (more or less, depending on how big you make them) begins in a large bowl into which you put 2 cups of all-purpose flour and ½ teaspoon of salt. Mix them until they’re combined and then form a well in the middle of the flour-pile. Into the well, put three egg-substitute eggs (or, if you like, three real eggs), and a teaspoon of olive oil. Mix them together using your hand, first combining the wet ingredients with the inner-most part of the flour pile, and gradually working your way outward until all the flour is incorporated to form a dough.

[Before we go further, I must add the following remark. There’s a good chance you’ve seen someone make pasta dough as described above, except without the bowl; in other words, with the flour piled directly on the kitchen counter. That’s the most authentic way, but it’s hard to do with only two cups of flour without making a mess once you start mixing in the wet ingredients. If you really want to try it, I suggest waiting until you’re making at least a double-batch of dough.]

Knead the dough for four to five minutes until it’s smooth and elastic, flouring your work surface as necessary during the kneading. After kneading, cut the dough ball into quarters. Wrap each quarter in plastic wrap and let them rest for 20 minutes while you mix the filling.
The filling, though delicious, couldn't be simpler to make.

Just put the following ingredients into a bowl and mix well until they’re combined: 1 cup of Ricotta cheese, 3/4 cup of grated Parmesan cheese, 3/4 cup of fresh grated Fontina cheese, 1 egg-substitute egg, 2 tablespoons of fresh chopped parsley, ½ teaspoon of garlic powder, and salt and pepper to taste.

So now you’ve got your dough, and you’ve got your filling. Next stop: home-made ravioli!

Beginning with the first quarter-portion of dough (and keeping the remaining portions covered to keep them from drying out), roll the dough out on a well-floured surface into something as close as you can to a square about 12” on each side and 1/16” thick. Using a cooking cutter, cut out as many pieces as you can. (Remember, each raviolo will require two of the pieces.) Place a generous teaspoon of filling on the centers of half of the pieces; using your finger, coat around the edges of those pieces with egg-substitute (or a real egg, beaten) and place an identical dough shape on top. Press the edges down onto the egg with your finger, then with a fork to seal. Done right, the egg will keep the ravioli from opening up later in the cooking water.
And that's it! As you finish the ravioli, either put them aside (if you’re going to cook them right away), or place them on a baking sheet covered with parchment for freezing later. In either case, cover them to prevent drying out while you repeat the above with each of the remaining pasta quarters.

Remember that fresh pasta generally cooks faster than the packaged kind. The ravioli will generally cook in about 7 minutes, but check them often for doneness. If you choose instead to freeze them, put the ravioli in the freezer on the baking sheet first; once they’re frozen, put them together in a plastic bag for storage. (If you put the ravioli together in the bag before they’re frozen, they’ll likely stick together.)

Once the ravioli are cooked, all that remains is to top them off with your favorite sauce and some parmesan, and to enjoy the taste of fresh-made ravioli – and the fantastic feeling of having made them yourself!
For a cookbook style, notebook-ready copy of this or any other recipe from this site, just drop me a line and I’ll get it right off to you. (I also hope to get a video of this recipe finished and available on You-Tube soon...stay tuned!)

Thanks for visiting! Till next week, stay well, keep it about the food, and always remember to kiss the cook. ;-)

Saturday, August 14, 2010

Oh Crepe!


Ok, I admit it. I messed up.

Normally I'm fairly rigorous about my mise-en-place, that French cooking term which translates, roughly, to "Exactly how dumb would you have to be to start cooking without checking first if you have all your ingredients?" (It does lose something in the translation.)

A couple of weekends ago, my vision of a perfect-50's-television-family Sunday morning breakfast of freshly made peach crepes came crashing back to reality when, part way through mixing the batter, I found I didn't have the milk called for in the recipe. Rummaging through the refrigerator, the closest thing to milk I could find was sour cream. Hardly an ideal substitute, but it's my firm belief that if an idea is the only one you have, it doesn't matter much if it's good or bad. (MacGyver would be so proud.)

As you might expect, the sour cream made for a much thicker batter than would the milk. If you've ever made crepes, you know that, while they're not at all hard to make, the thickness/thinness of the batter is critical. I found that increasing the amount of water called for in the original recipe brought the batter back to its intended thickness, while still allowing the nice flavor added by the sour cream to come through. The disaster for which breakfast was originally headed was, I am happy to report, avoided. It turned out so well that the sour-cream version has now become my go-to crepe recipe.

Crepes, of course, are one of the great, versatile foods. Fill them with fruit for breakfast, with meat for dinner; I've even heard of filling them with lunch meat and cheese, similar to a wrap, for lunch. Remember, it's your crepe. Have fun with it! (My son did try using peanut butter and it was terrible. Even crepes, it would seem, have their limits.)

For the filling, a peach-compote of sorts was easy to make using an approach that will probably seem familiar to anyone who has ever made fruit jam.

To make about 8 crepes, combine 1 cup of all-purpose flour, ¼ teaspoon of salt, 2 tablespoons of butter substitute (melted), 2 egg-substitute eggs, 1 cup of low-fat sour cream and 1/2 cup of water in a bowl and mix well with an electric hand mixer on high. Add additional water, ¼ cup at a time, until the batter is the consistency of heavy cream. Cover with plastic wrap and let rest in the refrigerator for 1-2 hours.

After the batter has finished resting, heat a non-stick sautĂ© pan over low heat. When it's heated, remove it from the stove, melt about a teaspoon of butter substitute in it, and add about ¼ cup of the batter. (Unlike pancakes, crepes are very thin.) Swirl the batter around to cover the surface of the pan, put it back on the stove and increase the heat to medium. (I recently saw one of my favorite tv chefs, Michael Chiarello, add a teaspoon of toasted chopped hazelnuts to the batter at this point. What a great idea!) When the crepe is browned on the bottom and firm enough to be flipped (usually about two minutes, but keep an eye on it), flip the crepe or use a spatula and your fingers (carefully!) to turn it over and cook it on the opposite side until it has the desired brownness. (If you're new at flipping, don't be discouraged if the first few flips don't work out. It's really the only challenging part of making a crepe, and it does get much better with just a little practice. The first time I made crepes I had to throw out the first three or four attempts. Stay with it. And this is a case where a good pan really does make a difference.) Repeat the process until all the batter is used, rebuttering the pan after each crepe, and stacking the cooked crepes as they finish. Keeping the stack covered with a clean towel to prevent them from drying out.

Of course, even good crepes need a nice filling.

For the filling, combine in a medium saucepan 1-1/2 cups of sugar and the juice and zest of 1 lemon. Heat it over very low heat, stirring often, until the mixture is melted. (This should take a few minutes.)

Once the sugar mixture is melted, add 6 peaches, sliced into eighths, ¼ tsp ground nutmeg, and 1 tablespoon of butter substitute, and increase the heat to medium. Cook until the peaches are soft and the liquid is reduced. Turn off heat and let the peach mixture rest to allow the liquid to thicken. Fill the crepes, roll them up, sprinkle them with a little confectioner's sugar, and serve warm.

(An equally nice apple filling can be made by using apples instead of peaches, and 1/2 tsp of ground cinnamon along with the nutmeg. I used golden delicious and it was delicious, but experiment with whatever your favorite apple is.)

After you've filled and folded over the crepe, don't forget to sprinkle confectioner's sugar on top!

Till next week, stay well, keep it about the food, and always remember to kiss the cook. ;-)

Saturday, August 7, 2010

Impossible Pie Crust


I've heard it from experienced pastry chefs, and you probably have too: it's impossible to make a good reduced-fat pie crust. It's what they learned in culinary school, taught to them by people who, themselves, learned it in culinary school from people who learned it in culinary school. It's so obvious there was never a need for anyone to waste time or ingredients trying it.

Not having a real, formal culinary education, however, I confess to not having been aware of this. And so, in my ignorance, I went ahead and made a reduced-fat crust that has gotten many compliments over the years from friends to whom I've served it. (Apparently, a lot of people I know didn't go to culinary school either.)

The key to making such a crust successfully is managing the fat in the eggs and the butter. The eggs are simple enough; egg-substitutes are an easy one-for-one swap when making dough. (They don't work quite as well for batters or other things that depend on the eggs getting fluffy.) It's the proper use of butter substitute that took a while (not to mention several not-very-good pie crusts along the way) to figure out; let me share with you what I learned.

First, and as most people probably already know, butter substitutes have lower fat than butter because they have a higher moisture content, so in recipes it's not a simple one-for-one substitution. It's more like three-quarters-for-one. In other words, if a recipe calls for a cup of butter, use three-quarters cup of butter substitute.

Moisture, of course, is not the only potential obstacle to a successful crust. Texture is another. I've found some butter substitutes have the right taste but are too soft, while others have a nice firm texture but not a good enough taste. For baking I solved this by making a mix; a blend of Smart Balance and I Can't Believe It's Not Butter, in equal parts, has worked well for me in baking projects. I recommend you experiment to find the combination you like best. An important factor to remember is that most brands of butter substitute are available in a variety of fat contents, some high enough to be suitable for baking, and some not. Check the package to make sure the manufacturer specifically says it's ok to use for baking. Remember, we're going for a crust that's reduced-fat, not one that's fat-free. Even I'm willing to admit that last one really is impossible.

Temperature is another key to making dough using a butter substitute. Dough, regardless of whether it's made with real butter or butter substitute, must be kept cold for easy handling. If you're using real butter, this means the refrigerator. For doughs made with butter substitute, think freezer instead. Not to freeze it solid, but to make it that much colder.

To make two 9-inch pie crusts, mix 1/2 cup of water, 1/4 tsp lemon juice and 1 tsp of salt, and put the mixture into the freezer until it's almost icy.

In the bowl of a mixer, combine 12 ounces of all-purpose flour, 4 ounces of cake flour, and 3 tablespoon of sugar. (For a real treat, use vanilla sugar instead of the plain kind. Oh baby!) Blend 8 ounces of butter substitute into the mixture using the paddle until it looks like a coarse meal with a few larger pieces of butter substitute. Add the icy water mixture and blend until the dough holds together. Divide it in half, wrap each in plastic and chill for at least 1 hour before using as you would any other pie crust.

 If you'd like a cookbook-style notebook-ready copy of this recipe, just send me an e-mail and I'll forward it to you as a Word file.

Thanks for visiting - be sure to share your comments and suggestions!

Till next week, stay well, keep it about the food, and always remember to kiss the cook. ;-)