Saturday, July 28, 2012

Pitzels (Stuffed Pizza Dough Pretzels)

To download a copy of the recipe for Stuffed Pizza Dough Pretzels, click HERE.

A warm welcome to new subscriber Jennifer. It’s great to have you!

I’m not sure who first had the idea of combining the goodness of a fresh, homemade soft pretzel with the heavenly joy of pizza, but whoever it was did it a long time ago. Since that time, many more versions have been made by countless cooks. This week’s recipe is my contribution to the lexicon of pizza-stuffed pretzels or, as I like to call them, “pitzels.”

As with many homemade foods, especially ones involving yeast dough, some who are new to the process may feel a little intimidated at first. To them I say, fear not! It’s easier than you might think. Besides, if you don’t want to make your own pizza dough it’s pretty easy to buy one.

Some Cook’s Notes before we begin:
  • This recipe starts with the pizza dough already made. You can purchase one at your local supermarket, or at many pizzerias, use your own favorite recipe, or use the savory crust recipe I posted here a while back. (Send me an e-mail or comment if you’d like a copy.)
  • You can also make your own sauce, but the amount you’ll need for this recipe is so small I recommend just getting a small jar of a good store-bought sauce. (Just make sure you keep some reserved for dipping.)
  • The fillings listed in the recipe are based on basic pizza toppings: sauce, cheese, basil and oregano. If there’s anything else you like on your pizza, feel free to chop it up small and add it.
  • The baking time will vary somewhat with a lot of factors, especially your dough recipe. For that reason, you’ll need to keep an eye on the pretzels while they’re baking to make sure they don’t overcook. Legend has it that hard pretzels originated when a baker’s assistant fell asleep and over-baked a batch of soft pretzels; instead of throwing the batch out, the baker packaged and sold them as hard pretzels as if that is what they had set out to make in the first place. (The “I meant to do that” approach to dealing with cooking mistakes is more common than you might have thought. Not that that ever happens here…)
  • The somewhat unique method of stuffing the dough described below is adapted from Guy Fieri.

This recipe makes eight medium size soft stuffed pretzels.

Spread a pizza dough out on a floured working surface.


Roll the dough out to about 16” x 10”, or as close to it as you can. Spread some sauce, ¼ cup shredded mozzarella or other pizza cheese; and 2 Tbsp chopped fresh basil along the middle 1/3 of the dough.


Fold 1/3 of the dough over the sauced portion.


Spread some sauce, the remaining cheese, and the remaining basil along the top of the folded dough.


Fold the remaining 1/3 of the dough over.


Cut the folded dough into 8 equal strips.


Press the edges of each strip together to seal the filling inside the dough. Roll each into a 14-inch long rope,


Twist each rope into a pretzel shape.


Begin heating 6 cups of water to a boil, and begin pre-heating the oven to 400 degrees. When the water is boiling, add 2 Tbsp of baking soda. Place the unbaked pretzels in the boiling water, in batches, for 30 seconds, turning half-way. Place them back on a baking sheet lined with parchment or a silicon baking sheet. 

Brush the tops with egg wash.


Sprinkle with dried oregano.


Bake until golden brown. (The baking time for this will depend on a lot of things so keep an eye on them, but it should be around 15-20 minutes.) Let the pretzels rest on the baking sheet for a few minutes, then let cool on a rack.

Use the remaining sauce for dipping. (This is optional, but strongly recommended.)

To download a copy of the recipe for Stuffed Pizza Dough Pretzels, click HERE.

When you make these delicious treats, just be sure to set some aside for yourself. They tend to get eaten up fast!

I hope you enjoyed this special homemade food delight, and that you’ll take a look at this site again next week for another recipe! Till then, stay well, keep it about the food, and always remember to kiss the cook. ;-)
  

Saturday, July 21, 2012

Tomato-Basil Risotto with Roasted Red Pepper

To download a copy of the recipe for Tomato-Basil Risotto with Roasted Red Pepper, click HERE.


I recently had the good fortune of attending a gathering of friends who love to cook. Some are professionals, some devoted home cooks; all contributed their talents (and, being human, no doubt a bit of competitive spirit too) to a spread of good food more expansive than any banquet I could imagine. One of the many great dishes there was a delicious shrimp risotto that reminded me of two things: that I really love risotto, and that it has been far too long since I’ve made it. Today’s recipe corrects that.

Risotto, for anyone not familiar, is a rich and highly addictive rice dish with a unique, al dente yet creamy texture. That texture, without which risotto is just not risotto, comes from the fact that it is made from any of several special short-grain rices that readily absorb liquid and release starch, instead of the long-grain rice used in most other rice dishes. The other essential part is the constant stirring (and occasional agitation of the pan itself) necessary for the rice to release its starch. Once started, the preparation of risotto is not usually something you can walk away from to let cook on its own. (For that reason, good mise en place – having everything measured, chopped, etc., before you start – is especially important here.) If you give the preparation the attention it deserves, you – and your family or guests - will be amply rewarded.

Within the basic risotto structure - rice, onion, garlic, oil or butter, wine and parmesan – many treatments are possible, This recipe is for Tomato-Basil Risotto with Roasted Red Pepper. It’s shown in the photo above topped with cornmeal-crusted codfish nuggets and surrounded by marinated grilled zucchini and yellow squash. (The fish is based on a recipe posted here previously; if you’d like a copy of that recipe, just let me know and I’ll be happy to send it. The grilled, marinated vegetables are from a recipe published by Bobby Flay in his “Grilling for Life” cookbook. It generally consists of grilling the vegetables, then marinating them.)

Hope you enjoy this take on an Italian classic! This recipe makes four servings.

Begin by warming 4 cups of vegetable broth in a saucepan over low heat.


While the broth is warming, roast a red bell pepper on the stove burner. After the entire skin is blackened, wrap the pepper in foil and set aside to steam in its own moisture. When it has cooled enough to handle, cut the roasted pepper into small pieces and set aside.

At this point, you’ll want to check your e-mails, go to the rest room, or do anything else you might otherwise be tempted to do while the risotto is cooking. The Risotto Show is about to start, and it’s performed with no intermissions!

Put 2 Tbsp of olive oil in a sauté pan and sauté the one small onion and 4 garlic cloves, all finely chopped, over medium heat. (I used a red onion just because it was what I had on hand, but any preferred kind of onion will work.)

When they are cooked through, add one cup of Arborio rice (not regular long-grain rice!) and cook for 2 – 3 minutes, stirring constantly to coat the rice lightly in the oil.

Add ¾ cup of dry white wine (Chardonnay or similar) to the sauté pan and cook until the liquid is absorbed, stirring constantly.


Increase the heat to medium-high. Add ¼ cup of chopped, fresh basil and 1 Tbsp of fresh thyme.


Immediately after, add the broth, ½ cup at a time, stirring occasionally and waiting till the liquid is absorbed before adding more.


When all the broth is absorbed, add a 14.5 ounce can of diced tomatoes (very well drained but not rinsed) and the roasted red pepper. Cook long enough to heat through.

Add ½ cup of fresh grated parmesan.


Stir until combined, and add salt and pepper to taste. Serve immediately.


To download a copy of the recipe for Tomato-Basil Risotto with Roasted Red Pepper, click HERE.

Enjoy! And please come back next week for another delicious, family-friendly recipe. Till then, stay well, keep it about the food, and always remember to kiss the cook. ;-)


Saturday, July 14, 2012

Potato-Free Veggie Burgers on Herbed One-Hour Buns


To download a copy of the recipe for Herbed One-Hour Buns, click HERE.
To download the recipe for the Veggie Burgers, click HERE.

A warm Kissing the Cook welcome to new subscriber Hayley. Greetings!


Meat-free patties, affectionately known as veggie burgers, might at first seem to be a product of the age of Aquarius and health-conscious eating, but they’ve really been around much longer than that. On several continents as well. And as good as many of the patty recipes are, they have (to me, at least) one great shortcoming: whatever vegetables are used to make the patty are mixed into a potato base. I love potatoes as much as anyone, but if I wanted a “carb burger” I’d have asked for one. I want my veggie burger to be a veggie burger.

In today’s recipe for Potato-less Veggie Burgers on Herbed One-Hour Buns, the vegetables are cooked in a base of grated carrots that were simmered in vegetable broth (with a splash of white wine for good measure) till they’re the consistency of the grated potatoes so many other recipes use. There are still carbs, of course – there’s whole wheat flour in the mix for consistency and, of course, you’re serving your veggie burger on a bun. (You can choose to make the herbed one-hour buns included here, or use ready-made buns. You make the call.) Either way, these are both healthy and tasty.

Some Cook’s Notes before we begin.
  • If you’ve never made bread before, these one-hour buns are a good introduction. They’re made with about twice as much yeast as regular bread dough, and so rise and proof much faster. (They may end up taking a little longer than an hour to make, but you get the idea.) It’s an easy bread to make, even on relatively short notice, and is an extremely useful item to have in your repertoire. This recipe makes 12 burger-size rolls, which is twice the number you’ll need for the burgers. It’s ok. They’re good rolls. You’ll use them.
  • When cutting the vegetables for making the Veggie Burger, it’s important to get a good fine chop as shown in the photos. The smaller the pieces, the better the patty will hold together when everything is mixed. (The pieces should, of course, be as close to the same size as possible for even cooking.)
  • If you like, you can make these into sliders instead of full-size burgers. Just make the patties and the buns smaller.

This recipe makes six meal-size Veggie Burgers, plus additional rolls.

First, let’s make our herbed buns. (If you’re using ready-made buns, just skip this part.)

In a small bowl, dissolve two ¼ ounce packages (5 teaspoons) active dry yeast and 3 Tbsp sugar in ½ cup of very warm water (about 110 degrees) and let stand for 5 minutes. The mixture should become frothy.

Mix 3 cups of all-purpose flour, ½ tsp baking soda and 1-1/2 tsp salt together in a large mixing bowl. (Be sure to mix the dry ingredients well. If the yeast you’re about to add comes into direct contact with the salt, it will kill the yeast and your bread won’t rise.) Add the yeast mixture, 1 cup of skim milk and 2 Tbsp of melted butter substitute. Add 1 tsp dried marjoram.

While mixing, add up to an additional 1-1/2 cups of flour, 1/2 cup at a time, to form a dough.


When all of the flour is incorporated, knead the dough for 5 minutes, adding some additional dough flour if necessary for a smooth texture.


Cover the bowl with plastic wrap, set the bowl on the stove, and let the dough rise till doubled in size, about 25 minutes.


After the dough has risen, press it down to deflate it. Turn the dough onto a floured surface, and divide it into 12 equal parts. Shape each into the desired shape. To get a classic roll shape as shown:
  • Roll each dough piece into a strand about ¾” in diameter and around 9” long.


  • Gently tie the strand into an overhand knot.


  • Tuck the two ends of the knot, one on top and one on the bottom, into the rest of the roll.


Place the formed dough onto a baking sheet lined with parchment or a silicon baking sheet, and cover loosely with oiled plastic wrap. Let proof at room temperature for another 20 minutes.

While the rolls are proofing, preheat oven to 425 degrees. (The top of the stove while the oven is preheating is a good place to proof the rolls.)

Bake the rolls until golden brown and an inserted toothpick comes out clean, about 12-15 minutes. Let the rolls cool on the baking sheet for 5 minutes, then place them on a rack to cool.

Now for the Veggie Burgers!

Heat ½ Tbsp olive oil in a skillet. Add 1 cup of finely chopped celery, ½ a finely chopped medium red onion (about ½ cup); ¼ cup very finely chopped red bell pepper; and 1 tsp very finely chopped jalapeno; and let cook for about five minutes.

Add ½ tsp chili powder; ½ tsp paprika; and 1 Tbsp salt, and heat until cooked through. Add 2 cloves of finely chopped garlic and cook for another minute, then transfer the cooked vegetables to a bowl and set aside.

Put 2 cups of grated carrots in the same skillet, and add enough vegetable broth to just cover. (That will usually be about 1 to 1-1/4 cups.) Add a splash of white wine. Bring the mixture to a boil, then reduce to a simmer until the carrots are soft but not mushy. This can take several minutes of simmering. Be patient with it.

Add the cooked carrots to the cooked vegetables, along with a thawed and drained 10 ounce package of frozen chopped spinach; 1 Tbsp chopped fresh basil; 1 Tbsp chopped fresh thyme; 1 Tbsp chopped fresh mint; 1 Tbsp chopped fresh rosemary; and 1 egg-substitute egg.


Add enough whole wheat flour to make the mixture thick enough to form patties, about ¾ cups.


When the mixture is the right texture, you should be able to make it a large patty in the bowl.


Divide the mixture into six parts and form patties on a foil-lined baking sheet. Chill the patties in the refrigerator for 30 minutes.


When the patties have been chilled, heat ½ Tbsp of olive oil and a little butter substitute in a non-stick skillet, and cook the patties in batches until cooked through and well-browned on the outside, about five minutes per side. Don’t be afraid to let get a good browning as shown in the photo.

Serve on the rolls with the desired toppings. In the photo, I’ve got a slice of fat-free cheese, ketchup and mustard (my usual burger toppings), and I did another with steak sauce and some prepared horseradish. Just treat it as you would any other burger, and I believe you’ll be pleased with the result!
To download a copy of the recipe for Herbed One-Hour Buns, click HERE.
To download the recipe for the Veggie Burgers, click HERE.

Hope you enjoy these easy, good-for-you burgers, and that you’ll visit again next week for another kitchen-tested recipe! Till then, stay well, keep it about the food, and always remember to kiss the cook. ;-)

Friday, July 13, 2012

Bonus Recipe: Ben's Bloody Mary

To download a copy of the recipe for Ben’s Blood Mary, click HERE.

Photo courtesy of Sherron Nagle Watson, used with permission and gratitude.
Here’s an in-between-regular-recipe-posts bonus for your summer party pleasure: Ben’s Bloody Mary recipe.

Although I did spend a brief period, lots of years ago, working as a bartender, most of that was spent opening beer bottles and pouring Southern Comfort at the bar in a local bowling alley. Done right, creating and mixing drinks is a great skill; it’s just usually not my thing.

With that in the background, I recently had the honor of attending a wonderful gathering of my BFF’s (“Best Foodie Friends”) and decided to supplement the baked items I brought with a pitcher of Bloody Mary’s to go with the seafood items I knew other guests would be bringing. And, although there is a basic recipe made from a few simple ingredients, most Bloody Mary’s are more ambitious endeavors meant to challenge the maker’s creative instincts and provide the drinker a more complex flavor profile. (Translation: they taste good.)

This recipe, which was well received at the gathering, makes a little more than three quarts.


Combine the following ingredients in a container and shake well: 3 cups vodka; 9 cups tomato juice; juice of 2 large lemons; 1-1/2 Tbsp hot sauce; 6 Tbsp Worcestershire sauce; 2 tsp celery salt; ½ Tbsp paprika; 1 tsp fresh ground black pepper; 2 tsp prepared horseradish; and 1 Tbsp sugar.

Serve on ice, with a lemon wedge and a celery stalk.


To download a copy of the recipe for Ben’s Blood Mary, click HERE.

Don’t forget: the regularly scheduled recipe for something tasty and healthy (and that would go nicely with a Bloody Mary!) is still to come. In the meantime, enjoy this extra bonus!

Saturday, July 7, 2012

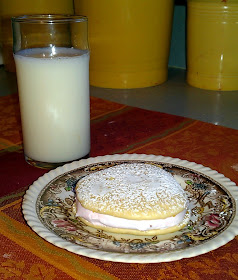
Strawberry-Vanilla Whoopies with Fresh Marshmallow Cream Filling


To download a copy of this recipe for Strawberry-Vanilla Whoopies, click HERE!


One might think that once they gave the world the glorious gift of Lobster Rolls, the good people of Maine would have rested on their laurels. Not so. Maine is also the state that popularized another classic culinary delight: Whoopie Pies, an irresistible treat consisting of vanilla marshmallow filling sandwiched between two soft, almost cake-like, chocolate cookies. (I say popularized instead of created because, although Whoopie Pies were first main-streamed in Maine in the late 20’s and early 30’s, they actually have their origins sometime before that in the Amish culture of Lancaster, Pennsylvania.)

Aside from using vanilla cookies instead of chocolate, and strawberry filling in place of vanilla flavored, this recipe differs from traditional Whoopie Pies in a number of areas. First is size. A traditional Maine Whoopie Pie can be about the same size as a hamburger which seems, to some of us at least, to be too much of a good thing. The version below is also made with butter substitute instead of the traditional vegetable shortening. 

By any name and regardless of origin, this we know for sure: a good Whoopie Pie is joyous thing.

Some Cook’s Notes before we begin.
  • The strawberry marshmallow cream filling we’ll make is essentially a homemade, strawberry-flavored version of the Marshmallow Fluff you used as a kid to make “fluffernutters.”
  • To make the thickening syrup, you’ll need to use a candy or sugar thermometer. (If you don’t already have it, I recommend getting one. You’ll  find it’s useful for all kinds of things in the kitchen.)
  • As you’ll see in the recipe, one of the ingredients for the filling is egg whites. Since we’ll be beating them into fluffiness, it’s important to use the whites from fresh eggs. Don’t use the packaged, pour-from-a-carton egg whites for this. Those may be good for a lot of things, but they don’t fluff up when beaten the way fresh ones do.

This recipe makes about twelve 3-1/2” whoopie pies.

We’ll start by making the cookie portion.

Begin preheating the oven to 375 degrees. Spread ½ cup of shredded coconut out on a foil-lined baking sheet and use the preheating oven to toast the coconut lightly. (Be sure to keep an eye on the coconut, since it can burn easily.)

In a bowl, sift together 2-3/4 cups of all purpose flour, ½ Tbsp cream of tartar, ½ tsp baking soda and ½ tsp kosher salt, and set aside.


Put 6 Tbsp of butter substitute and 1 cup of sugar in a mixing bowl and beat until it becomes light and fluffy.


Add ½ cup non-fat plain yogurt, 1 tsp vanilla, and ½ cup of skim milk and continue mixing. (At this point there will still be some separation in the mixture.)


Add 2 egg substitute eggs and the toasted coconut and continue mixing.


Reduce the mixer speed to low and add the flour mixture to the wet ingredients. When the flour has been incorporated enough, increase the mixer speed to high. (Starting at low speed prevents the flour from being thrown by the mixer.) Mix for about a minute at high speed so as not to overwork the mixture.

Place rounded tablespoons of the mixture about 2” apart on baking sheets lined with silicon sheets or parchment. (Depending on your baking sheets and oven, it may be necessary to work in batches.)

Bake until lightly browned but still a little soft, about 15 minutes, turning the baking sheet half-way. (Be careful not to overcook; the finished cookies should have a texture that is a little soft and cake-like, similar to black and white cookies.) Rinse the bowl for use in making the filling. When the cookies have finished baking, set them aside on a rack to cool.

While the cookies are cooling, we’ll prepare the filling, starting with the strawberry puree.
Hull and rough chop ¼ pound of fresh strawberries.


Cook the strawberries in a small, covered saucepan and over low heat for a few minutes until soft.


Puree the cooked strawberries in a mini-processor or blender and set aside. Rinse the small saucepan for use in making the syrup.


Next, we’ll make our marshmallow cream.
In a mixer bowl, beat 2 fresh egg whites, a pinch of kosher salt, and a pinch of cream of tartar, and continue whisking until fluffy. Add 2 Tbsp of granulated sugar to the egg white mixture and continue beating until peaks that are a little firmer than soft peaks form.


In the small saucepan, mix the 1-1/2 Tbsp water, ½ cup of light corn syrup, and 6 Tbsp of granulated sugar together. Using a candy or frying thermometer, cook over medium heat until it boils and comes to 246 degrees (“firm ball”).


With the mixer on low, drizzle the syrup into the beaten egg white mixture. When all the syrup has been added, increase the speed to high and beat until fluffy, about 5 to 6 minutes.


With the mixer on low speed, add a few drops of red food coloring and ¼ cup of the strawberry puree and food coloring until combined. Cover and refrigerate the filling mixture to cool.


To prepare the Whoopie Pies:

While the filling is cooling, apply a thin coating of apricot preserves to the flat side of each cookie.


After the filling has cooled, pipe it onto the flat side of half of the cookies using a piping bag or large zip-lock type storage bag with one corner cut.


When the filling has been placed on the cookies, place the flat side of an unfilled cookie on the filling to form a sandwich. Press down gently.


Dust both sides with confectioner’s sugar and serve!


To download a copy of this recipe for Strawberry-Vanilla Whoopies, click HERE!

That’s a sweet treat indeed. Enjoy!

Please visit again next week for new recipe! Till then, stay well, keep it about the food, and always remember to kiss the cook. ;-)