Friday, May 25, 2012

Shrimp Rolls with Drawn Butter on Herbed One-Hour Bread


To get a copy of this Shrimp Roll recipe, just click HERE.
 
With the start of summer due to arrive at any moment, it seems a good time to look at a recipe that’s perfect for the season: Shrimp Rolls on Herbed One-Hour Bread.

The classic Maine Lobster Roll, a tangy lobster mix served warm or room temperature on a toasted hot-dog style bun. If you’ve had one, you know a classic Maine Lobster Roll is a truly beautiful thing. Unfortunately, unless you live in some fortuitously located coastal area with a large lobster population, it’s also a truly expensive thing. Necessity (which, in this case, is the need to keep paying off my sons’ college loans)  being the mother of invention, this led me to put a version together based on shrimp; it’s still a bit of a luxury but not nearly as dear as the original lobster.

Some Cook’s Notes:
  • Although the current “tradition” in lobster rolls is to use mayonnaise, the origins of the dish use drawn butter. Use mayonnaise if you prefer, of course, but in the recipe below we’ll be using fresh-made drawn butter. (This is a rare case where a Kissing the Cook recipe uses real butter instead of butter substitute.)
  • Traditional Lobster Rolls are also often served on hot dog buns. Folks, I love hot dogs as much as anyone, but if we’re cooking lobster or shrimp and preparing drawn butter with which to serve it, are you really going to want to put that on a packaged hot dog bun? This recipe includes an easy, and very tasty, herbed one-hour roll that goes perfectly with your hand-crafted filling. (One hour dinner rolls, which, truth be told, sometimes can require more than an hour to make, require much less time than most breads for a very simple reason: there’s more yeast in proportion to the other ingredients.)
  • Speaking of the rolls, the recipe below shows them being made after the shrimp filling is made. You can make the rolls first if you like, but I’m recommending using the roll preparation time as a chance to let your shrimp filling ingredient flavors blend as the filling chills.
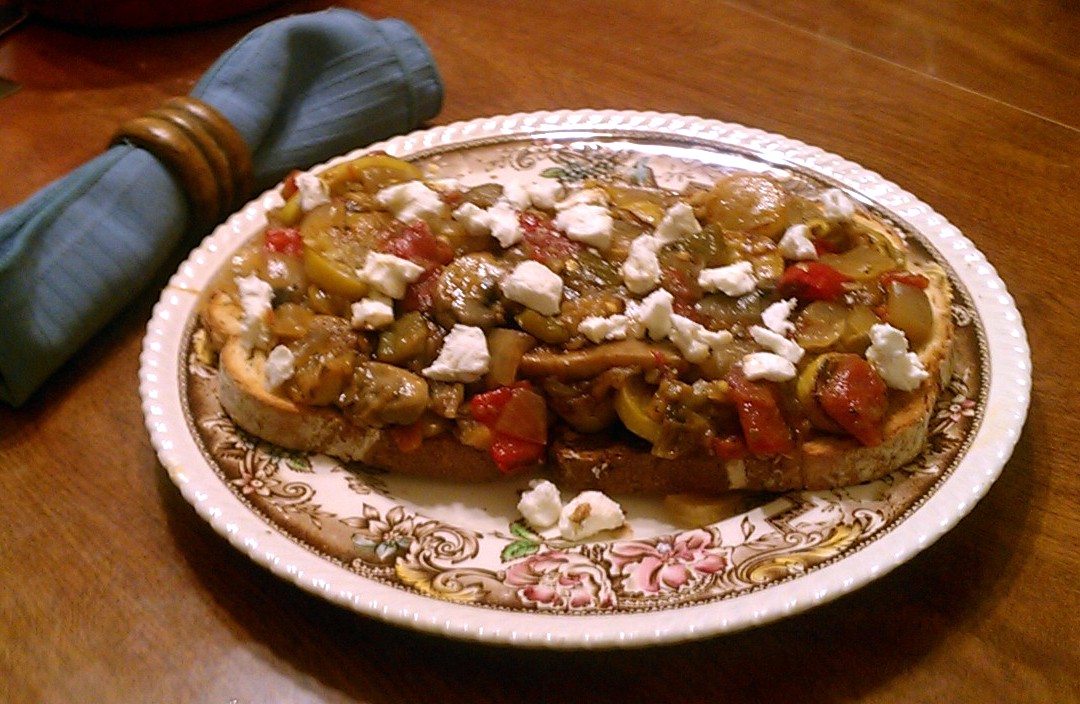
This recipe makes three servings.

 First, we’ll brine our shrimp. (You’ll recall we also did this back when we made Reduced Fat Fettuccini Alfredo. )
Place 1 to 1-1/4 pounds of uncooked shrimp, ½ cup of kosher salt and the juice of ½ lemon in a bowl of 2 quarts of water and let brine for 30 minutes. (The amount of water is important; if you use more or less, increase or decrease the salt and lemon proportionately.)

While the shrimp are brining, prepare the drawn butter as follows:
Place 1/2 pound of unsalted butter in a small saucepan over medium heat. (Note: In general, when you make drawn butter you’ll end up with about ¾ of the amount of the original butter you started with. In other words, if you start with 1 cup of butter, you should end up with about ¾ cup of drawn butter.) As seen in the photo, when I made this I used a pound of butter and made a double-batch, to have some left over for future use.

Let the butter melt, then bring to a simmer and let simmer for about a minute. The butter will begin to separate into a thin layer of frothy milk solids on top, clear liquid in the middle, and whey on the bottom.

The layers, illustrated.


Skim the frothy top layer of milk solids from the melted butter. Carefully pour off and retain the clear liquid underneath, separating it from the creamy whey at the bottom. Discard the milk solids and the whey.

To prepare the shrimp:
Drain and dry the brined shrimp, toss lightly with a little of the drawn butter and cook on a grille pan until done. (Using water-soaked bamboo skewers makes things much easier when it’s time to turn the shrimp over or to remove them from the grille pan without overcooking.)

Rinse with cold water to stop the cooking.


Dry the shrimp, remove the tails and shells, and cut into ½” pieces. Combine in a bowl with 6 Tbsp drawn butter; 1/4 cup finely chopped celery; ¼ cup finely chopped fresh chives; juice of ½ lemon; and a pinch cayenne pepper. Set aside in the refrigerator to chill while we make the rolls.

To make the rolls:
Begin preheating the oven to 200 degrees.

In a small bowl, dissolve 1 packet of yeast (1/4 ounce) and 1-1/2 Tbsp sugar in ¼ cup of very warm (110 degree) water and let stand for 5 minutes. The mixture should become frothy.

Mix 1-1/2 cups of the flour, baking soda and salt together in a large mixing bowl. Add the yeast mixture, ½ cup skim milk, ½ Tbps dried thyme and 1 Tbsp of drawn butter. Mix while adding an additional ½ cup of flour, 1/4 cup at a time, to form a dough.

When all of the flour is incorporated, knead the dough for 5 minutes, adding some of the remaining dough flour if necessary for a smooth texture.


Turn off the oven. Cover the bowl and place it in the warm oven till doubled in size, about 25 minutes.


After the dough has risen, press it down to deflate it. Turn the dough onto a floured surface, and divide it into three equal parts. Pat each part into the shape of a hot dog roll. Place the dough portions on a baking sheet lined with parchment and cover with oiled plastic wrap. Let proof at room temperature for another 20 minutes.

While the bread is proofing, preheat oven to 425 degrees. (The top of the stove while the oven is preheating is a good place to proof the loaf.)

Bake for 10 - 15 minutes at 425 degrees until the rolls are browned and cooked through, turning half-way.


Let the rolls cool on the baking sheet for 5 minutes, then place on a rack to cool.

To serve the shrimp rolls:
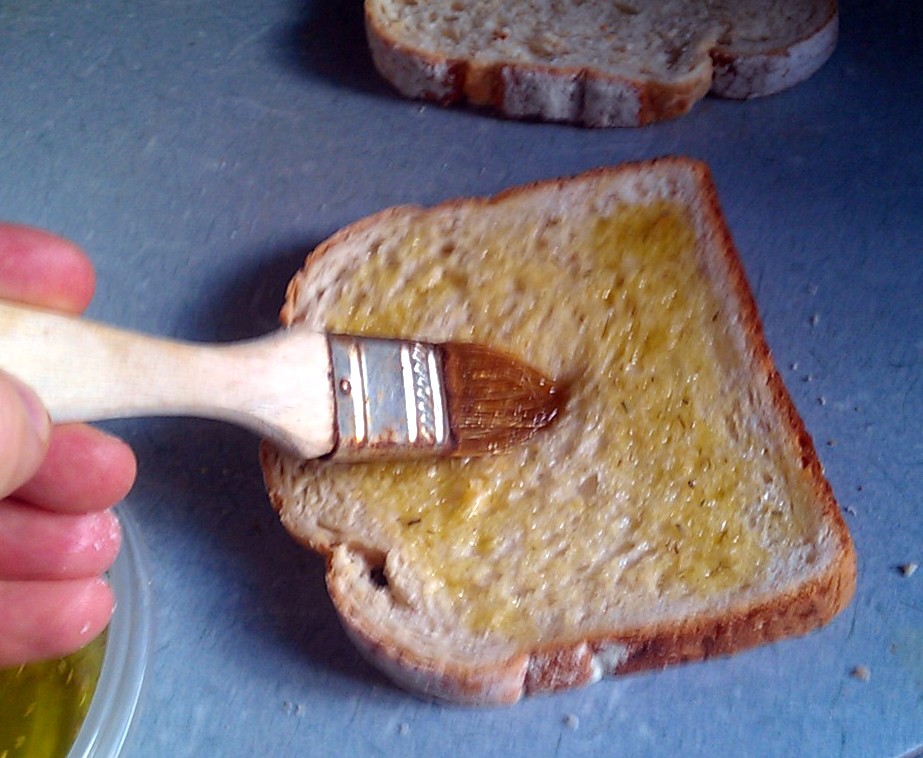
Split the rolls from the top and brush with drawn butter.


Toast on the grille pan over moderate heat until browned.


Fill the toasted buns with the shrimp filling and serve!

To get a copy of this Shrimp Roll recipe, just click HERE.


Hope you  like serving this delicious treat at your next cookout. Come to think of it, why wait till then? Serve it to your family this week; it tastes just as good indoors!

Visit again next week for another recipe to enjoy! Till then, stay well, keep it about the food, and always remember to kiss the cook. ;-)

Saturday, May 19, 2012

Sloppy Jacques (Ratatouille on Toasted Sourdough Bread)


For a cookbook style copy of this recipe for Sloppy Jacques (Ratatouille on Toasted Sourdough Bread), click HERE!

Low in fat and calories, high in nutrients, and wonderfully easy to make, ratatouille (“rah-tah-too-eee”) – the classic savory dish made from tomatoes, zucchini, eggplant, bell peppers, onions, garlic and herbs – is ideal for anyone who cooks, from experienced chefs to novice home cooks, and all levels in between. It is also enormously versatile, served as a meal with pasta or rice; as a filling for omelets, crepes or stuffed potatoes; as a side dish; and any other way you can imagine.

This recipe highlights my favorite way to serve ratatouille, something I call “Sloppy Jacques” style: using the ratatouille to top two slices of sourdough bread that have been brushed with herbed olive oil and lightly toasted, and garnished the combination with crumbled goat cheese and a kiss of balsamic vinegar.  (Of course, if you want to serve it in some other way, go right ahead. One of the great beauties of ratatouille is finding new ways to use it!)

Aside from how it is served, another way in which ratatouille recipes vary widely is in how the vegetables are cooked. Some recipe have the raw vegetables all cooked in a pot together. Others have the ingredients layered and baked as a casserole. Another frequently employed method is to sauté each of the vegetables separately (or, at the very least, in carefully chosen combinations), and then simmered all together in a pot to finish. The Sloppy Jacques recipe that follows is based on that last one; I feel it gives the cook the most control over how much each vegetable is cooked, making it easier to avoid overcooking some and under-cooking others just to get the rest cooked right.

You’ll also note that this recipe adds celery and mushrooms to the more traditional ingredients. I just think they work well here, in terms of both texture and flavor.

This recipe makes 4 meal-size servings.

First, we'll make the rosemary olive oil:
Combine ¼ cup of olive oil and 1 /2 tsp dried rosemary in a small bowl and heat in a microwave till warm, about 30 seconds. Set aside until ready to use.


Next, the ratatouille!
Line a colander with paper towels.


Slice 1-1/4 pounds of yellow squash or zucchini into ¼” thick rounds. Put 1 Tbsp of olive oil into a pan over medium-high heat.


Add the squash in a single layer (work in batches if necessary) and cook until lightly browned, about 4 minutes. When done, remove the squash from the pan and set aside in the colander.

Cut 2 green bell peppers and 1 red bell pepper into ½“ squares. Cut 2 stalks celery into ½“ slices.


Add another tablespoon of olive oil to the pan and put in the green pepper, red pepper, and celery. Cook for about 4 minutes.


When done, add the peppers and celery to the squash in the colander.


Cut 1 pound of eggplant into ½“ cubes. Add another tablespoon of olive oil to the pan and put in the eggplant. Cook for about 4 minutes. When done, add the eggplant to the colander.

Add another tablespoon of olive oil to the pan and put in 12 ounces of sliced mushrooms; 2 sweet onions (Vidalia or similar) cut into ½” pieces, and 3 cloves of minced garlic. Cook for about 4 minutes. When done, reduce the heat to low, and transfer the vegetables from the colander back into the pan.

Add a 14 ounce can of diced tomatoes, 1 bay leaf, 1 tsp dried thyme, 1 tsp dried basil, and 1 tsp dried parsley. Cook uncovered over low heat for 20 - 30 minutes until the vegetable are soft and cooked, but not mushy. Add salt and pepper to taste.

To serve:
Brush eight slices of sourdough bread with the herbed olive oil and lightly toast.


Place two slices on each plate.


Top the bread with the ratatouille, Sloppy Joe style.


Drizzle lightly with balsamic vinegar.


Garnish with crumbled goat cheese, and serve warm or at room temperature.


For a cookbook style copy of this recipe for Sloppy Jacques (Ratatouille on Toasted Sourdough Bread), click HERE!

Hope you enjoy this version of a French classic!

Thanks for visiting. Come by again next week for another kitchen-tested, home-cook friendly recipe for your cooking and dining pleasure! Till then, stay well, keep it about the food, and always remember to kiss the cook. ;-)

Saturday, May 12, 2012

Zuppa alla Pizzaiola (Pizza Soup)


For a cookbook style copy of the recipe for Zuppa alla Pizzaiola, click HERE!

I’m not sure what made me think of using pizza as an inspiration for a delicious soup, but whatever it is, I’m glad for it. And if you try Zuppa alla Pizzaiola (Pizza Soup), I think you will be too.

Should anyone think we’re just tossing a pizza into a blender at high speed, have no fear. Zuppa alla Pizzaiola is a full-bodied tomato soup, seasoned in the style of pizza sauce, and filled with finely chopped sausage, mushrooms and green pepper, or whatever other “toppings” you like. It’s topped with pizza crust croutons and melted pizza cheese (think French Onion Soup), with more of the sausage, mushrooms and green pepper on top. It’s one hearty meal.

Some Cook’s Notes before we begin.
  • The recipe gives step by step instructions for making the pizza crust croutons from scratch. If you prefer to use a store bought dough, that’s ok too.
  • Speaking of pizza dough, this recipe makes about one-and-a-half crusts. You’ll only need the half for the croutons; store the remainder for later use in making a fresh pizza. Why are we making more than we need? Simple: this amount uses one packet of yeast; making less would mean dividing the packet into a part you’ll use and a part that will end up getting thrown away because it’s not enough to make anything. I’d rather see it get used for something.
  • The “toppings” in this recipe (which are used both to fill the soup and to top the cheese) are sausage, mushrooms and green pepper. There’s no real reason for those particular toppings, except they're what I like on a pizza. Feel free to substitute whatever toppings you like. (Ok, almost whatever toppings you like: even if you’re from California, I’m begging you not to do that pineapple thing.)
 This recipe makes four meal-size servings.

First, let’s make the pizza crust for the croutons. (If you’re using a purchased dough, just skip this step.)

In a small bowl, whisk one packet of yeast (1/4 ounce) into 2 cups of 110-degree water. Add ½ teaspoon of sugar, then whisk in ¼ cup of olive oil.


Combine 1-1/2 pounds of bread flour and 1 tablespoon of salt in a large bowl and mix well. Add the yeast mixture and mix just until sticky dough forms. (It's important to mix the dry ingredients before adding the yeast mixture; direct contact with the salt will kill the yeast.)

In a mixer (using the dough hook) or by hand on a floured surface, knead the dough for about 5 minutes. If necessary, add a little more flour to make dough smooth and elastic.


Place the dough in an oiled bowl, covered with oiled foil or plastic. Allow to rise on the kitchen counter until at least doubled, about an hour. (When doubled, the dough should hold the indentation when poked with a finger.)
Begin preheating the oven to 500 degrees.

When the dough has risen, cut it into a 1/3 portion and a 2/3 portion. Wrap the 2/3 portion to freeze or refrigerate for later use in making a pizza. Place the 1/3 portion on a baking sheet that has been dusted with corn meal.

Stretch the dough out until it is about ¼” thick.


Bake for 11 minutes, turning the pan around in the oven half-way for more even baking.


Now let’s make the pizza crust into croutons. (If you’re using a purchased dough, this is the step you’ll start with.)

Preheat the oven to 250 degrees.


Brush the crust lightly with olive oil on both sides and cut into crouton cubes, ¼” to ½“on a side. Place the cubes on a baking sheet.


Bake for about an hour until the croutons are crisp. Set them aside till ready to use.


Next comes the soup:

Chop 1 large carrot, 2 stalks of celery, 1 medium onion, and 4 cloves of garlic.


Heat ¼ cup of butter substitute and ¼ cup of olive oil in a soup pot on medium-low heat until the butter substitute is melted.


Add the carrot, celery, onion and garlic, along with 1 bay leaf. Cover and cook for about five minutes. (Don’t let onions color.)


Add two 28 ounce cans of crushed tomatoes, three cups of tomato puree, 2 teaspoons of dried basil, 1-1/2 tablespoons of sugar, and ¼ teaspoon of chili powder. Mix until combined, and simmer covered for 30 – 40 minutes. Stir occasionally, until tomatoes and onions are soft and broken down. (While the soup is simmering, prepare the toppings as described below.)

To make the toppings:

Finely chop 1 green bell pepper, 12 ounces of turkey sausage (with the casings removed), and 8 ounces of sliced mushrooms. Place in a sauté pan with 1 tablespoon of olive oil, and sauté until cooked.

To finish the soup:

Begin preheating the oven to 450 degrees.

Remove the bay leaf, and puree the mixture with an immersion blender.

Add salt and pepper to taste.


Mix the toppings into the soup, reserving 6 Tbsp of the toppings.


Place the soup in a bowl, and top with croutons.


Cover the croutons with cheese.


Sprinkle 1-1/2 tablespoons of the toppings on top of the cheese.


When all the soup bowls have been prepared, bake for a few minutes until the cheese is melted. Serve hot.

For a cookbook style copy of the recipe for Zuppa alla Pizzaiola, click HERE!

Serve this with a salad on the side, and you’ve got a meal your family will love. (A bag Caesar salad, as seen in the photo at the top, works fine. You’ve just made fresh soup; give yourself a break on the salad.)

I hope you enjoy making, and eating, Zuppa alla Pizzaiola. And that you’ll stop by again next week for another great-tasting home-cook tested recipe! Till then, stay well, keep  it about the food, and always remember to kiss the cook. ;-)