Saturday, February 9, 2013

Bloody Mary Sauce with Bucatini Pasta


To download a copy of the recipe for Bloody Mary Sauce with Pasta, click HERE.

A recent post that featured chicken sauce served with linguini  received a great response from readers. Today’s recipe is for another sauce that’s both delicious and just a bit unusual. It’s based on the unique flavors of a classic Bloody Mary, and is quite easy to make from scratch.


Some Cook’s Notes before we begin.

  • The base sauce used in this recipe is an easy tomato sauce we’ll make from scratch. If you prefer not to make your own tomato sauce and want to purchase a jar of sauce instead, that will work also. You’ll need about three cups of the base sauce.

  • Although the sauce can be used with any pasta you like (or anywhere else you might want to use a good tomato sauce), in this post I’ve selected bucatini. If you love pasta and have never had bucatini, you’re missing out on a real treat. It’s a long pasta, a good bit thicker than spaghetti, that has a small hollow through the middle. This makes the bucatini a thick-walled tube that has a wonderful mouth-feel and that holds sauce very well. (The photo at right shows what this looks like.)

  • As you might expect, one of the ingredients of Bloody Mary Sauce is vodka. If you prefer to make a Virgin Mary sauce, just replace the 1 cup of vodka with ½ cup of tomato juice, and skip the cooking-down-the-vodka step.

  • This recipe makes about three cups of sauce. That’s twice as much as you’ll need to sauce one pound of pasta. The recipe provides an overview of the canning process for saving the unused sauce (or for saving the entire batch for future use). Refer to other published sources for additional details.


This recipe makes about three cups of sauce.


We’ll start by making the base sauce:


Put the contents of a 28 ounce can of tomatoes, including the juice, into a non-metallic bowl. You can either use crushed tomatoes or, if using whole tomatoes, crush them with your hand.


Add 1 small grated carrot; 1 large rib of celery, chopped; 1 Tbsp chopped onion; 4 minced cloves of garlic; 9 ounces of tomato paste (that’s 1-1/2 six ounce cans); 1-1/2 tsp dried basil; 1 Tbsp sugar; and a pinch of chili powder to the bowl.

Put the mixture through a food mill. (If your food mill has more than choice of orifice plate, use the plate with the widest holes.) Scrape the underside of the orifice plate into the milled mixture. Discard the remaining solids in the bowl of the food mill.


Add 2 tsp of olive oil, and salt and pepper to taste to the milled mixture and stir till combined. Set aside till needed.


Next, we’ll use the base sauce to make the Bloody Mary sauce.


Slice 2 ribs of celery very thin.


Warm 2 Tbsp of olive oil in a deep skillet. Add the celery and cook till tender but not mushy.


Add 1 cup of vodka. (Be careful: the mixture may flame up. If it does, just give it a moment and the flame will go out.) Put the skillet back on stove and reduce to about half volume.


Reduce heat to low. Add 1-1/2 cups of the base sauce; the juice of 1 large lemon; 1-1/2 tsp hot sauce; 3 Tbsp Worcestershire sauce; 3/4 tsp celery salt; pinch paprika; 1/4 tsp fresh ground black pepper; 3/4 tsp prepared horseradish; and 1 tsp sugar.


Cook over low heat, stirring constantly, for about 15 minutes. Add salt and pepper to taste.


Now you’ll either want to store half of the sauce for later use if you’re using it for the pasta right away, or to store all of the sauce for later use.


Transfer the sauce you’re saving to one or two 1-1/2 cup canning jars that have been sterilized, leaving ¼” head room (the air space at the top of the jar). On each jar, place a lid that has been processed in hot water as per the manufacturer’s instructions. Apply a ring seal to each jar.


Place the jars into a pot of hot water that completely covers the jars. Bring to a boil, then let simmer for about 40 minutes.


Remove the jars from the water. (Canning tongs are helpful for this.) Allow to cool. As the jars cool, you should hear the lids make a popping sound as they seal the jars, caused by the vacuum that forms in the head space above the sauce in the jar.


When you’re ready to cook the pasta:


Bring a pot of salted water to a boil. Drop 1 pound of bucatini into the water and let the water return to a boil. 

Cook the bucatini one minute less than recommended on the package.


While the pasta is cooking, begin heating 1-1/2 cups of the sauce in a skillet.


Drain the pasta, reserving ½ cup of the starchy pasta water. Add the pasta to the sauce in the skillet and mix to combine.


Add some of the pasta water to the skillet, starting with ¼ cup and adding more only if needed for texture. Mix until everything is combined. Cook till the pasta is done.


Garnish with parsley to serve.


To download a copy of the recipe for Bloody Mary Sauce with Pasta, click HERE.


Serve this to the pasta-lovers you know, add a Caesar salad on the side for good measure, and you’ll keep all them very happy!


Visit again next week for another delicious recipe! Till then, stay well, keep it about the food, and always remember to kiss the cook. ;-)


Saturday, February 2, 2013

Landlubber Cioppino


To download a copy of the recipe for Landlubber Cioppino, click HERE.


In its original form, Cioppino was a stew made from the bounty brought to the San Francisco waterfront by returning fishing boats. Fresh-caught fish and shellfish – often served in the shell – were cooked in a tomato and wine broth and served with good bread. As this delightful meal made its way inland, catch-of-the-day often got replaced by seafood from the freezer case, but the result was still a hot delicious combination of several different fish and shellfish.


Here in Jersey City, we have a waterfront too. It’s just generally considered best not to eat most of what you might catch there. And so came the inspiration for this week’s recipe: Landlubber Cioppino. Blending shrimp, beef, chicken and sausage in a tomato and wine broth, it’s a land-based meal soup with the soul of a stew. Serve it with a good bread on the side (and a glass of the wine used to make the broth), and you’re ready to take the chill out of the coldest winter night.


Some Cook’s Notes before we begin:


  • You’ll note the recipe calls for chicken drumsticks. This is an homage to the in-shell crab, mussels, etc. used to make the original Cioppino. If you prefer to use a boneless cut of chicken, feel free.

  • When stewing the beef, I have to warn you: an hour and forty-five minutes of simmering an uncovered skillet of tomato-juice covered meat will spatter on your stove. Not to worry; a moist sponge takes it right off.


This recipe makes about 6 meal-size servings.


To stew the beef:


Season ¼ cup of all-purpose flour with salt and pepper.


Pat 1 to 1-1/4 lbs. of stew beef cubes dry with a paper towel. Dredge them in the flour mixture to coat, shaking off excess flour.


Heat 2 Tbsp of oil in a large skillet. Brown the beef very well on all sides, then remove to a plate.


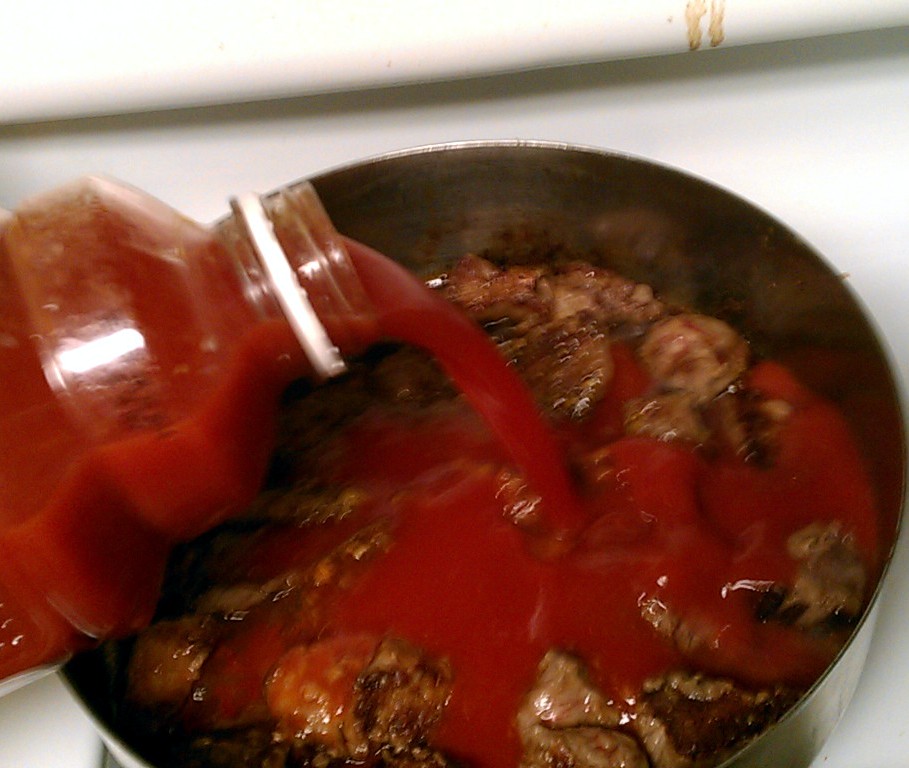
Add enough of a 46 ounce bottle of tomato juice to cover the beef. Add 1/2 teaspoon hot sauce, 1-1/2 tablespoons Worcestershire sauce, 1 tablespoon balsamic vinegar, and 1 tablespoon spicy brown mustard.


Mix well, scraping up the brown bits from the bottom of the skillet, and bring to a simmer.


Simmer uncovered until the meat is fork tender, about 1-3/4 hours. Add more of the tomato juice as needed during the stewing to keep the meat covered. (If you run out of juice and need to add more liquid, water can be used.) Season with salt and pepper to taste. Set aside till needed.


While the beef is stewing:


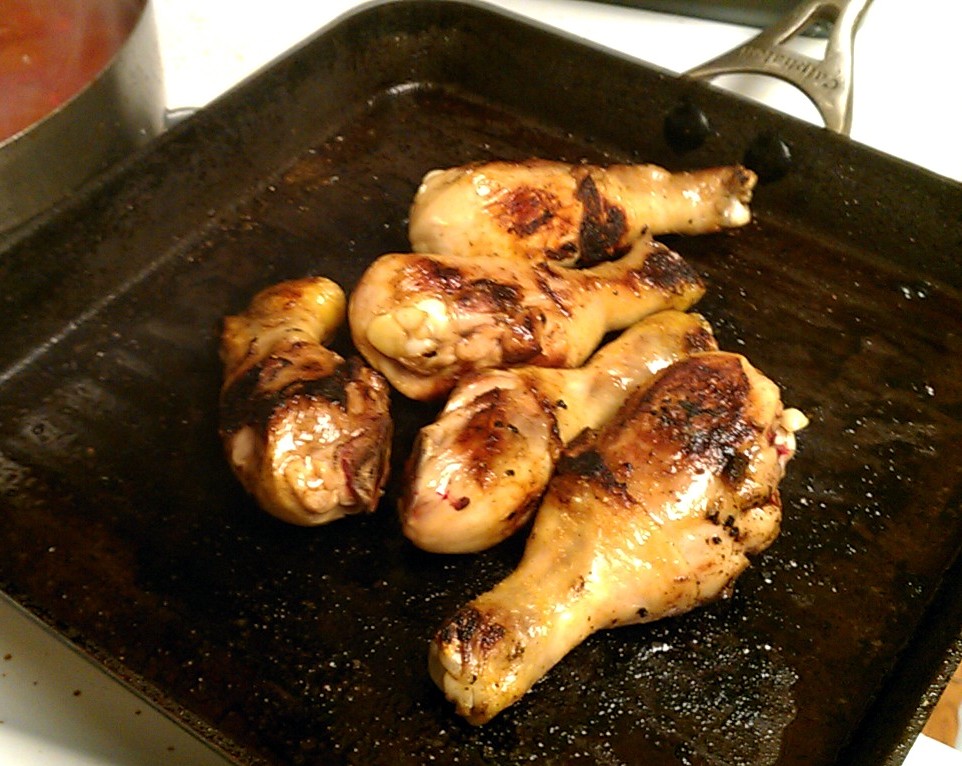
Warm 2 Tbsp of olive oil in a grille pan over medium heat. Brown 1-1/4 lb. of turkey sausages on all sides.


Begin preheating the oven to 350 degrees.


When the sausages have finished browning, wrap in foil and set aside.


Pat the 1 to 1-1/4 lbs. of chicken drumsticks dry with a paper towel. Add a little salt. Brown them on the same grille pan you used for the sausages. (They should be well browned, but don’t have to be cooked through, since they’re going into the oven after this.)


After the drumsticks have browned in the grille pan, wrap them in foil and place in the oven for 30 minutes..


After the beef has been stewing for about an hour, warm 3 Tbsp of olive oil in a large soup pot over medium heat. Add 1 large diced onion to the large pot and cook till translucent.


Add 4 minced cloves of garlic and cook till fragrant, about another 30 seconds to 1 minute. Add 2 tsp salt, a 28 ounce can of diced tomatoes (including juice), ½ tsp hot sauce, 1-1/4 cup dry white wine (chardonnay or similar), 4 cups chicken stock, and 1 bay leaf. Stir to combine.


Cover the large pot, bring to a boil, then reduce the heat to a simmer. Simmer covered for 30 minutes.


While the soup liquid is cooking, slice the sausages into 1-1/2” pieces.


After the soup liquid has finished simmering, add the browned chicken, browned beef, browned sausage, 1 lb. uncooked shrimp (shelled and deveined), ½ tsp dried oregano, ½ tsp dried thyme, ½ tsp dried basil, and 2 Tbsp dried parsley.


Bring to a boil, then simmer uncovered for an additional five minutes until the shrimp is cooked through.


Divide into bowls, making sure every portion gets all four types of protein. Serve with a good bread and a glass of the chardonnay you used to make the soup liquid.


To download a copy of the recipe for Landlubber Cioppino, click HERE.


Now that should keep you warm this winter!
 

That’s it for this week. Please visit again next week for another kitchen-tested, home-cook friendly recipe. Till then, stay well, keep it about the food, and always remember to kiss the cook. ;-)

Friday, January 25, 2013

Baked Orange-Banana Nut Donuts


To download a copy of the recipe for Baked Orange-Banana Nut Donuts, click HERE.


A warm greeting to new subscriber Raquel! Welcome!


Donuts: what a beautiful word. As treats go, if you’re thinking it’s got to be hard to beat fresh-baked donuts, you’re right. Some form of these warm, sweet delights are frequently found on Sunday mornings in the Kissing the Cook household. (That a batch of donuts can be put together for breakfast on a Sunday morning is proof of how fast and simple making them really is.) Now it’s time to share them.


Some readers got an advance look at an early version of this recipe on Facebook a couple of weeks ago. This week, it’s my pleasure to give you the upgraded version, complete with photographs.


The orange-banana flavor combination used in this recipe is one I learned – and came to love – when I was a small child and my mother would give me containers of orange-banana juice to drink. Baked donuts give it a whole new platform from which to shine. Another feature of this recipe is that it avoids being simply donut-shaped orange-banana nut bread. The flavor may be orange-banana nut, but the mouth-feel is all donut.


Some Cook’s Notes before we begin.


  • You’ll need a donut-baking pan to make these, of course, but believe me when I say it’s worth getting. I don’t know that any baking pan can change someone’s life, but a donut pan comes pretty close.

  • I used fat-free half-and-half in these donuts, but feel free to use skim milk instead.

  • In some of the photographs, you may notice that I’m mixing ingredients by hand using a spatula. This is just something I do every so often to remind myself of why it’s easier to use some kind of electric mixer. When you make these, feel free to use your hand mixer, Kitchen Aid, etc.


This recipe makes about 12 donuts.


Begin preheating the oven to 350 degrees.


Use the preheating oven to lightly toast 1 to 1-1/2 cups of chopped walnuts.


To make the batter:


Mash 2 medium bananas to a creamy consistency and set aside. (Two medium bananas should make about a cup of mashed banana.)


Blend 7 Tbsp of softened butter substitute (a firm-textured brand is best) and ¾ cup of granulated sugar.


Add 2 egg substitute eggs and mix well.


Sift in 2 cups of all-purpose flour, 1 Tbsp baking powder, ½ tsp salt, and ¼ tsp nutmeg into the bowl and mix to combine.


Add 1/3 cup of fat-free half-and-half, 1/3 cup of orange juice, and 1 tsp vanilla, and stir to combine.


Stir in the mashed bananas, and stir to combine.


To prepare for baking:


Lightly spray the baking pan with cooking spray. Put the batter in a pastry bag or a food storage bag with the corner removed. Fill each of the donut portions of the tray 3/4 full.


Bake until golden, about 16 minutes, turning the tray half-way for even baking.


When the donuts are almost finished baking, make the icing for the topping as follows:


Mix 1 cup of confectioner’s sugar and 2 Tbsp of orange juice till smooth. The mixture should be liquid, but thick enough not to be drippy.


Now let’s complete our donuts!


When the donuts have finished baking, let them rest in the baking pan for a minute or two, then remove them. (The side that was in the pan will be darker than the side that was on top. This is normal.)


While the donuts are still warm, dip the tops (the lighter-colored half) in the icing.


 Turn the iced donut with the frosting side up.


Sprinkle with the toasted nuts.


Repeat for the remaining donuts.


To download a copy of the recipe for Baked Orange-Banana Nut Donuts, click HERE. 

Now prepare to revel in the unique glory that can only be found in a fresh-baked donut!


Please visit again next week for another delicious recipe, kitchen tested and home-cook friendly for your pleasure. Till then, stay well, keep it about the food, and always remember to kiss the cook. ;-)