Saturday, January 14, 2012

Pecan Pralines with Yogurt Frosting

One of the American south’s most classic treats is the Praline (pronounced “praw-leen”), a confection made from nuts and a sweet coating. Some versions, especially in Europe where they originated, are hard (similar to peanut brittle) and use almonds. When French settlers brought them to Louisiana in the 1800’s, an American praline evolved using pecans and made with cream to give them a texture more like a firm fudge. Once you taste a praline’s crunchy rich sweetness, you’ll know why they’re still made and loved today.

In this version, we’ll reduce the fat content by using fat-free half-and-half in place of cream. Then, just because we can, we’ll top it with a frosting made from fat-free Greek Yogurt. (In general, I’ve found fat free half-and-half and fat free Greek yogurt can be valuable additions to your fat-reducing cooking arsenal.)

Some Cook’s Notes before we begin:
  • In the recipe that follows, you’ll note that making pralines can take several hours. Don’t be put off; almost all of that is inactive time, during which the pralines are cooling and getting firm, and you’re reading e-mails and practicing Zumba. 
  • We'll be heating the sugar mixture to 236 degrees, what candy-makers call "soft ball." Although there’s a way described below to do this that doesn’t require a candy thermometer, the use of a candy thermometer is strongly recommended. It’s easier and a lot more reliable, and something you’ll find to be a valuable item to have on hand for frying, candy making, etc.
  • Use caution when heating the sugar mixture, particularly when stirring. Hot sugar makes for one of the worst kitchen burns there is.

The number of pralines this recipe makes depends, of course, on how big you make them. If you make them about 1-1/2 tablespoons each, you’ll get about 28.

Preheat the oven to 300 degrees. When hot, place 2 cups of chopped pecans or pecan halves in a single layer on a baking sheet into the oven until toasted, about 10 minutes, turning them once.

In a saucepan, combine 1-1/2 cups of granulated (white) sugar, 1-1/2 cups of brown sugar and 1-1/2 cups of fat-free half-and-half.


Over medium heat, and stirring gently and very often, bring the mixture to 236 degrees (“soft ball”) as measured on a candy thermometer, or until a small amount dropped into a cup of very cold water forms a soft ball. (The thermometer is better to use.) Reaching “soft ball” over medium heat should take about 20 minutes, but cook this by temperature, not by time. As you can see in the photo, expect a good bit of frothing along the way.

Remove the mixture from the heat and let cool for about an hour.

Add 1 teaspoon of vanilla extract, a pinch of salt, and the toasted pecans, and stir till the pecans are well coated and the mixture is creamy and firm.


Spoon the mixture onto a foil-lined baking sheet lightly coated with butter substitute, using about 1 to 1-1/2 Tbsp for each praline. Let rest for another 1 – 2 hours.

While the pralines are cooling, mix 1 cup of fat-free Greek yogurt and 2 cups of confectioners sugar till combined, and refrigerate until ready to use.


When the pralines are ready to be coated, begin preheating the oven to 225 degrees. Using tongs, dip the pralines one by one into the yogurt mix and place on a wire rack on a baking sheet. When the pralines are all coated and on the wire rack, turn off the oven and place the baking sheet into the oven with the door ajar for at least 4 hours to help the frosting firm up. (Cook’s note: In the batch I made for the photo at the top of this article, I decided to frost only half of the pralines and leave the others plain.)

When the coating has dried, place the pralines into an air-tight container. They should keep for at least three days, if no one eats them all before that!

Hope you enjoy making (and, of course, eating!) the sweet goodness of these delicious treats. Stop by again next week for more! Till then, stay well, keep it about the food, and always remember to kiss the cook. ;-) 


Saturday, January 7, 2012

Chicken Provencal Melt on Sourdough Bread

Ah, bonjour, mis amis!

Chicken Provencal Melt on Sourdough Bread is an easy, delicious twist on a classic tuna melt. Serve it with a good soup – more on that below – and you’ve got a hearty, healthy homemade meal everyone can enjoy! It’s so good you may have trouble believing it is made from reduced-fat ingredients that, truth be told, would probably have a traditional French chef chasing me down with a meat cleaver.

Some cook’s notes before the recipe itself:
  • Although it’s possible to make this recipe with boneless chicken breast, since the chicken is made more moist and flavorful by being cooked bone-in, and by being baked with the herb rub between the skin and the meat, I used drumsticks. (Two pounds of drumsticks gave me about one pound of meat after the bones and skin were removed after roasting. If you decide to use a boneless cut, remember to use the smaller amount.)
  • Provencal (pronounced “proe-ven-sahl”) herbs are dried herbs typical of the Provence region of south-eastern France. It would be easier if there were only one mixture of herbs called Provencal but, alas, it is not to be. The mixture I’ve used here is but one of several generally accepted combinations.
  • As always when working with raw proteins, and poultry in particular, use safe food-handling practices to prevent cross-contamination.

It’s also worth noting that a delicious hot soup is the perfect accompaniment to the Chicken Provencal Melt. In the photo at the top, it’s shown with a favorite Cream of Tomato soup made from an outstanding recipe generously shared on-line by the Michelin-starred Bistro Jeanty in Yountville CA. You’ll find the recipe at http://www.bistrojeanty.com/home/bistrojeanty/pdf/Bistro-Tomato-Soup.pdf. (I make it without the puff pastry, and reduce the fat by using fat-free half-and-half instead of heavy cream, and by replacing the butter with butter substitute. (If you make this with the fat-free half-and-half, add it a little at a time, making sure each amount you add is incorporated into the soup before adding more. Also, after adding the half-and-half, heat the soup only till steam begins to rise from the surface. Add the half-and-half too quickly, or letting it boil, can cause the half-and-half to separate and harm the soup.)

Back to the Chicken Provencal Melt. This recipe makes 4 servings.

Preheat the oven to 350 degrees.

Combine the following to make the Provencal herb mix: 4 tsp dried marjoram; 4 tsp dried thyme; 4 tsp dried savory; 1/2 tsp dried basil; 1/2 tsp dried rosemary; 1/4 tsp dried sage; and 1/4 tsp dried fennel. Grind the mixture by hand or with a spice grinder (or small coffee grinder dedicated to grinding herbs and spices.)

Add 3 tablespoons of olive oil to the herbs to form a wet rub. Set half of the rub aside in a separate container for later use.


While the oven is heating:
  • Dry the chicken drumsticks with a paper towel. Pull back the skin and apply the wet rub to the chicken meat. Fold the skin back over the meat after the rub has been applied.
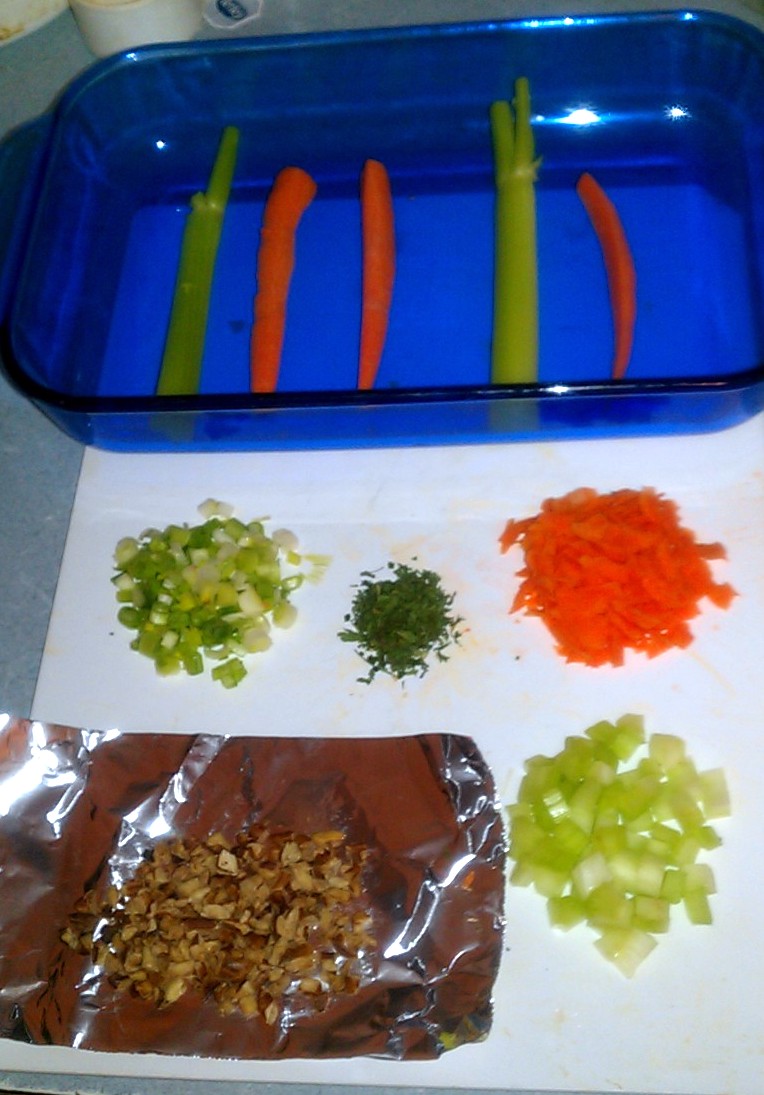
  • Prepare 2 tablespoons minced celery; 2 tablespoons minced green onions; 2 tablespoons of grated carrot; 1 tablespoon of toasted chopped pecans or walnuts; and 1 teaspoon minced flat-leaf parsley. (The celery and carrot stalk portions left over can be used to line the bottom of the baking dish you use for the chicken in the next step.)

Bake the chicken in a baking dish until cooked through, about an hour and ten minutes.


Let the drumsticks cool enough to touch, then remove the meat and skin and cut the meat into small chunks. Combine in a bowl with the remaining chicken salad Provencal ingredients: 1 teaspoon fresh lemon or lime juice; 2 tablespoons sweet pickle relish; about ¼ cup reduced-fat mayonnaise (added a bit at a time until the desired texture is reached); and salt and fresh ground black pepper to taste. Set the mixture aside until ready to use.

Lay out four slices of sourdough bread. Spread a light coating of the reserved herb rub on one side of each bread slice. Place the bread on a baking sheet and place in the broiler till lightly toasted, turning the slices over half-way.

Remove the baking sheet from the broiler and place two tomato slices on the top (seasoned side) of each slice of bread.


Spread the chicken mixture on top of the tomato slices, and drizzle each with a little balsamic vinegar.


Top each serving with a fat-free cheese slice (American or cheddar), and return the baking sheet to the broiler till the cheese is melted and bubbly, about 3 minutes. Serve immediately.

Now break out the soup and a nice white wine, and enjoy a glorious gastronomical experience! (And remember that the leftovers make a great next-day chicken salad sandwich.)

See you next week with another offering for your cooking and eating pleasure! Till then, stay well, keep it about the food, and always remember to kiss the cook. ;-)

Saturday, December 31, 2011

Belgian Yeast-Risen Waffles


A special welcome to new subscriber Magda. Great to have you here!

A special breakfast seems a perfect way to welcome the New Year. And if you love waffles, here’s one that’s not the usual kind: light, tasty Belgian Yeast-Risen Waffles.

What’s different about it? We often see what are being called Belgian Waffles. The problem is that those often are simply Belgian-style waffles that look like real Belgian waffles because they are large and have deep openings to hold toppings, but that are made with an American-style batter leavened with baking powder. A real Belgian waffle is made from a batter that is leavened with yeast, giving it a characteristic light texture. For this recipe, I’ve also used lemon or orange zest to give the waffles just a touch of tartness to complement the sweetness of the toppings, and beaten egg whites and some sparkling water to supplement that batter’s “fluff factor.” A bit of fat-free Greek yogurt enhances the flavor in a nice, healthy way. (Those last two ingredients are decidedly inauthentic for real Belgian waffles, but help keep the batter reduced-fat.)

So let’s heat up those waffle makers to ring in the new year right!

This recipe makes about eight 8” waffles.

Mix 1 package (0.25 ounce) of active dry yeast in 1 cup of warm (around 110 degrees) skim milk mixed with a teaspoon of honey or sugar. Let the mixture rest for about 10 minutes until creamy.

In a large bowl, sift together 3 cups all-purpose flour; 1 teaspoon salt; ½ cup sugar; ½ teaspoon cinnamon; and ½ teaspoon ground nutmeg.

Make a well in the dry ingredient mixture, and add 2 egg-substitute eggs; ¼ cup fat-free Greek yogurt; 1-1/2 teaspoon vanilla; ½ cup plus 1 tablespoon melted butter substitute; zest of one lemon or orange; and the yeast mixture.

Mix the wet ingredients, then stir into the dry ingredients while adding 1-1/4 cups of warm milk and ½ cup of room temperature sparking water to form a batter. Allow to rest for 5 minutes.

While the batter is resting, beat 3 fresh egg whites and a pinch of salt until soft peaks form, then fold the egg whites into the batter.


Cover the bowl and let rise for 60 minutes.


Preheat the waffle maker according to manufacturer's directions. When the batter has finished rising, spray the waffle iron with cooking spray and add batter as per your waffle maker’s directions.

Close the top and cook until the waffle is golden on both sides and is easily removed from iron.


Add your favorite topping and a sprinkle of confectioner's sugar, and serve immediately, or keep warm in a 200 degree F oven until ready to add toppings and serve. (Click here for an easy recipe for a fresh fruit topping, along with a strawberry-rhubarb pastry that’s a lot of fun to make and eat! That recipe is for a strawberry topping; you can use the same recipe with different fruit, too. In the photo at the top, for example, I used blueberries, and kept them whole instead of pressing them with my hands.)

Wishing you all a happy, healthy and prosperous new year, a great start to which would be to visit again next week for another great-tasting, kitchen-tested recipe! Till then, stay well, keep it about the food, and always remember to kiss the cook, especially at midnight on December 31. ;-)

Saturday, December 24, 2011

Cranberry-Pomegranate Chiffon Pie and Ben’s Gingerbread Hall of Fame

It is once again my pleasure to bring you two of my favorite Christmas traditions: a delicious recipe you can serve at Christmas dinner, (this year, Cranberry-Pomegranate Chiffon Pie in a Graham Cracker Crust with White Chocolate Sauce), and the 2011 inductees into Ben’s Gingerbread Hall of Fame. With a two-part article there’s much to show, so let’s get started!


Part 1: Ben’s Gingerbread Hall of Fame Class of 2011

Gingerbread cookies are, of course, one of Christmas’ most cherished traditions. One of my favorite things is to use them to commemorate people or images that made a special mark during the year. (Click here to see the previous inductees, along with a recipe for a great-tasting pecan pie with cranberries and bourbon.)

And now, please welcome the Gingerbread Hall of Fame, Class of 2011!

Angry Birds

Sock Monkey

Sue Sylvester

William and Kate Royal Wedding

Part 2: Cranberry-Pomegranate Chiffon Pie in a Graham Cracker Crust with White Chocolate Sauce

A delicious dessert is the perfect finish to a special dinner. This Cranberry-Pomegranate Chiffon Pie tastes great, is easy to make, and is low-fat too! (If you've never worked with unflavored gelatin before, this recipe is a good example of why you might want to add this wonderful and useful ingredient to your arsenal.)

This recipe makes one 9” pie. (You might also want to save the directions for the graham cracker crust and the white chocolate sauce separately, since those will be useful for lots of other dishes, too!)

First, let’s make the crust. (If you use a purchased graham cracker crust, just skip this step and go on to the filling directions.)
Preheat oven to 350 degrees.

To make 1-1/2 cups of crumbs, put about 12 low-fat graham crackers in a large (1 gallon size) food storage bag.


Use a rolling pin to crush the crackers and make the crumbs. (Try not to let on how much fun this is to do.)


In a bowl, combine the crumbs with ¼ cup sugar, a pinch of ground cinnamon, and a pinch of ground nutmeg. Add 5 tablespoons of melted butter substitute.


Combine until the mixture has the consistency of wet sand.


Spread the batter into a 9” pie pan, pressing down using fingers or the flat bottom of a glass.


Bake for 10 – 15 minutes until light brown and firm to the touch. Allow the crust to cool before filling.


To make the chiffon filling:

You'll need a bottle of cranberry-pomegranate juice.

Place a mixer bowl, mixer blades, and ½ cup of juice in the freezer until very cold.


In a small saucepan, bring ¾ cup juice to a boil. Pour into a bowl or mixing cup, add 1 packet (1/4 ounce) of unflavored gelatin and stir. Add ¼ cup sugar, and stir well.

Let the mixture cool until it is the consistency of unbeaten egg whites, about 20 minutes.

Place ½ cup non-fat dry milk and the ice-cold juice in a mixing bowl. Beat on high speed 3-4 minutes, or until soft peaks form.

Add  2 tablespoons of fresh lemon juice and continue beating.

Gradually add ¼ cup of sugar and continue beating until soft peaks form.


Gently mix the cooled gelatin mixture into the beaten dry milk mixture to form the filling.


Pour the filling into the cooled pie shell, cover and refrigerate three hours or until firm.


Finally, to make the white chocolate sauce:
Finely chop 3.5 ounces of white chocolate and place in a bowl.


Combine 6 tablespoons of fat-free half-and-half and 1 tablespoon light corn syrup in a small saucepan and bring to a boil.


Pour the boiled mixture onto the chocolate in the bowl. Let stand for 1 minute.


Add ½ tablespoon of butter substitute and stir until smooth. (If the sauce thickens too much when cooled, add a splash of skim milk to thin.)


To complete the pie:

Once the pie has cooled and is firm, sprinkle the top with finely chopped pecans.


Slice to serve. As you plate each slice, top it with the white chocolate sauce using a spoon or squeeze bottle as shown in the photo at the top of the recipe.

Wishing you all a joyous [fill in the name of your favorite December celebration]!


See you next week with another delightful treat for your cooking and eating pleasure!  Till then, stay well, keep it about the food, and always remember to kiss the cook. ;-)

Saturday, December 17, 2011

Deconstructed Stuffed Peppers

With deconstructed dishes in culinary style this season, it seems a good time to share this recipe for Deconstructed Stuffed Peppers, a wonderful take on traditional stuffed peppers that my wife created and cooked. My part this week was limited to following her around the kitchen with a camera and taking good notes.


The idea for this recipe came a few weeks ago when, after attending a spaghetti and meatballs dinner, we were fortunate to be given some leftover meatballs to take home. (The meatballs were some of the best I’ve ever had and, despite my best efforts, I was not able to get the recipe out of the chef.) A night or two later, my wife used them to put together a kind of deconstructed stuffed pepper meal that was so good I knew it had to be shared here. (Unlike her husband, a technocrat who typically plans recipes in great detail, she’s a marvelous improvisational cook.) As an added benefit, except for the bowl used to mix the meatball ingredients, everything is done in one baking dish. (Long-time readers may also remember a recipe my wife provided about a year ago for a lovely cream of broccoli soup, also worth checking out.)

The recipe begins with finished meatballs, cooked to completion. Use any you like; if you need a meatball recipe, click here for the one published on this site a couple of weeks ago. 


The recipe also calls for a tomato sauce. You may choose to use a good-quality marinara sauce from a jar, the no-cook sauce published here previously, or any other you like. This being her recipe, I’ll pass along my wife’s recommendation that a smoother sauce works better than a chunkier sauce in this case.


This recipe makes about three servings.


Preheat the oven to 350 degrees.


Put 10 cooked 2” meatballs, 2 rough-chopped green peppers, 1 medium rough-chopped onion in a baking dish sprayed with cooking spray. (You’ll want to use more meatballs if yours are smaller, or fewer if yours are larger.)
Add 2-1/2 to 3 cups of sauce and stir to mix.


Cover the baking dish with foil and bake for 30 minutes.


Add 1 cup of uncooked white rice and 1 cup of water. Cover again with the foil and bake for another 5 – 10 minutes.


Top with shredded mozzarella cheese.


Bake uncovered a few more minutes until the cheese is melted.


All that’s left is to dish it up, add some garlic bread and a glass of wine, and you’ve got yourself an easy, delicious meal that’s a real change of pace!


Hope you enjoy these deconstructed stuffed peppers as much as I did. And be sure to stop by next week for another great-tasting, kitchen-tested treat that will be perfect with your Christmas dinner! (Or any other time, for that matter.) Till then, stay well, keep it about the food, and always remember to kiss the cook. ;-)