Saturday, June 29, 2013

Strawberry Lovers’ Strawberry Chiffon Pie with Graham Cracker Crust and Shaved White Chocolate


To download a copy of the recipe for Strawberry Lovers’ Strawberry Chiffon Pie with Graham Cracker Crust and Shaved White Chocolate, click HERE


With the warm weather now upon us, a cool and refreshing dessert seemed like a good idea. That’s where Strawberry Lovers’ Strawberry Chiffon Pie with Graham Cracker Crust and Shaved White Chocolate comes in. Rather than being made with boxed flavored gelatin, or even unflavored gelatin mixed with fruit juice, this chiffon gets its deeper flavor by using fresh-made strawberry puree.


Another plus: reducing the fat by making the chiffon with non-fat powdered milk instead of the usual packaged whipped topping, and using low-fat graham crackers to form the crust. 


Some Cook’s Notes before we begin:

  • When forming the pie shell, be sure to press the graham cracker mixture down tight enough to prevent it from falling apart when sliced.

  • Much credit to the American Heart Association for publishing recipes that show how easy it is to use non-fat powdered milk to create a fluffy, guilt-free chiffon.


This recipe makes one very delicious 9” pie.


Here’s what you’ll need.


For the graham cracker crust: 1 cup low-fat graham cracker crumbs (about 12 crackers); 3 Tbsp sugar; 3 Tbsp plus 2 tsp butter substitute, melted and warm; pinch ground cinnamon; and a pinch ground nutmeg.


For the strawberry topping: ½ cup sugar; juice of ½ lemon; ½ lb. hulled fresh strawberries; pinch dry rosemary; salt; and ½ Tbsp firm-textured butter substitute.


For the strawberry chiffon: 1 envelope unflavored gelatin (1/4 ounce); 2 pounds fresh strawberries, hulled and rough-chopped; ½ cup sugar, divided; ½ cup non-fat dry milk; and the juice of one lemon.


For the garnish: shaved white chocolate.


To prepare the crust:


Preheat oven to 350 degrees.


Place the graham crackers in a food storage bag, squeeze out as much air as possible and, using a rolling pin, crush to a sand-like consistency.


Place the crushed graham crackers in a bowl, add the remaining crust ingredients, and mix well. The finished mixture should have the consistency of wet sand.


Spread the batter out in a 9” pie tin. Press down using your fingers or the flat bottom of a glass. (Reserve any leftover graham cracker mixture for use as a garnish on the finished pie.)


Bake until light brown and firm, about 12 minutes. Set aside to cool.


While the pie shell is baking, prepare the strawberry topping as follows:


After placing a small glass plate in the freezer, place ½ cup of sugar and the juice of ½ lemon into a medium saucepan. Mix until combined, then cook over a low heat until the sugar mixture is melted.


Crush ½ pound of hulled strawberries by hand into the saucepan. (Crushing by hand will give the finished topping a lightly chunky texture.) Add a pinch of rosemary, salt, and ½ Tbsp of butter substitute. Cook to a thick but spreadable texture. (You can check the thickness of the cooled liquid by placing a few drops of the hot liquid onto the plate you put in the freezer and letting it cool.) When the topping has the desired texture, set aside to cool until needed.


To make the chiffon filling:


Using a blender or food processor, puree the chopped strawberries completely. (This should make about 3 cups of puree.)


Place a bowl, mixer blades, and 1 cup of the puree in the freezer until very cold.


In a small saucepan, bring 2 cups of puree to a boil.


Pour into a bowl, add the gelatin and stir.


Add ¼ cup sugar, and stir well. Let the mixture cool for about 20 minutes.


Place the non-fat dry milk and ice-cold puree in a mixing bowl.


Beat on high speed 3-4 minutes, or until soft peaks form.


Add lemon juice and continue beating. Gradually add ¼ cup of sugar and continue beating until soft peaks form.


Gently mix the cooled gelatin mixture into the beaten dry milk mixture.


To complete and serve the pie:


Pour the filling into pie shell, cover and refrigerate three hours or until firm.


(If there’s leftover chiffon mixture after filling the pie shell, pour it into cups and chill along with the pie until firm. It makes a great dessert treat!)


After the chiffon pie and topping have cooled, gently spread the topping over the chiffon.


If you like, sprinkle some of the leftover graham cracker mixture over the top of the pie. Garnish with shaved white chocolate to serve.


To download a copy of the recipe for Strawberry Lovers’ Strawberry Chiffon Pie with Graham Cracker Crust and Shaved White Chocolate, click HERE.


Wishing you all a great, refreshing start to the summer season!


Please visit again next week for another delightful treat for your cooking and eating pleasure!  Till then, stay well, keep it about the food, and always remember to kiss the cook. ;-)


Saturday, June 22, 2013

Pierogi with Potato, Carrot and Cheese Filling

To download a copy of the recipe for Potato, Carrot and Cheese Pierogi, click HERE.

First things first: “pierogi” is plural. The singular form, pierog, is on the list of forgotten singular food words that also includes raviolo, gnocco, and – so help me, I’m not making this up – spaghetto.

Pierogi, of course, are essentially dumplings that are boiled, and often (though not always) fried afterward. (You can think of it as Poland’s somewhat doughier answer to Italy’s ravioli, although similar-concept dishes with a variety of different names are served throughout Europe and Asia.) Pierogi are popular throughout Canada and the United States, particularly in areas populated by Eastern European immigrants or their descendants.

It also seems worth a mention that pierogi even have their own patron saint.  (According to Wikipedia, “ ‘Swiety Jacek z pierogami!’, (St. Hyacinth and his pierogi!) is an old expression of surprise, roughly equivalent to the American "good grief" or "holy smokes!" As they say in the sports pages, you can look it up. http://en.wikipedia.org/wiki/Pierogi )

Some Cook’s Notes before we begin:

  • If refrigerating the pierogi to serve the next day, lightly flour the container in which they are being stored to prevent sticking.
  • If freezing the pierogi, first freeze on a baking sheet, then place the frozen pierogi in a sealed bag or container for storage.
  • Exercise care when rolling out the dough. If it’s thicker than the 1/8” called for in the recipe, the pierogi can become overly doughy.
  • The filling used in this recipe is a dressed up version of a typical potato and cheese filling. In this case, the potato and cheese mixture has added mashed carrots, sautĂ©ed onions, and just the right bit of bacon. Pierogi are often topped with sour cream and sautĂ©ed onion. Since here I’ve put the onion in the filling, the recipe calls for the sour cream to be mixed with chopped chives.
  • Since I like to keep things low fat whenever possible, in this recipe the pierogi are cooked by boiling. As mentioned above, pierogi are often pan-fried after being boiled, so feel free to do that here too you’re so inclined.

This recipe makes about 30 3-1/2” pierogi (four servings).

Here’s what you’ll need:

For the filling: 2 medium carrots, peeled and cut into coins of equal thickness; olive oil for sautĂ©; 1 small onion, diced; ¾ lb. red potatoes, baked; 3 Tbsp low fat sour cream; 3 Tbsp farmer cheese; 1 ounce turkey bacon, cooked and diced; and salt and pepper.

For the dough: 3 cups AP flour; ½ tsp salt; 2 egg-substitute eggs; ¼ cup low fat sour cream; and ½ cup water.


Other Ingredients for Serving: low fat sour cream; and chopped chives.

First, prepare the filling as follows:

Steam the carrot coins till soft. After they are soft, mash them with a masher or fork.


While the carrots are steaming, heat a little oil in a pan over medium heat. Add the onions and sauté until lightly caramelized.


Place the potatoes in a large bowl and mash well. (Leaving potato skins on is optional but recommended.)


Add the carrots, sour cream, farmer cheese, diced turkey bacon, and the sautéed onions, and mix well. Season with salt and pepper to taste. Set aside to cool.


While the filling is cooling, prepare the dough as follows:

Combine the flour and salt in a bowl. Form a well in the flour, and add the egg-substitute eggs, sour cream and water. Whisk the liquids in the well together.


Work the liquid mixture into the flour until a dough forms.


Knead the dough for about five minutes until smooth.


Cut the dough into four equal parts. Wrap each in plastic wrap, and let rest for twenty minutes.


To form the pierogi:

Roll one of the dough quarters out on a floured surface to about 1/8” thick.


Using a 3-1/2” cookie cutter to cut out as many circles as you can. (Alternatively, the dough can be cut into 3-1/2” squares.)


(If necessary, you can get an extra pierogi or two by taking a dough piece and attaching it where needed with a wet finger.)


Place about a tablespoon of filling on each dough piece.


Fold the dough piece over into a half-circle, and press down on the edges with your fingers.


Seal the edges with the tines of a fork.


Set the pierogi out on a lightly floured baking sheet lined with foil while you prepare the other dough quarters in the same way.


To cook:

Drop the pierogi into a pot of salted boiling water. When the pierogi float to the top (about four minutes) they are ready to serve.


To serve:


Plate the pierogi. Place some sour cream and chives on the side.


To download a copy of the recipe for Potato, Carrot and Cheese Pierogi, click HERE.

If you don’t make this great dinner for your family, friends, and even yourself, you just might end up saying, “! Swiety Jacek z pierogami!”

I hope you’ll visit here again next week for another kitchen-tested, home-cook ready recipe. Till then, stay well, keep it about the food, and always remember to kiss the cook. ;-)


Friday, June 14, 2013

Garlic Polenta Oven-Fries


To download a copy of the recipe for Garlic Polenta Oven-Fries, click HERE.


If you’ve ever created a recipe, you already know they can originate in many ways. This week’s recipe for Garlic Polenta Oven Fries began as one of those, “I wonder if this would work” ideas. I’m happy to say it did work, and quite well at that.


The concept is a simple one. Although polenta is often thought of as having the thick consistency of, say, mashed potatoes, it is also sometimes allowed to cool until it sets into a kind of loaf with a texture more like gelatin that is then cut into circles using a cookie cutter and pan-fried to a delicious golden brown. With that second way of serving polenta in mind, I had the idea of letting it set and cutting it into sticks; the sticks would then be seasoned and browned under a broiler until they formed a kind of polenta French fry.


From this concept, and with the inspiration of the legendary garlic fries served during San Francisco Giant games at AT&T Park, came a tasty – and very unique – side dish.


A couple of Cook’s Notes concerning polenta:

  • Polenta, which you’ll see below is quite easy to make fresh, is made from cornmeal a bit finer than the coarse kind used for grits. (There’s also a traditional Southern dish call mush - pronounced as in “mushroom,” not as would rhyme with push - that’s made from a cornmeal that’s finer still.)
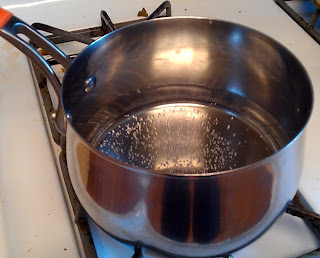
  • There is considerable disagreement among cooks in the matter of what liquid should be used to make polenta. Some cooks use chicken broth. Being of the opinion that this can mask the corn meal’s natural corn flavor, I’m on the side of those who use water. Ultimately, of course, the right liquid to use is whichever one you like best.


This recipe makes 3 side-dish size servings.


Here’s what you’ll need: 3 cups of water; salt; 1 cup cornmeal; butter substitute (for coating the baking dish); fresh ground black pepper; garlic powder; and cooking spray.


First we’ll make the polenta.


Bring 3 cups of salted water just to the boiling point.


After reducing the heat to low, add the cornmeal to the water, a little at a time, whisking constantly to avoid the formation of lumps. Let the cornmeal mixture bubble until very thick to form the polenta, about 20 minutes, whisking very frequently.


To cool and set the polenta:


Transfer the cooked polenta to a buttered 11” x 7” baking dish. Smooth the polenta with a spatula or spoon, cover with foil. Refrigerate for about two hours till the polenta is set and firm.


Once the polenta has cooled and set, it’s time to prepare the polenta “French fries.”


Begin preheating the broiler to high.


Slice the polenta into “French fry” type sticks.


Place the polenta sticks onto a baking pan that has been lightly sprayed with cooking spray.


Lightly spray the polenta slices with cooking spray, and season with salt, pepper and garlic powder.


Place the polenta sticks in the oven and broil till lightly browned , about 20 minutes. When done, turn the polenta French fries over, spray with cooking spray, season with salt, pepper and garlic powder, and return to the oven until the tops are lightly browned, about another five minutes.


When the polenta fries are done, remove from the oven and let cool for a few minutes until they can be touched. Serve warm as a side dish.


To download a copy of the recipe for Garlic Polenta Oven-Fries, click HERE.


Now that’s food that’s tasty, fun to eat, and totally unique. Reduced fat, too!


Hope you’ll come back next week for another great tasting recipe! Till then, stay well, keep it about the food, and always remember to kiss the cook. ;-)