Showing posts with label omelet. Show all posts

Saturday, May 19, 2012

Sloppy Jacques (Ratatouille on Toasted Sourdough Bread)


For a cookbook style copy of this recipe for Sloppy Jacques (Ratatouille on Toasted Sourdough Bread), click HERE!
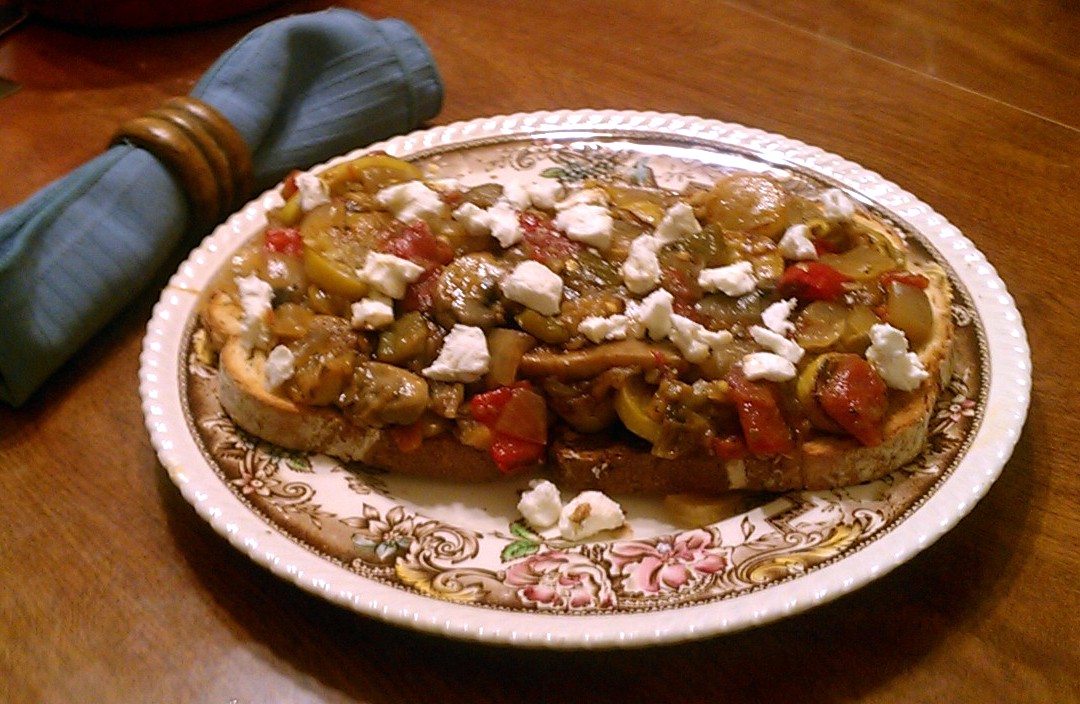
Low in fat and calories, high in nutrients, and wonderfully easy to make, ratatouille (“rah-tah-too-eee”) – the classic savory dish made from tomatoes, zucchini, eggplant, bell peppers, onions, garlic and herbs – is ideal for anyone who cooks, from experienced chefs to novice home cooks, and all levels in between. It is also enormously versatile, served as a meal with pasta or rice; as a filling for omelets, crepes or stuffed potatoes; as a side dish; and any other way you can imagine.

This recipe highlights my favorite way to serve ratatouille, something I call “Sloppy Jacques” style: using the ratatouille to top two slices of sourdough bread that have been brushed with herbed olive oil and lightly toasted, and garnished the combination with crumbled goat cheese and a kiss of balsamic vinegar.  (Of course, if you want to serve it in some other way, go right ahead. One of the great beauties of ratatouille is finding new ways to use it!)

Aside from how it is served, another way in which ratatouille recipes vary widely is in how the vegetables are cooked. Some recipe have the raw vegetables all cooked in a pot together. Others have the ingredients layered and baked as a casserole. Another frequently employed method is to sauté each of the vegetables separately (or, at the very least, in carefully chosen combinations), and then simmered all together in a pot to finish. The Sloppy Jacques recipe that follows is based on that last one; I feel it gives the cook the most control over how much each vegetable is cooked, making it easier to avoid overcooking some and under-cooking others just to get the rest cooked right.

You’ll also note that this recipe adds celery and mushrooms to the more traditional ingredients. I just think they work well here, in terms of both texture and flavor.

This recipe makes 4 meal-size servings.

First, we'll make the rosemary olive oil:
Combine ¼ cup of olive oil and 1 /2 tsp dried rosemary in a small bowl and heat in a microwave till warm, about 30 seconds. Set aside until ready to use.


Next, the ratatouille!
Line a colander with paper towels.


Slice 1-1/4 pounds of yellow squash or zucchini into ¼” thick rounds. Put 1 Tbsp of olive oil into a pan over medium-high heat.


Add the squash in a single layer (work in batches if necessary) and cook until lightly browned, about 4 minutes. When done, remove the squash from the pan and set aside in the colander.

Cut 2 green bell peppers and 1 red bell pepper into ½“ squares. Cut 2 stalks celery into ½“ slices.


Add another tablespoon of olive oil to the pan and put in the green pepper, red pepper, and celery. Cook for about 4 minutes.


When done, add the peppers and celery to the squash in the colander.


Cut 1 pound of eggplant into ½“ cubes. Add another tablespoon of olive oil to the pan and put in the eggplant. Cook for about 4 minutes. When done, add the eggplant to the colander.

Add another tablespoon of olive oil to the pan and put in 12 ounces of sliced mushrooms; 2 sweet onions (Vidalia or similar) cut into ½” pieces, and 3 cloves of minced garlic. Cook for about 4 minutes. When done, reduce the heat to low, and transfer the vegetables from the colander back into the pan.

Add a 14 ounce can of diced tomatoes, 1 bay leaf, 1 tsp dried thyme, 1 tsp dried basil, and 1 tsp dried parsley. Cook uncovered over low heat for 20 - 30 minutes until the vegetable are soft and cooked, but not mushy. Add salt and pepper to taste.

To serve:
Brush eight slices of sourdough bread with the herbed olive oil and lightly toast.
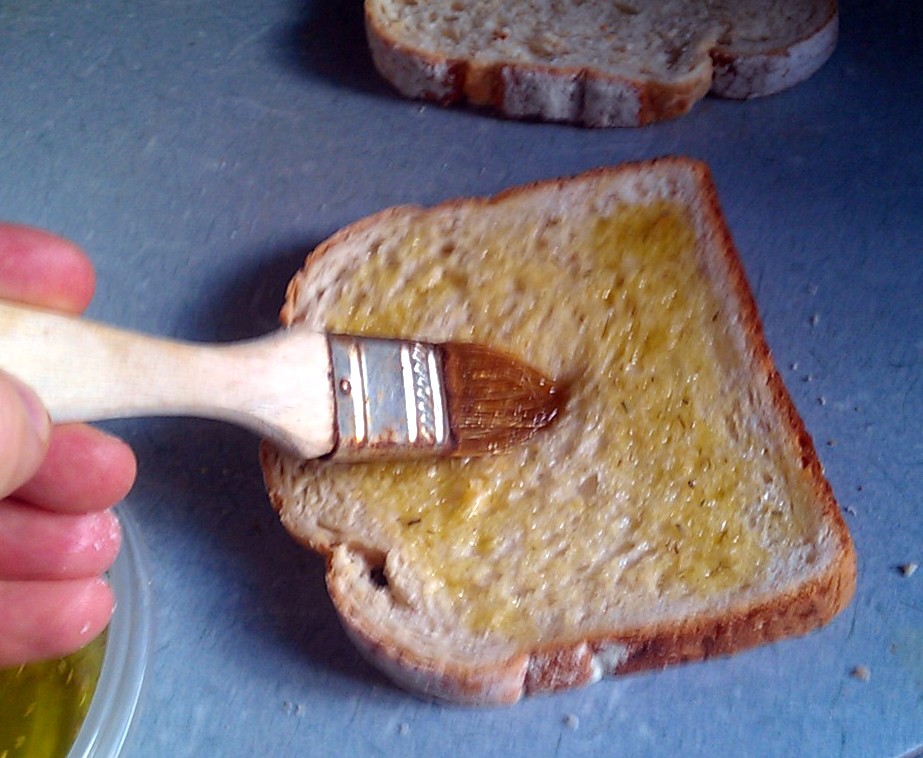


Place two slices on each plate.


Top the bread with the ratatouille, Sloppy Joe style.


Drizzle lightly with balsamic vinegar.


Garnish with crumbled goat cheese, and serve warm or at room temperature.


For a cookbook style copy of this recipe for Sloppy Jacques (Ratatouille on Toasted Sourdough Bread), click HERE!

Hope you enjoy this version of a French classic!

Thanks for visiting. Come by again next week for another kitchen-tested, home-cook friendly recipe for your cooking and dining pleasure! Till then, stay well, keep it about the food, and always remember to kiss the cook. ;-)

Saturday, January 21, 2012

Fruit-Filled Lemon-Ricotta Pancake “Omelets”


If you’ve never had a ricotta pancake, you’ve been missing a real treat. The richness of taste and texture that ricotta adds brings the pancake’s fully goodness to a new level. And in this recipe, we’ll be giving these already delicious pancakes some extra special treatments:
  • We’ll make our own fresh ricotta. (You’ll love how easy it is!) Of course, if you prefer to use packaged ricotta from the supermarket, that’s ok too.)
  • We’ll make each pancake a bit larger than normal – one pancake will be a full portion – and fold it over, omelet-style, with a fruit and bacon filling inside.
  • As always, all of this goodness will be made even better by being reduced fat!
Time to get started! This recipe is in three parts – the ricotta, the fruit filling, and the pancakes – and, when combined, makes four generous servings.

Making the Ricotta
As mentioned above, if you prefer to use store-bought ricotta, just skip this step and go on to the next. If you’re thinking about making your own fresh ricotta, however, and are concerned that you may not have the skills needed, here’s a simple quiz you can do in the privacy of your own home to find out: 

Can you read a thermometer? (     ) Yes   (     ) No
 
If you answered "Yes", congratulations...you’re a born ricotta maker! (You’ll also need a candy thermometer; that’s something you’ll find useful to have for a wide range of cooking projects.)

This portion of the recipe makes about a cup of ricotta.

Zest a large lemon and set the zest aside. We’ll use it later for the pancakes.

Combine 2 quarts of 2% milk and the juice of the zested lemon in a large, heavy-bottomed pot. (Steel or enameled only.)


Cook over medium-high heat, stirring gently and constantly, until the temperature reaches 170 degrees as measured with a candy thermometer. (By now you’ll see the mixture should be separating into solids (“curds”) and a pale, milky liquid (“whey”).)

Stop stirring but continue to heat the mixture until the temperature reaches 190 degrees.

Remove the pot from the heat, cover and let rest for 20-30 minutes.

Line a colander with fine-mesh cheese cloth and place it on a large bowl. Pour the milk mixture into the colander to strain out the curds while capturing the whey (about quart or a little more) in the bowl. (Don’t discard the whey. More on this later.)

After about five minutes, tie the top of the cheesecloth with twine to form a bag, and hang over the sink or other location to drip for about another 15 minutes.


Transfer the cheese curd to a bowl, and add salt, starting with ½ tsp and adding more to taste. (You’ll probably end up using about 1 teaspoon all together, but judge the amount by the taste.)

Use the cheese right away (warm is good) or store it in an airtight container and refrigerate. Since it has no preservatives, use it within 2 or 3 days. Do not save the cheese longer than that.

With our cheese now made, here’s a word about the whey before we go on to the rest of the recipe. Inexplicably, practically every ricotta recipe out there says to discard the whey after straining the curds. With the guidance of Facebook friend, chef, cheese-maker (and purveyor of fine scarves!) Maya, however, I was enlightened as to the wonderful taste, texture and health benefits whey brings to breads, soups, or other recipes when used as a substitute for water or even milk. (Click here for a very helpful site she suggested.) Thank you, Maya, for showing me the whey! (Ahem...sorry, couldn't resist.)

Making the Fruit Filling (With Just a Bit of Bacon!)
I used apples for the filling, but feel free to use whatever fruit suits your fancy.

Cook 2 – 4 slices of turkey bacon till slightly crisp and set aside.

Combine 1 cup of sugar and the juice of one lemon in a medium saucepan and heat over low heat until the sugar has melted, stirring often.


Add four Granny Smith apples, peeled and cut into ¼”- ½” wedges, along with ¼ teaspoon of ground nutmeg and 1 tablespoon of butter substitute, to the saucepan and mix well to coat with the melted sugar.  Cook over medium heat until the apples are soft and the liquid is reduced. Turn off heat and let rest to thicken the liquid while you make the pancakes in the next step. Crumble or chop the bacon and add before using.

Making the Pancakes
Now that we've got our fresh ricotta and the filling...

Preheat the oven to 375 degrees.

Combine 1-1/2 cups of skim milk; ½ cup of low-fat ricotta cheese; 2 tablespoons of melted butter substitute; 1 teaspoon of vanilla extract; zest of one lemon, and one egg-substitute egg.


Sift together 1-1/2 cups of all-purpose flour; 1 tablespoon of baking powder; 3/4 teaspoon of salt; 3 tablespoons of sugar, and ¼ teaspoon of nutmeg. Mix the dry ingredients into the milk mixture until combined.
Combine 2 fresh egg whites and pinch of salt, and beat until soft peaks form. Fold the egg whites in parts into the batter, working carefully to keep the fluffiness.


Melt 1 teaspoon of butter substitute on a griddle or crepe pan. Working one pancake at a time, pour ¾ cup of the pancake batter onto the griddle or crepe pan and cook until done, turning half-way. (Tip: Because the pancakes are very large, using a plate makes flipping them a lot easier! Slide the half cooked pancake onto a plate, cooked side down, and drain any excess liquid from the griddle or pan. Turn the pan over on top of the plate, turn them both over together, and remove the plate. Your uber-pancake is now flipped!)

Once all the pancakes are cooked, place them on a baking sheet and place in the oven for about 4 minutes to finish. (I’ve found this oven step gives a nice texture to the pancakes, both inside and outside.)

To plate, place some of the fruit filling on half of the pancake (and, if you like, some of the ricotta for extra richness), and fold the pancake over as with an omelet.

Top the folded pancake "omelet" with butter substitute and syrup or preserves, serve with an appropriate side dish, such as turkey sausage, and you’ve got a breakfast – or lunch, or dinner! – that is as fresh as it is good-tasting.

I hope you enjoy making and serving this special pancake meal, and that you’ll come back again next week for another recipe! Till then stay well, keep it about the food, and always remember to kiss the cook. ;-)

Friday, March 18, 2011

Easy Omelettes (or, if you prefer, Omelets) Tutorial Video

Greetings to new subscribers Marie, Bonnie and Keetha!

Before I go any further, let me say this: despite anything Microsoft Word may say to the contrary, “omelette” is a perfectly acceptable alternate spelling of omelet. Now that I’ve got that off my chest, let’s get to this week’s post.

One of my favorite foods to cook is an omelette. I like eggs anyway, but there’s so much to love about the omelette process: the folding of the cooked eggs, the selection of filling and, of course, the sheer athleticism of the all-important flip. (I’m 51 years old. At my age, flipping an egg is athleticism, ok?)

Making omelettes is not difficult, but it’s one of those things that is easier to learn if someone demonstrates and explains it than if it’s just described in writing. And so, this week, an Easy Omelettes Tutorial Video joins the previous tutorial videos on making homemade ravioli and blind-baking a pastry shell.

In the video, you’ll see how to make two styles of omelettes: a simple single fold, and a tri-fold. (You’ll also see how to wrist-flip the eggs, as well as how to do an easy “cheater’s flip” that’s as close to foolproof as you can get.) For demonstration purposes, I used a simple filling of green peppers, shallots, garlic and mushrooms, since I wanted the focus of the video to be on the handling of the eggs and not on a particular filling. Needless to say, feel free to use any filling you like, and don’t be afraid to be creative! (Even leftovers sometimes make a great omelette filling.) In the video, before sautéing the filling ingredients, I set a small amount of each aside and used them to top the finished omelette. Having the cooked vegetables inside, and the same (uncooked) vegetables on top, is a good way to create an interesting texture/flavor combination.

And don’t forget the cheese!

The total video length is about 12:19. Happy Omelette making!


See you next week! Till then, stay well, keep it about the food, and always remember to kiss the cook. ;-)