Showing posts with label bake. Show all posts

Saturday, July 6, 2013

Earl Grey and Almond Biscotti with White Chocolate Amaretto Topping

To download a copy of the recipe for Earl Grey and Almond Biscotti with White Chocolate-Amaretto Topping , click HERE

Long before being popularized by Captain Picard, Earl Grey – black tea scented with Mediterranean bergamot oil - was recognized as a refreshing and flavorful tea with a distinct, wonderful fragrance.

It’s highly versatile too; aside from its primary use for brewing hot or even iced tea drinks, Earl Grey’s lovely flavor and aroma have led to another application among its devotees: as an ingredient in cookies, cakes and other baked goods. In this week’s recipe, Earl Grey lends its special qualities to delicious almond biscotti. (For good measure, we also add a white chocolate-amaretto topping!)

Although, as with most biscotti, Italy’s twice-baked gift to the pastry world, these are very firm textured cookies intended to be dunked in coffee, tea or wine, I’ve been able to enjoy them “undunked” as well.

Some Cook’s Notes before we begin:
  • To toast the slivered almonds, spread them evenly in a shallow baking pan. Bake at 350°F, stirring after two or three minutes, until they're lightly browned. Let them cool completely before adding them to the biscotti batter.
  • If you prefer, you can substitute almond extract for Amaretto.
  • Earl Grey works well because it has both a pleasant taste and a lovely aroma, but feel free to experiment with other types of flavored teas to vary the result.
  • The finished biscotti should be sealed in an air tight container. As with anything topped with chocolate, they should be ok if kept out at room temperature. If the room is warm, however, it’s usually best to refrigerate them to keep the topping from melting.

This recipe makes about 46 3-1/4” biscotti.

Here’s what you’ll need:

For the biscotti dough: 2 cups all-purpose flour; 2 Tbsp Earl Grey tea from tea bags (or 3 Tbsp loose Earl Grey tea leaves); 1 teaspoon baking powder; 1/4 teaspoon salt; 1 cup sugar; 3/8 firm-cup butter substitute; 1 teaspoon Amaretto; 2 egg-substitute eggs; and 3/4 cup chopped slivered almonds, toasted.

For the topping: 5 ounces white chocolate chips or chopped white chocolate bar; 2-1/2 Tbsp Amaretto; 1/2 tsp vanilla extract.

To make the biscotti dough:

Prepare 2 Tbsp of ground Earl Grey tea, either by cutting open about six teabags or by grinding 3 Tbsp of loose tea leaves in a mini-processor or using a mortar and pestle. (When ground, the volume of the loose tea leaves will be reduced to about 2 Tbsp.)


Chop the toasted slivered almonds into small bits.


Stir together flour, tea, baking powder and salt, and set aside. When properly mixed, the dark flecks of the tea should look evenly distributed throughout the flour mixture.


Combine sugar, butter substitute and Amaretto in large mixer bowl. Beat at medium speed, scraping bowl often, until well mixed (about 2 minutes).


Continue beating, adding the egg-substitute eggs 1 at a time, until the mixture is creamy (about 1 minute).


Stir in the almonds by hand.


Gently add the flour mixture just until a dough forms. Be careful not to overwork the dough.


Wrap the dough and refrigerate for about 1-1/2 hours.


To form and bake the biscotti:

After the dough has finished chilling, begin preheating the oven to 350 degrees.


Divide the dough in half. Shape each half of dough on lightly floured surface into a log about 12” long and about 1- 1/2-inches in diameter.


Place logs about 4 inches apart on a baking sheet lined with parchment or a silicon baking pad. Flatten each log to 2-inch width.


Bake until the edges begin to brown, about 25-30 minutes, turning the baking pan half-way for even baking. Remove from the oven and let stand 10 minutes on the baking sheet.


While the logs are resting, reduce oven to 300°F.


Carefully cut the logs diagonally into 1/2-inch slices with sharp knife lightly coated with butter substitute.


Place the slices on the same cookie sheet, cut-side down. Don’t pack the biscotti too tight; there should be enough room for air to circulate. Use two trays if necessary.


Bake for about 9 minutes with the trays staggered to allow for good air and heat circulation.


Turn each biscotto over, turn the trays around and swap the position of the trays for even baking. Bake for another 9 minutes.


When done, the biscotti should be crisp and very light brown on both sides. Place on cooling racks. Cool completely.


To make the topping:

Combine the topping ingredients in the bowl of a double-boiler. (If necessary, you can improvise a double boiler by fitting a boil over the top of a saucepan with some water in it.) Heat over medium heat till melted.


Let stand for about two minutes and stir till smooth.


To add the topping to the biscotti:

After the biscotti have cooled, dip the top (rounded) part of each into the topping to coat.


Let the excess drip from off.


Place the biscotti on a baking sheet lined with parchment or a silicon pad to cool for about 1 hour to allow the topping to set.


To download a copy of the recipe for Earl Grey and Almond Biscotti with White Chocolate-Amaretto Topping , click HERE.

All that‘s left now is to brew the coffee or tea, or pour the wine, and enjoy a delicious treat! After your first biscotto, you’ll be glad you have so many more!

Please visit again next week for another great-tasting, home-cook friendly recipe! Till then, stay well, keep it about the food, and always remember to kiss the cook. ;-)

Saturday, November 10, 2012

Creamy Three-Cheese Celery Bake with Oven-Fried Crispy Onions

For a copy of the recipe for Creamy Three-Cheese Celery Bake with Oven-Fried Crispy Onions, click HERE. 

Although we were quite fortunate and had no significant damage in my area from Hurricane Sandy, having no power for a few days did keep me from posting – the first week I’ve missed since starting this site over two years ago!- and limited the ingredients I had available. It’s a great pleasure to be back.

This week’s recipe for Creamy Three-Cheese Celery Bake with Oven-Fried Crispy Onions is not only a great side dish for your Thanksgiving holiday dinner, but for year-round dinner use as well. It’s my version of a tasty celery bake dish my mother-in-law used to make.

Some readers may remember that there was a celery-based soup posted here two weeks ago, and could be wondering the reason for what must seem to be my recent obsession with cooking celery dishes. Celery is a great, versatile ingredient, of course, and I like it very much for that reason alone. In the interest of full disclosure, however, I must also confess to another reason. Back in the spring, I planted celery in my garden for the first time. Not knowing any better, I thought that one celery seedling would grow one head of celery such as we buy at the supermarket. I planted three, unaware that each seedling would grow not one, but three or four celery heads. At harvesting time that’s a lot of celery, folks, and leads naturally to a desire to cook dishes that use it in significant quantities.

One more note regarding this recipe. For the mushrooms I would, of course, normally use fresh. Similarly, for the roasted red pepper I’d normally start with a fresh red bell pepper and roast it myself. This recipe having been cooked during the power-outage of Hurricane Sandy, the ingredients available to me were somewhat limited, and I had to use canned mushrooms and jarred roasted red pepper instead. The recipe below describes the use of both fresh and canned mushrooms. Making a roasted red pepper using the stove-top or oven is described in several recipes previously posted here, including one of my favorites, “Mini-Taco Hors D’oeuvres with Roasted Red Pepper and Tomato Salsa.”
 
This recipe makes an 11” x 7” x 1-1/2” baking dish of celery bake, enough for 6 – 8 side dish size servings, or 3 – 4 servings of the celery bake plated by itself as a light lunch or dinner.

To start, let’s make the crispy onions:

Preheat the oven to 450 degrees.


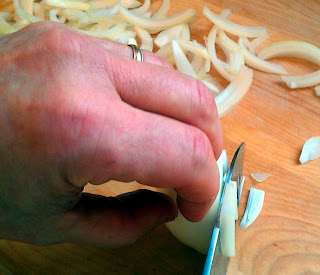
Julienne 1 medium onion.


In a plastic bag, combine 1 egg substitute and 1 Tbsp skim milk. Place the onion slices in the bag and shake to coat.


In another plastic bag, combine the 1-1/2 cups plain bread crumbs, 1 tsp dried oregano, and 1 tsp salt. Transfer the coated onion slices to the bag of seasoned bread crumbs and toss to lightly coat.


Spread the onion pieces out evenly on a baking sheet lined with parchment or a silicon sheet, and spray lightly with cooking spray.


Bake for 15 minutes. Toss the onions, lightly spray with cooking spray again, and bake for about another 15 minutes until golden. (Watch the onions near the end to make sure they don’t burn!)

When done, set the onions aside to cool. They'll get crispier as they cool.


Now let’s do the celery bake.


Begin lowering the oven temperature to 350 degrees.

Prepare 1/2 cup of chopped green pepper, 1/2 chopped roasted red pepper, and 2 to 2-1/2 cups of mixed grated cheese consisting of equal parts cheddar, parmesan, and asiago.

In a skillet, melt ¼ cup of butter substitute over medium heat, add 4 cups of thin-sliced celery (and 8 ounces of sliced mushrooms if fresh are being used), cover and cook until tender, about five minutes.

Uncover the skillet, move the celery to one side, and put 3 Tbsp flour and 1 tsp of salt in. Add 1-1/2 cups skim milk to the flour mixture. Cook until the mixture is thickened and bubbling, stirring constantly.


Stir in celery into the milk mixture, and add the green pepper and roasted red pepper. (If using canned mushrooms instead of canned, add 4 ounces of them here.)

When the ingredients in the skillet have combined, turn off the heat and add 2 to 2-1/2 cups of mixed grated cheddar, parmesan, and asiago cheeses (equal parts of each), stirring until melted.


Transfer the mixture to an 11” x 7” x 1.5” baking dish.


Bake until cooked through, about 20 minutes.


When the celery mixture has finished baking, top with the crispy onions. Serve warm.

For a copy of the recipe for Creamy Three-Cheese Celery Bake with Oven-Fried Crispy Onions, click HERE.


Hope you enjoy making this side dish even if you don’t ever find yourself dealing with more celery than any reasonable person should ever have to. And please come by again next week for another kitchen-tested, home-cook friendly recipe. Till then, stay well, keep it about the food, and always remember to kiss the cook. ;-)


Friday, September 28, 2012

Peach Pie Cookies

To download a copy of the recipe for Peach Pie Cookies, click HERE.

Real food is all well and good, but every so often a person has to have cookies. With that in mind, this week’s recipe for Peach Pie Cookies makes a soft, peach flavored cookie, seasoned similar to peach pie, bakes them into a miniature pie shape, and tops it with peach-flavored icing made to look like a lattice top. (These cookies are not only delicious; they’re fun to make and to eat!)

This recipe makes about 30 cookies. (The number you get will vary with exactly how you spoon out the cookie dough.)

We'll start by making the peach puree.

In a saucepan, combine the juice of one lemon, 2 Tbsp water, and a 28 ounce can of sliced peaches (well drained but not rinsed) over medium heat. Bring to a boil, then lower heat to a simmer.

Simmer until the peaches have broken down to a sauce consistency, about 35 minutes, stirring occasionally. (Mash the peach flesh with a spoon or masher if necessary.) This should make about 1 cup of peach puree.

Place the puree in a separate container and let cool a little in the freezer while you preheat the oven to 375 degrees.


Next, we'll make the cookie dough.

In a medium size bowl, mix ¼ cup of granulated sugar, ¼ cup of light brown sugar, and 6 Tbsp of softened butter substitute together until combined and creamy.

Stir in ½ tsp of vanilla and ¾ cup of the peach puree, reserving the remaining puree.


Sift 1 cup of all-purpose flour, ½ tsp baking powder, ¼ tsp baking soda, a pinch of salt, ½ tsp cinnamon and a pinch of nutmeg into the mixture, and stir to combine.

To bake the cookies:

Drop a heaping teaspoon of the mixture into each cup of a medium-size (12 cup/pan) muffin pan that has been lightly sprayed with cooking spray. (You can also drop them onto a baking sheet lined with parchment or a silicon baking sheet, but it’s the muffin tin that gives the cookie its pie-like shape.)

Bake the cookies until golden and the edges are browned, about 10 minutes.


Transfer to a wire rack and allow the cookies to cool completely before applying the glaze as described below.


To glaze the cookies:
While the cookies are cooling, make the glaze by combining 1 Tbsp of the reserved peach puree and 1 cup of confectioner’s sugar until thick (but spreadable) and smooth. It’s ok to use a little more of the puree if necessary, but make sure the glaze remains thick; if the glaze is too thin, it will tend to soak into the cookies.

After the cookies have cooled completely, apply the glaze and wait 30 minutes for the glaze to get firm. (As an added touch, you can apply the glaze in a lattice-top pattern!)


To download a copy of the recipe for Peach Pie Cookies, click HERE.

I hope you’ll make and enjoy these delicious, and slightly unusual, cookies. And that you’ll visit again next week for another recipe! Till then, stay well, keep it about the food, and always remember to kiss the cook. ;-)