Friday, February 24, 2012

Frosted Oatmeal-Cranberry Cookies with Walnut Butter

Having set out to make an oatmeal cookie for grown-up tastes, my initial thought for Frosted Oatmeal-Cranberry Cookies with Walnut Butter was to bake them as bar cookies, as if this would somehow make them more sophisticated than the usual round shape. Fortunately, I abandoned that approach almost immediately. For although they are designed for grown-up tastes, and contain plenty that’s “good for you,” these aren’t health bars. They’re oatmeal cookies, and there’s no reason to hide that proud heritage. So round it is!

Any similarity between these oatmeal cookies and the ones we all grew up with, however, ends with their round shape and the base ingredients (oatmeal, for example). While children will enjoy them too, the flavor blend includes several items more likely to be appreciated by grown-ups. Specifically:
  • This recipe combines the usual all-purpose flour with ragi flour, which is found in Indian markets. Aside from packing a ton of nutrients, ragi flour has an earthy flavor that combines beautifully with the oats and deepens the flavor. 
  • Coconut, which is often used in combination with ragi flour, provides not only good flavor but a kind of after-texture I hadn’t expected but was very pleased with. 
  • The use of fresh cranberries adds a lively touch to the texture of the cookie, and brings a natural tartness that contrasts with the sweet ingredients. (And don’t get me started on how much more nutritious fresh cranberries are compared to the dried ones!) 
  • The use of walnut butter lends a delightful, grown-up, nutty flavor that’s a change from the familiar peanut butter. (Where do you get walnut butter? Easy: you make it yourself in a matter of minutes. The recipe is described below, but here’s the short version: put a couple of cups of toasted nuts in a food processor, add a small amount of a few simple ingredients, and process the living daylights out of it until it’s smooth and creamy. Everything should be so easy!) 
  • Adding a simple frosting to almost any baked good can take it to an entirely new level. In this recipe I went with a raspberry liqueur frosting, but swap any fruit liquid (orange juice, lemon juice, cranberry juice, etc.) for the liqueur and you’ve got a child-friendly version.
And did I mention these delightful treats are reduced fat?

This recipe makes 30 – 36 2-1/2” cookies. (You might want to make them a bit smaller for children or some adults. I just like larger cookies.)

First, let’s make the walnut butter. (You can skip this part if you decide to use store-bought peanut butter or almond butter instead.)

Preheat the oven to 350 degrees.

Spread 2 cups of shelled walnuts out in a single layer on a baking sheet and place in the oven for a few minutes until lightly toasted.


After the toasted walnuts have cooled, place them in a mini food processor and process until powdered but not pasty. Add a generous pinch of salt, 1 teaspoon of maple syrup, and 1 teaspoon of flavor-neutral oil (grapeseed, canola, or similar)

Process until creamy, about five minutes.


Set aside until ready to use.


Next, we’ll make cookies.

In a bowl, combine ¾ cup all-purpose flour, ¾ cup ragi flour, 1 teaspoon baking soda, 1 teaspoon cinnamon, and ½ teaspoon salt.


In a separate bowl, beat together 3/4 cup butter substitute, 1 cup firmly packed brown sugar, and ½ cup granulated sugar until creamy.


To the butter mixture, add 2 egg-substitute eggs, 1 teaspoon vanilla extract, and ½ cup of the walnut butter.


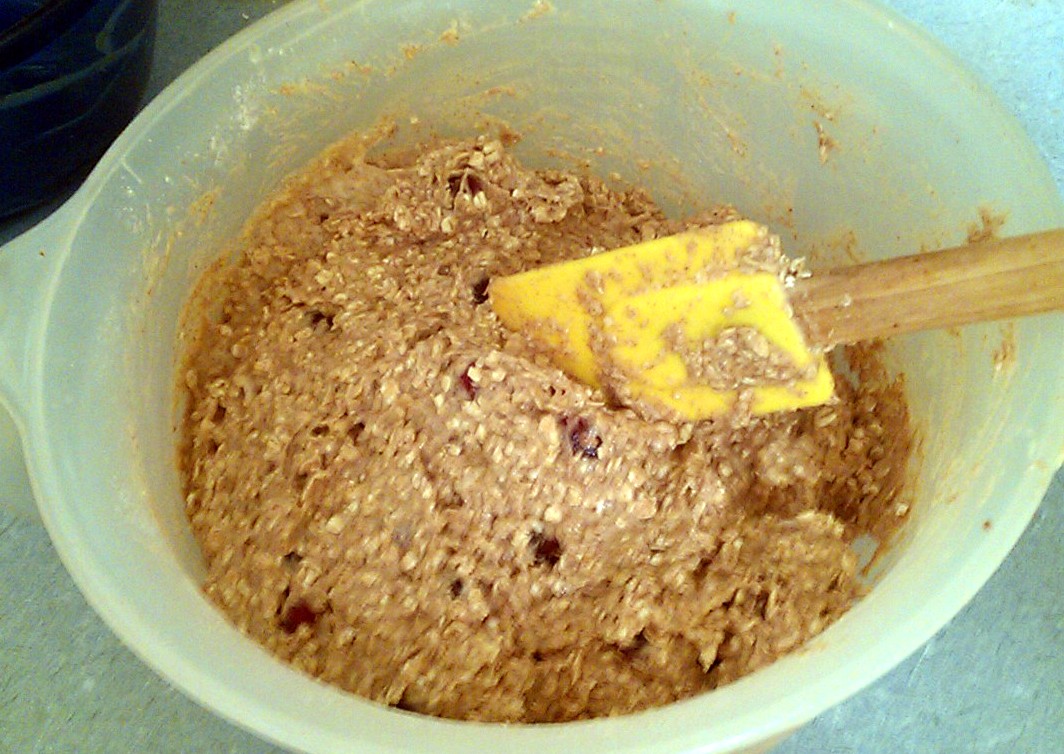
Stir in 3-1/2 cups of uncooked oats, ¼ cup of untoasted shredded coconut, and the flour mixture. When mixed, fold in 1 cup of fresh cranberries.


Drop by rounded tablespoons onto a parchment-lined cookie sheets. (For smaller cookies, drop rounded teaspoons of the mixture instead.)


Bake 12-15 minutes (a little less for the smaller cookies) or until golden brown, reversing the baking sheets half-way. (When putting two baking sheets in the oven at the same time, stagger them as in the photo for better heat circulation.)

Let the cookies cool for 5 minutes on the cookie sheets, then move them wire racks to finish cooling.


When the cookies are cool, make the frosting by combining 1 cup of confectioner’s sugar and 1-1/2 tablespoons of raspberry liqueur or other flavoring liqueur or fruit juice. (Don’t apply the frosting to warm cookies.)
Mix the frosting until smooth.


Using a spoon, drizzle the frosting on the cookies, and let harden before serving. (Placing wax paper under the cooling racks before applying the frosting is recommended.)
I found these cookies can be pretty addictive. You’ve been warned!

Looking forward to meeting again next week for another fun, delicious recipe! Till then, stay well, keep it about the food, and always remember to kiss the cook. ;-) 

Saturday, February 18, 2012

Smoked Salmon Hummus

When you’re looking for healthy food that’s simple to prepare, it’s hard to beat home-made hummus. If it’s a delicious light meal you want, smoked salmon (which packs its own good collection of nutrients, including omega-3 fatty acids) is a great way to go. And should a single food that combines both be what you seek, read on! Home-made Smoked Salmon Hummus works equally well for breakfast, for lunch, as an appetizer, healthy snack, or as a dip for breads, crackers or veggies that guests at your next gathering will love.

Hummus has been around in one form or another since at least the 13th century, and is found in most countries of the Middle East. It has become quite popular here in the United States as well. Typically made from tahini (which, in turn, is made from sesame seeds), chick peas, lemon juice, garlic and olive oil, it is widely considered a nutritionally well-rounded vegetarian dish. According to Wikipedia, hummus is a great source of iron, vitamins B6 and C, folate, protein, dietary fiber, and the amino acid methionine.

This recipe adds smoked salmon to the mix. (It is important to note that the term “smoked salmon” can refer to a number of products, depending on where you’re located; as used here, the term refers to the cured salmon fillet often called “lox” and that is generally associated with bagels.) Hummus normally being a vegetarian dish, I know of no other recipe that combines it with fish or animal protein, although I have to think that, sometime between the 13th century and today, someone else, somewhere, must have done it. And let’s not forget that smoked salmon packs a lot of nutrition as well. Livestrong cites smoked salmon as being a good source of lean protein, calcium, selenium, niacin, potassium, phosphorus, magnesium, and omega-3 fatty acids. It also offers vitamins D, B-6 and B-12. With all that going for smoked salmon, combining it with a healthier spread-base than cream cheese starts to make a lot of sense!

This recipe makes about four cups of hummus.


First, we’ll need our tahini, the sesame seed paste that serves the same function in hummus as mayonnaise does in tuna salad. You can either buy ready-made tahini (you’ll need about ¼ cup) or make it as follows:
In an oven or toaster-oven, toast ½ cup of sesame seeds at 350 degrees until golden brown. Let cool for 15 minutes.


Combine the sesame seeds with 1-1/2 tablespoons of olive oil in a food processor. (A mini food processor is good here because of the small quantity of sesame seeds.) Puree until creamy.


With the tahini now ready, let's use it to make our hummus.


      Prepare the following: 2 cups chickpeas (well-drained canned are ok); juice of 1 lemon; 2 cloves garlic, chopped; 8 ounces smoked salmon, divided (6 ounces chopped, 2 ounces minced); and 2 tablespoons of capers, divided (1 Tbsp + 1 Tbsp).

      Combine the tahini, chick peas, lemon juice, garlic, 6 ounces of chopped smoked salmon and 1 tablespoon of capers in a food processor. Process the ingredients in batches if necessary for the capacity of your food processor.


      Process to desired consistency. (As you’ll see in the photos, I like my hummus a little chunky, but that’s just me. Process it till it’s the consistency you like. Remember, it’s your hummus.) Once you have the consistency you want, transfer the mixture to a bowl or container and fold in ½ a diced large tomato; 2 tablespoons of minced onion; 1 teaspoon dried dill; 2 ounces of minced smoked salmon; 1 tablespoon of capers (broken slightly be pressing each between your thumb and index finger as you add them); ½ teaspoon of salt; and ¼ teaspoon of fresh ground black pepper.

      Adjust seasoning to taste.


      Top with one or two tablespoons of dried parsley; it’s great served in pita bread as a sandwich (pictured above). Another way to serve hummus (this or any other) is to put it in a bowl and drizzle the top with olive oil, and use it as a spread or dip.

      Hope you like this unique, delicious variation on of the most classic dishes around, and that you’ll visit again next week for another easy, delicious recipe! Till then, stay well, keep it about the food, and always remember to kiss the cook. ;-)

      Saturday, February 11, 2012

      Linzer Tarts with Herbed Strawberry Filling

      A great welcome to new subscribers Linda and Al. It’s great to have you here!

      Holidays and cookies have a way of going together, and Valentine’s Day is no exception. And for cookies that are fun, romantic and, most important, delicious, it’s hard to beat a Linzer Tart. Today’s recipe - Linzer Tarts with Herbed Strawberry Filling  - puts two cookies with a hint of almond around a special strawberry filling and tops them with confectioner’s sugar to add a great tasting touch to your Valentine’s Day. (To any other day too, but this is supposed to be a Valentine’s Day post.) No one has to know they’re also reduced-fat, and quite easy to make.


      An added bit of goodness for these cookies is the fresh strawberry preserves we’ll use to fill them. A while back I was going through some old cooking notes and saw an idea from Michael Chiarello, one of my favorite chefs, to add a touch of rosemary to strawberry preserves. I’m glad I’d written it down. You’ll be amazed at how well the strawberries and rosemary complement each other.


      To make the preserves, this recipe describes using a candy thermometer to know when the strawberry mixture had cooked long enough. If you don’t have one, another way you can check hot preserves for doneness is the frozen plate method you’ve seen used here in other recipes. That’s also described in the recipe.


      When cutting out the cookies and making the cut-outs for the top half of each Linzer Tart, admittedly I went a little overboard making the Valentine Man shape you see in the photos. You don’t have to get quite so elaborate when cutting out your cookies. In fact, I recommend that you keep the shapes and cutouts to simpler shapes you can make with cookie cutters; you’ll save a lot of time. The custom cut-outs on the top layer of the Valentine Man were made mostly with a paring knife and were very time consuming.


      This recipe makes about twelve filled cookies. It will also give you an added bonus: about a cup of preserves left over after the cookies are filled.


      If you’re going to use the frozen plate method to check the preserves for doneness, place a small glass plate in the freezer.


      Preheat oven or toaster oven to 350 degrees.


      Place ¾ cup of whole almonds or ½ cup of chopped or sliced almonds on a baking sheet; toast for a few minutes until the almonds are slightly browned and aromatic. Turn off the oven when done.


      Let the toasted almonds cool, then pulse in a food processor or mini food processor with 1/3 cup granulated sugar until finely ground. (Be careful not to over-process the mixture or it can become pasty.)


      Whisk the following together: 1-2/3 cup all-purpose flour; 2/3 cup pastry flour; ½ teaspoon baking powder; ¼ teaspoon ground nutmeg; ½ teaspoon ground cinnamon; and ¼ teaspoon salt

      in a medium bowl. Set aside.

      Using a mixer, beat 8 ounces of cold, firm-textured butter substitute and 1/3 cup granulated sugar in a large bowl until light and fluffy, about 1-1/2 minutes. Beat in ½ teaspoon of vanilla extract; 1 egg-substitute egg; and 1 teaspoon of lemon zest until well-combined, about another 30 seconds. (Zest the entire lemon; we’ll use any remaining zest when we make the preserves for the filling.)

      Add the ground almond mixture and the flour mixture, stirring with a spatula just until incorporated. Be careful not to over-mix.


      Divide the dough into 2 pieces; place 1 piece between 2 lightly floured sheets of wax paper and roll into about a 10-inch circle, about 1/4-inch thick. Repeat with the other piece of dough. Put both rolled doughs, covered with the wax paper sheets, in the freezer until firm, about 45 minutes.


      Preheat the oven to 350 degrees. Working one dough at a time, cut the top shapes (including any special cut-outs) and the bottom shapes, collecting, re-rolling, and cutting the scraps. Place the cookies, about 1 inch apart, on a baking sheet and chill in the freezer for about 20 minutes.


      Bake the cookies until the edges are golden, about 16 minutes, rotating the sheet halfway through. Cool on wire racks. While the cookies are cooling, make the filling. (See separate recipe below.) If you prefer to use a jar of prepared preserves instead, spoon about 1 cup of prepared preserves into a small saucepan and warm until a thick liquid.


      Once the cookies have cooled, turn the bottom cookies over, flat side up. Spread the warm filling over the surface and let it cool.


      Sift confectioners' sugar over each top cookie. (Using a strainer is an easy way to get a nice, even distribution.)


      Place the top cookies on top of the filling-covered bottom pieces to complete the cookies.


      To make about 1 pint of the preserve filling:


      In a medium saucepan, combine 1-1/2 cups of granulated sugar, and the juice of 1 large lemon. Add any lemon zest left over from the making the cookie dough. Stir till combined, then cook over a low heat until the sugar is dissolved, about 10 minutes.


      Add 1 pound of hulled and chopped fresh strawberries, a pinch of salt, and ¼ teaspoon of dried rosemary, and continue to cook over the low heat. Mixture should be at a low boil in about 20 minutes.


      The strawberries will gradually break down as the mixture cooks and thickens. Cook with very little stirring until a candy thermometer reads 220 degrees or until a small amount of the liquid gels on the frozen plate.

      Using a teaspoon, carefully put the hot filling onto the bottom cookies and add the top cookie as described above. Save the rest as a topping for your toast that no store-bought preserves will ever match!

      And there you have it: delicious, fresh-made reduced-fat Linzer Tarts with a very tasty herbed strawberry filling. Be sure you share them with people you love, and don’t forget to include yourself!


      See you next week with another tasty, reduced-fat recipe for something special. (I know what it is, but I’m not telling!) Till then, stay well, keep it about the food, and always remember to kiss the cook. ;-)

      Saturday, February 4, 2012

      Rosemary Focaccia Bread with Just a Hint of Garlic


      A few weeks ago I posted a recipe for home-made Italian bread that turned out to be quite popular. Today we’re going to take it up a level and make one of my all-time favorite recipes: home-made Rosemary Focaccia Bread with Just a Hint of Garlic. Its savory taste and slightly chewy texture make focaccia (pronounced foh-KAH-chah) perfect for a wide range of toppings or fillings, as an accompaniment to a delicious meal, or even by itself, warmed and gently dipped in just a bit of olive oil!

      As with most breads, most of the time required to make it is inactive time, during which the dough does the work and you don’t even have to be in the kitchen. So don’t let the amount of time described in the recipe deter you from one of the best breads you’ll ever have. Just take it step-by-step, and you’ll be surprised at how easy it is to have your kitchen graced by the aroma of a warm, fresh-out-of-the-oven focaccia.

      Cook’s Notes:
      • Although the basic recipe uses water, if you made the ricotta cheese recipe from a couple of weeks ago and still have the leftover whey, here’s a great place to use it. The recipe below explains both methods; if you decide to use the whey, I think you’ll be pleased at the flavor and texture it adds. (I sure was!)
      • The recipe calls for 2-1/2 pounds of bread flour. This is about 8 cups, but if you can it’s better to measure this out by weight.
      • While we’re on the subject, remember to use bread flour, not all-purpose flour. Bread flour has a higher gluten content that gives bread its characteristic firm texture. (For recipes such as focaccia, Italian bread and pizza dough, high-gluten flour, which has a gluten content even higher than bread flour, is even better to use, but that’s an ingredient you’re more likely to find in bulk at a restaurant supply house than in small packages at the supermarket.)

      This recipe makes one baking sheet (half-sheet) size focaccia. (Once you taste it, you’ll be glad you made enough to go around!)

      Combine 5 ounces of olive oil and 6 sliced cloves of garlic in a non-stick pan over medium heat and cook for a few minutes until the garlic is browned but not burnt. Remove and dispose of the garlic. Set the flavored oil aside for use in the rest of the recipe.

      Whisk two 0.25 ounce packages of dry yeast into 1 cup of warm (about 110 degrees) water, and set it aside to rest for five minutes.


      Combine 2-1/2 pounds (about 8 cups) of bread flour and 4 teaspoons of salt in a bowl and mix well. (When the yeast is added in the next step, you don’t want it to be in direct contact with the salt. This can damage the yeast.)


      Form a large well in the flour mixture and pour in 3 cups of room temperature water (or three cups of whey) and three ounces of the olive oil. Whisk the liquids together to cool the oil, and then whisk in the yeast mixture. (Otherwise, the heat from the oil can damage the yeast.) Mix the liquids into the flour mixture to form a smooth, sticky dough. (If using a stand mixture, mix at low speed for about 4 minutes.)

      Cover the bowl with plastic wrap and allow the dough to ferment until at least doubled. (This usually takes an hour to about an hour and twenty minutes.)


      Once the dough has doubled in size, use the garlic-flavored olive oil to oil a half-sheet pan. Transfer the dough onto the pan without folding the dough. Rubbing a bit of oil onto your hands, press and stretch the dough into the pan.

      Pour the remaining flavored olive oil onto the dough and spread it around till the entire top of the dough is oiled.


      Use your fingertips to make dimples over the entire surface of the dough.


      Distribute 1 teaspoon of Kosher salt and ¾ cup of stemmed, fresh rosemary (about ¾ ounce unstemmed) evenly over the top of the dough, and press them down into the dough gently. Cover the focaccia with oiled plastic wrap and leave on the counter to “bench proof” until at least doubled in size. (This usually takes about an hour.)

      Bake in a non-convection oven at 450 degrees for about 20 minutes until well-colored and baked through. Slide to a rack to cool. (And if you want to keep walking over to your focaccia and inhaling the heavenly aroma, that’s fine too!)

      Buon appetito, i miei amici!

      Visit again next week for a special in-time-for-Valentine’s Day recipe! Till then, stay well, keep it about the food, and always remember to kiss the cook. ;-)