Friday, June 29, 2012

Oven-Fried Brined Chicken Breast Rolled with Asparagus, Peppers and Four-Herb Pesto

To download a copy of this recipe for Oven-Fried Brined Chicken Breast Rolled with Asparagus, Peppers and Four-Herb Pesto, click HERE!

At a recent luncheon, one of the items served was a thin chicken breast rolled around asparagus and cut into pieces about 1” thick. Three or four made a serving. It was a good combination, and ample inspiration for today’s recipe: Oven-Fried Brined Chicken Breast Rolled with Asparagus, Peppers and Four-Herb Pesto. There are several ways in which this version takes the chicken breast in a somewhat different direction: the chicken breast is brined for added moisture and flavor; pesto is added to the inside of the roll, and red pepper is added to the asparagus; and the chicken breast is oven-fried instead of just baked.


Served on top of noodles with lemon and fresh chopped parsley (as in the photo above), or with rice, this is a great, fresh meal!


Some Cook’s Notes before we begin:
  • Use any pesto you like: purchased, your favorite recipe, or the four-herb pesto described below.
  • If you choose to make fresh pesto, as with so many cold-mix items, the flavor improves if you let it for a while or, even better, overnight.
  • The pesto portion of this recipe makes about 1-1/2 cups of pesto, which is far more than you’ll need to make the chicken. Put the remainder in a couple of sealed containers and refrigerate or freeze. Pesto is good to have around; you’ll think of something to do with it.
  • The chicken breast in this recipe is cut in half instead of into several 1” thick slices. There’s a reason for this: the breading (which the original I ate at the luncheon didn’t have) can start to fall off if the chicken is cut into smaller pieces. The breading itself is done with crushed cornflakes. When oven-frying, I've tried bread crumbs, panko, and various combinations of both, but I've just found that cornflakes give the best flavor and texture for the coating.
  • The chicken breasts are brined for about an hour. While brining a whole chicken can take several hours, doing smaller amounts of individual parts takes a good bit less time.
This recipe makes six servings.


First we’ll make the pesto. (If you’re using your own pesto recipe, or are using purchased pesto, just skip this part.)


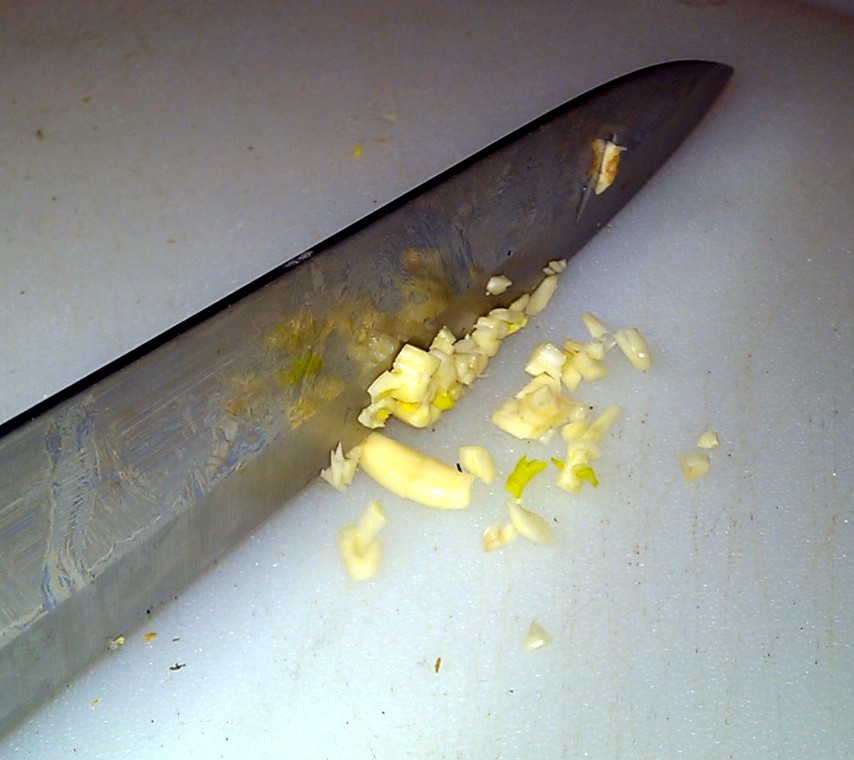
Rough chop 2 cups packed fresh basil; ½ cup fresh parsley; ½ cup fresh oregano; ¼ cup fresh mint; and 2 cloves garlic. Combine with /3 cup pine nuts, and the juice of ½ lemon in a food processor and pulse until coarsely chopped.


While still pulsing the processor, drizzle in up to 1/3 cup of olive oil till the mixture is smooth and has the desired texture.


Transfer the mixture to a bowl, and stir in 1 cup of finely shredded parmesan, ½ tsp salt, and ¼ tsp fresh ground pepper. Refrigerate until ready to use.


To brine the chicken:


Dissolve 3 Tbsp kosher salt; 2 Tbsp granulated sugar; and 2 Tbsp brown sugar in 1 cup of boiling water.


Add the boiled solution to 3-1/2 cups of cold water. Stir to combine, and place in the refrigerator to chill completely.


Place 1-1/2 pounds of boneless chicken breast (3 breasts at about ½ pound each) in the brine and refrigerate for 60 to 90 minutes. While the chicken is brining, continue the preparations as described below.


To prepare the vegetables:


Place 9 to 12 toothpicks in a cup of water to begin soaking.


Trim the bottoms on 1 pound of asparagus, and slice two red bell peppers into strips about the same width as the asparagus.


Prepare an ice bath and begin boiling a pot of water. When the water is boiling, put in the asparagus and, after two minutes, put in the red pepper strips. Remove both after another minute. (In other words, you’re blanching the asparagus for three minutes and the pepper strips for one minute.)


Place both in the ice bath (“blanch and shock”) to stop the cooking while retaining color and texture. Drain and set aside.


To prepare the breading station:


Place 1 cup of all-purpose flour in a wide dish.

Combine 1-1/4 cups all-purpose flour; ½ tsp salt; ¼ tsp fresh ground black pepper; ¾ cup dry white wine (Chardonnay or similar); and 1 egg-substitute egg and mix till well-combined into a smooth batter. Place in a wide dish to the right of the flour.

Place 2 cups of crushed corn flakes in a wide dish to the right of the batter.


To prepare the chicken breast:


Butterfly one of the chicken breast and spread it out open. Spread some pesto over the chicken. (Don’t use too much; pesto has strong flavor, and a little goes a long way!) Lay some of the asparagus and pepper strips at one end of the chicken breast. (There should be enough asparagus and peppers left over to serve as a side dish as described below.)


Roll the chicken breast around the asparagus and peppers. Secure the roll with three or four of the soaked toothpicks.


To bread the rolled chicken breast:


Dredge the chicken in the flour to coat, shaking off the excess.


Roll the chicken in the batter to coat, shaking off the excess. Then roll the chicken in the corn flakes to coat, shaking off the excess.


Place the breaded chicken on a parchment-lined baking sheet. Repeat the breading steps for the remaining chicken breasts. When all three breasts are breaded and on the baking sheet, place the baking sheet in the refrigerator for 20 minutes.
While the chicken breasts are in the refrigerator, begin preheating the oven to 400 degrees. Cut the remaining asparagus and peppers into 1” pieces.


To bake the chicken:


Spray the breaded chicken with cooking spray and place the baking sheet in the oven. Bake till the breasts are cooked through, about 30 minutes, turning the baking sheet half-way. When turning the tray, place a smaller try with the chopped asparagus and peppers into the oven to finish cooking.


When the chicken has finished baking, let rest on the baking sheet for 10 minutes, then cut each in half. (Each chicken breast should provide two servings.) Serve on top of noodles or rice, surrounded by the mixed chopped asparagus and peppers. REMEMBER TO REMOVE THE TOOTHPICKS BEFORE SERVING.


 To download a copy of this recipe for Oven-Fried Brined Chicken Breast Rolled with Asparagus, Peppers and Four-Herb Pesto, click HERE!


Hope you enjoy this fresh, delicious meal! And please be sure to visit again next week for another home-cooked, kitchen tested recipe. Till then, stay well, keep it about the food, and always remember to kiss the cook. ;-)

Friday, June 22, 2012

Mini Taco Hors D’oeuvres with Roasted Red Pepper and Tomato Salsa


To download a copy of this recipe for Mini Taco Hors D’oeuvres with Roasted Red Pepper and Tomato Salsa, click HERE!

Hors D’oeuvres may not be the first thing that comes to mind in a discussion of good food, but if you’ve ever been to a really good cocktail hour you know that, taken all together, those mini-treats you snare from the trays of the servers as they go past can make a pretty good meal on their own. And although I’m as fond of cocktail franks dipped in mustard as anyone (maybe even fonder, if New Year’s Eve here is any indication), sometimes you just have to shake things up a bit and do something different and interesting.

Enter Mini-Taco Hors D’oeuvres with Roasted Red Pepper and Tomato Salsa. They’re made with seasoned taco meat and cheese placed inside a fresh-baked mini-shell, and dipped in a tasty salsa, so eating them is both delicious and fun.

Some Cook’s Notes before we begin.
  • The salsa portion of this recipe makes about 1-1/2 cups, which is more than you’ll need for the mini-tacos. Don’t worry; you’ll find something to do with it. Just use it within a couple of days, since it has a short shelf-life, or use proper canning procedures to hold it longer.
  • This recipe makes mild-medium salsa. Adjust amount of jalapeno pepper to desired heat level.
  • If you prefer not to make tortillas from scratch, just use a cookie-cutter to cut 3” rounds out of purchased corn tortillas.
  • Since corn flour does not contain gluten, it will not be damaged by being overworked while making the tortillas.

This recipe makes about twenty-four 3” mini-tacos.

First we’ll make the salsa.

Roast a red bell pepper on the stove top till blackened on all sides.


Wrap the blackened pepper in foil and let it steam in its own moisture till cool enough to handle.


Peel the blackened skin from the red pepper. Mince half of the pepper. Store the other half in a sealed container or storage bag and use in the next day or two.


In a non-reactive bowl, combine the salsa ingredients: the minced red pepper; 1 can (14.5 ounces) of diced tomatoes, drained; 1/4 cup cooked sweet corn; 1/4 green bell pepper, minced; 1/4 cup onion, minced; 2 garlic cloves, minced; 1/2 tsp minced jalapeno pepper; 1 Tbsp chopped fresh cilantro (or 1 tsp dried); 1/2 Tbsp fresh lime juice; 1/2 Tbsp fresh lemon juice; 1 – 3 Tbsp of tomato paste to desired thickness; 1/4 Tbsp salt; and a pinch fresh ground black pepper. Mix and set aside at least 30 - 60 minutes.

Next, our fresh tortillas. (If you’re using purchased tortillas cut to size, you can skip this step.)

In a bowl, mix 1 cup masa harina (corn flour with “lime” [calcium hydroxide]; use Maseca or similar); pinch of salt; and 1 cup of warm water until a soft, moist dough forms.

Divide dough into 24 balls. Cover with plastic wrap or a damp cloth to keep from drying out.


Place one dough ball at a time between plastic sheets (such as a cut food storage bag) dusted with corn flour, and use a tortilla press or a rolling pin to make tortillas about 3” in diameter. (Use the tortilla press if possible; rolling these by hand can be done, but it’s time consuming and labor intensive.) Make them only 3” – 3-1/2” in diameter; if you press them larger, they’ll be thin and too fragile to handle for cooking.

Carefully peel off the tortilla and put on a dry, non-stick medium hot skillet. Cook for about 30 seconds on each side. While the tortilla is cooking, start to press the next one.


As the tortillas finish cooking, place in a sealed container until ready to use.


Now for the filling meat:

Begin preheating the oven to 375 degrees. Heat a little olive oil in the same sauté pan you used for the tortillas, and sauté ½ a diced medium onions until lightly browned.

Add the ½ pound of ground turkey, ½ tsp salt and 1 minced garlic clove, and brown for about 4 minutes. Be sure the ground turkey is chopped into small pieces.

Add the 1-1/2 tsp chili powder; ½ tsp cumin; ½ tsp dried basil; ½ tsp dried oregano; and ¼ tsp fresh ground black pepper. Mix till combined. Add ½ cup of chicken broth and 2 Tbsp corn flour, and mix well. Simmer uncovered about 3 minutes until the liquid thickens a little.

Place one of the tortillas on a parchment lined baking sheet. Add some filling and cheese.


Fold the tortilla over to form the taco. Hold the tortilla closed with a water-soaked toothpick or with a water-soaked skewer that will hold several tortillas.


Repeat until all the tortillas have been formed into tacos.


Bake for about 15 minutes until the taco have started to get crisp.

To serve, trim any excess melted cheese from each mini-taco and serve with salsa for dipping!

To download a copy of this recipe for Mini Taco Hors D’oeuvres with Roasted Red Pepper and Tomato Salsa, click HERE!
 

Make these unusual treats for your guests, or for yourself and  your family, and enjoy!

See you next week with another home-made, kitchen-tested recipe! Till then, stay well, keep it about the food, and always remember to kiss the cook. ;-)


Saturday, June 16, 2012

Fisherman's Pie (A Seafood-Based Version of Shepherd's Pie)

To download a copy of this recipe for Fisherman’s Pie, click HERE!

Several months ago, I posted a recipe for Shrimp Stuffing that was intended for use as a side dish in seafood entrees. Why, I thought at the time, should enjoying stuffing be limited to turkey, chicken and pork?

Sometime later, I was enjoying a Shepherd’s Pie (which some authoritative sources spell “Shepard’s Pie" for reasons I have been unable to determine), and a similar thought came to mind: why should shepherds have all the fun? Why can’t something similar to Shepherd’s Pie, but based in seafood instead of lamb, be made?

The answer was simple: it could be made. By using fish instead of lamb, fish spices instead of lamb spices, fish stock instead of beef stock, and the aforementioned shrimp stuffing for the topping instead of mashed potatoes, classic Shepherd’s Pie can be transformed into a delicious seafood dinner we’ll call Fisherman’s Pie.

Some Cook’s Notes before we begin:
  • Regarding the issue that always seems to come up when people and stuffing get together, this recipe makes a “medium-moist” stuffing. Vary the fish stock to increase or decrease the moisture accordingly.
  • If you ever want to use the stuffing on its own as a side dish instead of making it part of the Fisherman’s Pie, after uncovering the baking dish in the recipe let the stuffing bake further until browned, about 30 minutes more.
  • Instead of baking the entire Fisherman’s Pie in a baking dish as in the recipe, it can also be put into ramekins and baked as individual servings.

This recipe makes 4 servings.

First, let’s make the stuffing for the topping:


Preheat oven to 375 degrees.

Combine the following to make the spice mix: 1 tsp dried oregano; 1 tsp celery seed; 1 tsp dried thyme; ¼ tsp dried sage; 1 tsp dried marjoram; and 1 tsp fresh lemon zest. Divide the mixture into halves and set each aside.

Melt a little butter substitute in a skillet over medium heat. Add ½ cup diced onions, ½ diced celery, and half of the spice mix. Add salt and pepper to taste, and cook for 5 minutes.

Add ¾ cup fish stock; 2 Tbsp dry white wine (chardonnay or similar) and the juice of ½ a freshly-squeezed lemon. Stir to combine and bring to a simmer.

In a large bowl, combine 1 egg-substitute egg and ½ Tbsp dried parsley. Add the 4 cups of stale (or lightly toasted) potato bread cubes; and 8 ounces of thawed, cooked salad shrimp that has been diced. Toss to combine.

Transfer the mixture to a buttered 11”x 7” baking dish and dot with butter substitute. Cover with foil and bake for 30 minutes. Uncover and set aside. When finished, transfer the stuffing to a separate bowl and set aside. Rinse the baking pan for use later.


While the stuffing is baking, make the filling as follows:


Pat one pound of white fish fillets dry with a paper towel, drizzle with a little olive oil, and season with salt and pepper.


Dredge the fillets in corn flour (not corn meal) and cook on a hot grille pan till done.


When the fillets are cooked, about 4 – 5 minutes per side, cut into bit size pieces and set aside.


Heat some olive oil in a skillet over medium high heat. Add 1 diced medium onion and 2 peeled, diced carrots and cook until they just start to get some color. Add 2 minced garlic cloves and cook for another minute or two.

Add 2 Tbsp of tomato paste, 1 cup of fish stock, ½ cup of dry wine (chardonnay or similar), a bay leaf, and the other half of the spice mix to the skillet, and mix till combined.

Bring the liquid in the skillet to a boil, then reduce to a simmer. Simmer till the liquid is reduced by half, about 15 minutes.Remove the skillet from the heat, and remove the bay leaf. Add the corn, peas and fish. Stir gently to combine.


To put the Fisherman’s Pie together:


Preheat the oven to 400 degrees.

Transfer the filling mixture to the 11” x 7” baking dish and spread until level.


Top the filling with the stuffing, being sure to get a good seal around the edges.Bake until the top of the stuffing is browned, about 25 minutes.When done, let the baking dish cool on a rack for five minutes before serving.


To download a copy of this recipe for Fisherman’s Pie, click HERE!

Serve with the rest of that white wine we used in the cooking, and you’re all set for a great dinner! (You didn’t think we were going to let the remaining wine go to waste did you?)

Please visit again next week for another tasty, kitchen-tested recipe. Till then, stay well, keep it about the food, and always remember to kiss the cook. ;-)

Saturday, June 9, 2012

“Braised-n-Glazed” Mirepoix Side Dish with Lemon Mushrooms


To download a copy of this recipe for “Braised-n-Glazed” Mirepoix Side Dish with Lemon Mushrooms, click HERE!

Mirepoix (meer-PWAH), the classic French combination of carrots, onions, and celery, is generally used to add great flavor and aroma to soups, sauces, stews, stocks, and other foods. (As a side note, when the French settled in Louisiana, the mirepoix concept they brought with them eventually evolved into the region’s famous “Trinity” – equal parts celery, onions, and peppers – that serves a similar purpose in that local cuisine.)

Such great flavor and aroma, in fact, that it seems a shame to keep it in the background. I believe it’s time to give this time-honored workhorse vegetable combination a more prominent place on your plate as featured - and great tasting - vegetable side dish.

To make mirepoix a side dish we’ll need to modify it a bit. Classic mirepoix is prepared with 1 part-by-weight carrots, 1 part-by-weight celery, and two parts-by-weight onion. In this recipe, those proportions have been adjusted to emphasize the carrots. A bit of garlic was added. The celery and carrots were browned, braised in seasoned vegetable stock, and the braising liquid was then sweetened and cooked down to a glaze. Finally, to add contrast with the sweetness of the glaze, sliced mushrooms sautéed in olive oil and lemon were added. (Note, too, that for the browning and sautéing, I used olive oil in place of the more traditional, but considerably less heart-healthy, butter.)

This recipe makes four side-dish size servings.

First, let’s make the seasoning mix.

Combine the following seasoning mix ingredients and set aside: ½ tsp dried marjoram; ½ tsp dried thyme; ½ tsp dried basil; ½ tsp dried rosemary; ¼ tsp dried sage; and ¼ tsp dried tarragon.

Next, we’ll prepare our vegetables.


Julienne ½ a Vidalia onion.


Mince 6 garlic cloves.


Slice 8 ounces of mushrooms. (Better yet, open an 8 ounce package of sliced fresh mushrooms.)


Peel 1 pound of carrots, and cut on-the-bias into equal size coins.


Slice 4 large celery stalks to equal thickness.


Next, start browning the carrots and cooking the onions:

Heat a small amount of olive oil over medium-high heat in a skillet. Add the carrots in a single layer and cook undisturbed until lightly browned. Turn the carrots over and cook for a few minutes. When done, the carrots should be cooked only about half-way, not cooked through completely. Season to taste.
While the carrots are browning in the skillet, heat a small amount of olive oil over medium heat in a sauté pan and add the onions. Cook until the onions are soft and browned, adding the garlic for the last few minutes of the cooking. Season to taste. When done, set the onions aside onto paper towels.

Next, we cook the celery and add the carrots:

When the carrots are done cooking, set aside in a bowl, reduce the heat to medium, and put the celery and a small amount of olive oil in the pan. 

When the celery is half-way cooked (similar to the carrots), season to taste, reduce the heat to low, and return the carrots to the skillet and mix with the celery. Add about ½ cup of white wine, the seasoning mix, and enough vegetable stock to cover the carrots and celery about half way. (The amount of stock you’ll need depends on your skillet, but will probably be between 1 and 2 cups.) Cover the skillet and allow to simmer until tender but not mushy.

Now for the mushrooms:

While the carrots and celery are braising, add a small amount of oil and the mushrooms to the sauté pan. Sauté until cooked through, adding the fresh-squeezed juice of ½ lemon. After the mushrooms are at least partially cooked, season to taste. (Adding salt too soon can draw needed moisture from the fresh mushrooms.)

To finish the side dish:

When the carrot and celery mixture is cooked, remove the cover, add ½ tablespoon of sugar, mix to combine, and increase the heat to high.


Stirring frequently to avoid burning, leave the skillet uncovered and let the liquid cook down to a glaze.


Combine the carrots and celery with the mushrooms and the onions. Transfer to a serving dish, and garnish with parsley as in the photo at the top. Serve hot as a side dish.


To download a copy of this recipe for “Braised-n-Glazed” Mirepoix Side Dish with Lemon Mushrooms, click HERE!

Serve this with your next entrée, and you’ve got a vegetable side that’s both delicious and healthy!

Please visit again next week for another tasty, kitchen tested recipe! Till then, stay well, keep it about the food, and always remember to kiss the cook. ;-)