Saturday, December 31, 2011

Belgian Yeast-Risen Waffles


A special welcome to new subscriber Magda. Great to have you here!

A special breakfast seems a perfect way to welcome the New Year. And if you love waffles, here’s one that’s not the usual kind: light, tasty Belgian Yeast-Risen Waffles.

What’s different about it? We often see what are being called Belgian Waffles. The problem is that those often are simply Belgian-style waffles that look like real Belgian waffles because they are large and have deep openings to hold toppings, but that are made with an American-style batter leavened with baking powder. A real Belgian waffle is made from a batter that is leavened with yeast, giving it a characteristic light texture. For this recipe, I’ve also used lemon or orange zest to give the waffles just a touch of tartness to complement the sweetness of the toppings, and beaten egg whites and some sparkling water to supplement that batter’s “fluff factor.” A bit of fat-free Greek yogurt enhances the flavor in a nice, healthy way. (Those last two ingredients are decidedly inauthentic for real Belgian waffles, but help keep the batter reduced-fat.)

So let’s heat up those waffle makers to ring in the new year right!

This recipe makes about eight 8” waffles.

Mix 1 package (0.25 ounce) of active dry yeast in 1 cup of warm (around 110 degrees) skim milk mixed with a teaspoon of honey or sugar. Let the mixture rest for about 10 minutes until creamy.

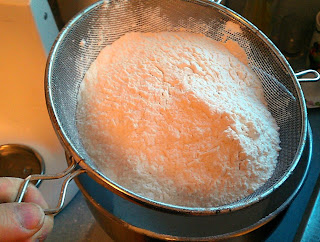
In a large bowl, sift together 3 cups all-purpose flour; 1 teaspoon salt; ½ cup sugar; ½ teaspoon cinnamon; and ½ teaspoon ground nutmeg.

Make a well in the dry ingredient mixture, and add 2 egg-substitute eggs; ¼ cup fat-free Greek yogurt; 1-1/2 teaspoon vanilla; ½ cup plus 1 tablespoon melted butter substitute; zest of one lemon or orange; and the yeast mixture.

Mix the wet ingredients, then stir into the dry ingredients while adding 1-1/4 cups of warm milk and ½ cup of room temperature sparking water to form a batter. Allow to rest for 5 minutes.

While the batter is resting, beat 3 fresh egg whites and a pinch of salt until soft peaks form, then fold the egg whites into the batter.


Cover the bowl and let rise for 60 minutes.


Preheat the waffle maker according to manufacturer's directions. When the batter has finished rising, spray the waffle iron with cooking spray and add batter as per your waffle maker’s directions.

Close the top and cook until the waffle is golden on both sides and is easily removed from iron.


Add your favorite topping and a sprinkle of confectioner's sugar, and serve immediately, or keep warm in a 200 degree F oven until ready to add toppings and serve. (Click here for an easy recipe for a fresh fruit topping, along with a strawberry-rhubarb pastry that’s a lot of fun to make and eat! That recipe is for a strawberry topping; you can use the same recipe with different fruit, too. In the photo at the top, for example, I used blueberries, and kept them whole instead of pressing them with my hands.)

Wishing you all a happy, healthy and prosperous new year, a great start to which would be to visit again next week for another great-tasting, kitchen-tested recipe! Till then, stay well, keep it about the food, and always remember to kiss the cook, especially at midnight on December 31. ;-)

Saturday, December 24, 2011

Cranberry-Pomegranate Chiffon Pie and Ben’s Gingerbread Hall of Fame

It is once again my pleasure to bring you two of my favorite Christmas traditions: a delicious recipe you can serve at Christmas dinner, (this year, Cranberry-Pomegranate Chiffon Pie in a Graham Cracker Crust with White Chocolate Sauce), and the 2011 inductees into Ben’s Gingerbread Hall of Fame. With a two-part article there’s much to show, so let’s get started!


Part 1: Ben’s Gingerbread Hall of Fame Class of 2011

Gingerbread cookies are, of course, one of Christmas’ most cherished traditions. One of my favorite things is to use them to commemorate people or images that made a special mark during the year. (Click here to see the previous inductees, along with a recipe for a great-tasting pecan pie with cranberries and bourbon.)

And now, please welcome the Gingerbread Hall of Fame, Class of 2011!

Angry Birds

Sock Monkey

Sue Sylvester

William and Kate Royal Wedding

Part 2: Cranberry-Pomegranate Chiffon Pie in a Graham Cracker Crust with White Chocolate Sauce

A delicious dessert is the perfect finish to a special dinner. This Cranberry-Pomegranate Chiffon Pie tastes great, is easy to make, and is low-fat too! (If you've never worked with unflavored gelatin before, this recipe is a good example of why you might want to add this wonderful and useful ingredient to your arsenal.)

This recipe makes one 9” pie. (You might also want to save the directions for the graham cracker crust and the white chocolate sauce separately, since those will be useful for lots of other dishes, too!)

First, let’s make the crust. (If you use a purchased graham cracker crust, just skip this step and go on to the filling directions.)
Preheat oven to 350 degrees.

To make 1-1/2 cups of crumbs, put about 12 low-fat graham crackers in a large (1 gallon size) food storage bag.


Use a rolling pin to crush the crackers and make the crumbs. (Try not to let on how much fun this is to do.)


In a bowl, combine the crumbs with ¼ cup sugar, a pinch of ground cinnamon, and a pinch of ground nutmeg. Add 5 tablespoons of melted butter substitute.


Combine until the mixture has the consistency of wet sand.


Spread the batter into a 9” pie pan, pressing down using fingers or the flat bottom of a glass.


Bake for 10 – 15 minutes until light brown and firm to the touch. Allow the crust to cool before filling.


To make the chiffon filling:

You'll need a bottle of cranberry-pomegranate juice.

Place a mixer bowl, mixer blades, and ½ cup of juice in the freezer until very cold.


In a small saucepan, bring ¾ cup juice to a boil. Pour into a bowl or mixing cup, add 1 packet (1/4 ounce) of unflavored gelatin and stir. Add ¼ cup sugar, and stir well.

Let the mixture cool until it is the consistency of unbeaten egg whites, about 20 minutes.

Place ½ cup non-fat dry milk and the ice-cold juice in a mixing bowl. Beat on high speed 3-4 minutes, or until soft peaks form.

Add  2 tablespoons of fresh lemon juice and continue beating.

Gradually add ¼ cup of sugar and continue beating until soft peaks form.


Gently mix the cooled gelatin mixture into the beaten dry milk mixture to form the filling.


Pour the filling into the cooled pie shell, cover and refrigerate three hours or until firm.


Finally, to make the white chocolate sauce:
Finely chop 3.5 ounces of white chocolate and place in a bowl.


Combine 6 tablespoons of fat-free half-and-half and 1 tablespoon light corn syrup in a small saucepan and bring to a boil.


Pour the boiled mixture onto the chocolate in the bowl. Let stand for 1 minute.


Add ½ tablespoon of butter substitute and stir until smooth. (If the sauce thickens too much when cooled, add a splash of skim milk to thin.)


To complete the pie:

Once the pie has cooled and is firm, sprinkle the top with finely chopped pecans.


Slice to serve. As you plate each slice, top it with the white chocolate sauce using a spoon or squeeze bottle as shown in the photo at the top of the recipe.

Wishing you all a joyous [fill in the name of your favorite December celebration]!


See you next week with another delightful treat for your cooking and eating pleasure!  Till then, stay well, keep it about the food, and always remember to kiss the cook. ;-)

Saturday, December 17, 2011

Deconstructed Stuffed Peppers

With deconstructed dishes in culinary style this season, it seems a good time to share this recipe for Deconstructed Stuffed Peppers, a wonderful take on traditional stuffed peppers that my wife created and cooked. My part this week was limited to following her around the kitchen with a camera and taking good notes.


The idea for this recipe came a few weeks ago when, after attending a spaghetti and meatballs dinner, we were fortunate to be given some leftover meatballs to take home. (The meatballs were some of the best I’ve ever had and, despite my best efforts, I was not able to get the recipe out of the chef.) A night or two later, my wife used them to put together a kind of deconstructed stuffed pepper meal that was so good I knew it had to be shared here. (Unlike her husband, a technocrat who typically plans recipes in great detail, she’s a marvelous improvisational cook.) As an added benefit, except for the bowl used to mix the meatball ingredients, everything is done in one baking dish. (Long-time readers may also remember a recipe my wife provided about a year ago for a lovely cream of broccoli soup, also worth checking out.)

The recipe begins with finished meatballs, cooked to completion. Use any you like; if you need a meatball recipe, click here for the one published on this site a couple of weeks ago. 


The recipe also calls for a tomato sauce. You may choose to use a good-quality marinara sauce from a jar, the no-cook sauce published here previously, or any other you like. This being her recipe, I’ll pass along my wife’s recommendation that a smoother sauce works better than a chunkier sauce in this case.


This recipe makes about three servings.


Preheat the oven to 350 degrees.


Put 10 cooked 2” meatballs, 2 rough-chopped green peppers, 1 medium rough-chopped onion in a baking dish sprayed with cooking spray. (You’ll want to use more meatballs if yours are smaller, or fewer if yours are larger.)
Add 2-1/2 to 3 cups of sauce and stir to mix.


Cover the baking dish with foil and bake for 30 minutes.


Add 1 cup of uncooked white rice and 1 cup of water. Cover again with the foil and bake for another 5 – 10 minutes.


Top with shredded mozzarella cheese.


Bake uncovered a few more minutes until the cheese is melted.


All that’s left is to dish it up, add some garlic bread and a glass of wine, and you’ve got yourself an easy, delicious meal that’s a real change of pace!


Hope you enjoy these deconstructed stuffed peppers as much as I did. And be sure to stop by next week for another great-tasting, kitchen-tested treat that will be perfect with your Christmas dinner! (Or any other time, for that matter.) Till then, stay well, keep it about the food, and always remember to kiss the cook. ;-)
Saturday, December 10, 2011

Easy, Fresh Italian Bread

A warm welcome to new subscriber Margot!

As part of last week’s recipe for a delicious spaghetti and homemade meatballs dinner with an easy-to-prepare no-cook tomato sauce, I promised to come back with directions for the fresh-baked Italian bread I served on the side. Today I keep that promise.

What’s that you say? Baking bread is difficult? Not at all! Although we’ll be making ours by hand, remember that some people make bread by putting the ingredients in a bread machine, walking away, and coming back later when the bread is finished, with the machine having done all the work; how much thinking could be involved? This is especially true of Italian bread, which is usually kept simple because one of its main purposes is mopping that delicious sauce from the entrée plate, and you wouldn’t want embellish it with herbs or other savory flavors that might conflict with your sauce. (That said, it’s also mighty good gently dipped in a small dish of either plain or herbed extra virgin olive oil. I like a dash of vinegar too, but that’s just me.)

If you’re concerned that bread takes hours to make, I have more good news. While it’s true that several hours will pass between the time you start to the time you have fresh, warm bread to serve, for almost all of it the dough is doing the work while you’re off living your life. In the culinary world, this is known as “inactive time.”

Among the few simple ingredients this recipe uses is bread flour. That’s not the same thing as all-purpose flour, but it’s easy to find right next to it in the baking aisle at any supermarket. For a quick description of what the difference is, here’s a link to a recipe for Savory Crust Pizza posted here previously.

This introduction to bread-making would be incomplete without this bit of wisdom I read in a wonderful book call, “How I Learned to Cook” by Kimberly Witherspoon and Peter Meehan. It's a compilation of early experiences related by a collection of well-known chefs. One of the chapters was from Nancy Silverton, co-founder (and bread expert) of a number of high-level restaurants in California. What she said, which I simply loved, included this:

"I realized I couldn't think about bread the way I thought about pastry or pasta or any other typical culinary undertaking. Bread is alive. Minor inconsistencies are a fact of life, not a mark of failure. The tiny variation in the loaves from day to day made them unique, not imperfect. And the relationship of a baker to her bread is like any other kind of serious relationship you have with anybody in life. It's never perfect. It takes so much work. And every time you think that you've mastered it, the next day you're brought back to reality and it needs some more work."

Let’s bake some fresh bread! This recipe makes four 4 loaves.

Dissolve 1 package (1/4 oz.) dry yeast and ½ teaspoon of sugar in 2 cups of 110 degree F water and let it rest for about five minutes. (The mixture should foam while resting.)

Sift 1-1/2 pounds of bread flour, setting another ¼ pound aside for adding later if needed for texture. (It’s easier to add flour to a dough that’s too moist than it is to add liquid to a dough that’s too dry.)

Add 1 tablespoon of salt and mix well, since direct contact with the salt will kill the yeast in the next step.)


Add water-yeast mixture and mix to form dough.

Knead for 8-10 minutes until the dough becomes smooth and elastic, and just a bit sticky. (You can do this by hand, but it’s easier with a stand mixer fitted with the dough hook attachment.)

Place dough in a well oiled bowl and let stand until about double in size. (Usually 1-2 hours.) The stove top or the top of the refrigerator are good places for this.


After the dough has doubled in size, pressing down with hands to deflate it, then turn it out onto your counter and divide it into four portions.


Press each portion into an oval.


Fold the long sides toward the center. Press out again and repeat.


Using palms, roll each into a cylinder 12 inches long. (Start with palms in the middle and work toward the ends to make the cylinders longer. Don’t pull the dough, which will toughen the gluten in the flour.)

Place each cylinder on a baking sheet dusted with cornmeal. Cover loosely with oiled wrap and “bench-proof” until doubled, about 45 minutes – 1 hour. While the loaves are proofing, pre-heat the oven to 500 degrees.

When the loaves have finished proofing, make three lengthwise cuts on top of each loaf. Place each loaf in oven and bake until browned, about 10 minutes.

Lower the temperature of the oven to 400, and continue baking for another 20-25 minutes until well-colored. Let the loaves cool a bit on racks.

Happy bread-making!

See you next week with another delicious, kitchen-tested recipe made from easy-to-find ingredients. Till then, stay well, keep it about the food, and always remember to kiss the cook. ;-)

Saturday, December 3, 2011

Turkey Meatballs and Spaghetti


In last week’s article, I called fresh-baked pie a “white shirt” dish because, like a white shirt, it’s a good choice for almost any situation. Today I’m happy to share another can’t-go-wrong meal choice: Meatballs and Spaghetti made, in this case, with lower-fat turkey meatballs (and other reduced fat ingredients) and an easy-to-prepare no-cook tomato sauce.
 

Meatballs, in particular, are worth a close look. Getting the taste right isn’t all that difficult: adjust the seasonings to your taste, and remember to brown the meatballs before cooking them through in the sauce. I’ve always thought the catch to meatballs is their texture. Well-seasoned and properly cooked meat too easily becomes overly tough if not made properly. This recipe avoids that.

As shown in the photo, I served this with a simple Caesar salad and an easy, fresh-baked Italian bread. (I’ll be posting the bread recipe next week as a follow-up!)

This recipe makes four servings as determined by the amount of pasta. You’ll actually end up with enough leftover meatballs for another meal. (Spoiler alert: The last time we had leftover meatballs my wife used them to make a wonderful deconstructed stuffed pepper dinner; I’m hoping to convince her to let me post it here the next time she makes it.)

Prepare 4 cups of tomato sauce using the Easy, No-Cook Tomato Sauce recipe posted here previously. (Click here for the recipe.)


Preheat oven to 400 degrees.

Cut five slices of stale bread (crusts removed) into small cubes to make about 1-1/4 cups. Put these in a bowl and let them rehydrate in ¾ cup of fat-free half-and-half.

Brush 2 ounces (2 – 4 slices, depending on the brand) of turkey bacon strips with abou a tablespoon of maple syrup and bake in the 400 degree oven till cooked, about 15 minutes. When the bacon is done, set it aside to cool. (Hint: If you don’t have the stale bread called for in the steps below, you can crisp up five slices of bread in the oven at the same time to simulate it becoming stale. Just watch it carefully so it doesn’t burn, and turn it over to do both sides.)

While the oven is preheating and the bacon is cooking, add a little olive oil to a sauté pan and, when warmed, cook 2 cloves of chopped garlic till aromatic, about 1 minute. Add ½ cup of chopped onions and sauté till cooked but not browned. When the onions have almost finished cooking, add 2 tablespoons of chopped fresh parsley (or 2 teaspoons of dried parsley. When done, set the onion mixture aside to cool.

After the bacon and the onion mixture have cooled, combine them in a bowl with the other meatball ingredients: 1-1/2 pounds ground turkey; the turkey bacon (chopped into small pieces); ½ tablespoon fresh thyme (or ½ teaspoon dried thyme); 1/3 cup grated parmesan (fresh grated instead of canned if possible); 1/2 tablespoon kosher salt; ½ tsp fresh-ground pepper; a pinch of red pepper flakes; a pinch of nutmeg; 2 egg-substitute eggs; and the rehydrated bread cubes. Mix gently by hand, being careful not to press hard or overwork the mixture; we want to keep the texture of the meatballs light. This handling, although easy, is a critical step to getting the meatball texture right. (You can mix the ingredients with a spatula if you prefer, but if you don't mix it by hand you're missing one of life's great experiences.)
You can test the seasonings by taking a small bit of the meat mixture and cooking it in the pan you used to cook the onions and tasting it. 


Gently form meatballs, each about 2” diameter.


Warm a little olive oil in the pan you used to sauté the onions. Working in batches, sauté the meatballs till browned. While the meatballs are browning, begin heating the pasta water (salted).

When the meatballs have all browned, drain any excess oil from the pan, and add the sauce. Let the meatballs simmer in the sauce till cooked through, about 25 minutes.

When the meatballs have almost finished cooking, drop 1 pound of long pasta into the boiling water (I used fettucine, but any long pasta you like will work) and cook one minute less than indicated on the package.

When the meatballs have finished cooking, set them aside in a bowl and top with some of the sauce. Drain the pasta, reserving ½ cup of the starchy pasta water, and add the pasta and the water to the sauce remaining in the pan. Finish cooking the pasta through in the sauce.

Serve the pasta and the meatballs in separate serving bowls. (Meatballs are a very personal thing, you know!)

Hope to see you here next week for Part II: easy, fresh baked Italian bread to serve with this or any other Italian meal you make! Till then, stay well, keep it about the food, and always remember to kiss the cook. ;-)