To download a copy of the recipe for Challah Bread Three
Ways, click HERE.
 You no doubt know by now that challah bread has reached far beyond its original Hebrew
cultural beginnings and is widely-enjoyed in the mainstream. World over, people
who don’t know the difference between nachas and nachos recognize this sweet
egg bread as something that is both delicious in its own right, and that one of
the best breads anywhere for making French Toast.
You no doubt know by now that challah bread has reached far beyond its original Hebrew
cultural beginnings and is widely-enjoyed in the mainstream. World over, people
who don’t know the difference between nachas and nachos recognize this sweet
egg bread as something that is both delicious in its own right, and that one of
the best breads anywhere for making French Toast.
As the title suggests, this week’s recipe uses the challah
dough in three ways:
- traditional braided loaf;
- in a loaf pan for use in making French Toast;
- with raisins and dried apricots, sweetened with extra
honey, and formed into a round shape, as
it is traditionally served for the Jewish New Year. (Imagine a bread pudding
made with that!)
You can use the recipe to make two larger loaves or three
smaller loaves. I chose to make the three smaller loaves to show each of the
three ways listed above. (For that reason, in this batch shown in the photographs
below, I added only 1/3 of the raisins, apricots and extra honey to 1/3 of the
dough batch since, for demonstration purposes, I was only making one of the
challahs round.)
Some Cook’s Notes before we begin:
- If you’ve never baked bread before, you might be
tempted to let yourself be put off by what you’ve heard about how long it
takes. I hope to convince you otherwise. While it’s true that there are several
hours between the time you break out the flour and the time you take the
fresh-baked loaves out of the oven, almost all of that is inactive time: the
dough is doing the work while you’re going about your day.
- Although
honey is recommended, sugar may be used instead.
- If you’ve never braided, it’s not hard to do. You
can find many explanations on line. One excellent source of braiding methods can be
found at www.virtue.to/articles/braiding.html.
(It’s a hair-braiding article, but the method is applicable to challah also.)
As noted, this recipe makes 2 larger loaves or 3 smaller loaves.
We’ll start by preparing the yeast mixture:
 In a bowl or measuring cup, combine 2 packets of yeast, 1/3
cup warm (110 degree) water, and 1 Tbsp honey. Set aside for a few minutes while
continuing with the next steps.
In a bowl or measuring cup, combine 2 packets of yeast, 1/3
cup warm (110 degree) water, and 1 Tbsp honey. Set aside for a few minutes while
continuing with the next steps.
To make the dough:
 In a large bowl (such as the bowl of a stand mixer),
combine ½ cup of olive oil, ½ cup of honey (use ¾ cup if you’re making the
round New Year challah), and 1 Tbsp salt. Add 1-1/2 cups of warm (110 degree) water to the bowl and
stir until all is dissolved.
In a large bowl (such as the bowl of a stand mixer),
combine ½ cup of olive oil, ½ cup of honey (use ¾ cup if you’re making the
round New Year challah), and 1 Tbsp salt. Add 1-1/2 cups of warm (110 degree) water to the bowl and
stir until all is dissolved.
 By now the yeast mixture should be foamy.
Add the yeast mixture to the large bowl, along with 3 cups
of all-purpose flour and three egg-substitute eggs. (If you’re making the round
New Year challah, add ¼ cup of raisins and ¼ cup of chopped, dried apricots
also.)
 Mix to combine.
Add 4 additional cups of flour, 1 cup at a time, mixing
thoroughly after each addition. (Be mindful of mixer speed so that flour does
not fly out of the bowl!)
 Turn the dough out onto a floured surface and knead for 5
minutes. (If using a stand mixer, you can knead the dough using the dough
hook.)
Turn the dough out onto a floured surface and knead for 5
minutes. (If using a stand mixer, you can knead the dough using the dough
hook.)
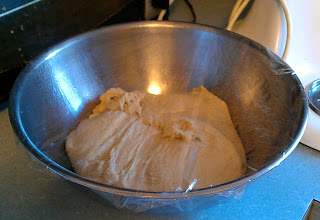 Place the dough into an oiled bowl, cover with oiled
plastic wrap, and set aside to rise for two hours.
Place the dough into an oiled bowl, cover with oiled
plastic wrap, and set aside to rise for two hours.
 After the dough has risen, punch it down. Turn in onto a floured
surface and knead for another minute.
After the dough has risen, punch it down. Turn in onto a floured
surface and knead for another minute.
Divide the dough into two or three equal portions,
depending on whether you’re making two larger loaves or three smaller loaves.
Here’s where we form the different loaf types. If you’re
making a traditional braided challah:
 Cut off 1/3 of the dough portion.
Cut the 2/3 portion into three equal parts and roll each
into a snake.
Braid the three larger snakes.
Cut the 1/3 portion into three equal parts and roll each into
a snake the same length as the larger snakes. Braid the three smaller snakes.
Place the smaller braid on top of the larger braid, and
place on a baking sheet covered with parchment or a silicon sheet.
Making the challah as a loaf for making French
Toast is similar to the above, except you're using the entire portion to make and braid only one set of snakes:
 Cut the dough portion into three equal parts and roll each
into a snake.Braid the snakes, and place the dough into a two pound loaf pan that has
been lightly sprayed with cooking spray.
Cut the dough portion into three equal parts and roll each
into a snake.Braid the snakes, and place the dough into a two pound loaf pan that has
been lightly sprayed with cooking spray.
If you’re making the round, sweetened challah:
Roll the dough portion into a single large, thick snake.
 Arrange the snake in a spiral in a round baking pan that
has been lightly sprayed with cooking spray.
Arrange the snake in a spiral in a round baking pan that
has been lightly sprayed with cooking spray.
Repeat the above for the remaining dough portions.
Next, we'll “bench proof” the loaves:
Regardless of which shape(s) you have chosen to make, cover
the formed loaves with plastic wrap and set aside to proof for one hour.
To bake the loaves:
Preheat the oven to to 375 degrees.
 Brush the top of each dough gently with a sweet egg wash
made by combining one egg-substitute egg, 1 Tbsp water, and ½ Tbsp honey. (If
using poppy seeds or sesame seeds, sprinkle them on now.) Bake till well browned, about 35 minutes. Be careful not to
let the loaves burn.
Brush the top of each dough gently with a sweet egg wash
made by combining one egg-substitute egg, 1 Tbsp water, and ½ Tbsp honey. (If
using poppy seeds or sesame seeds, sprinkle them on now.) Bake till well browned, about 35 minutes. Be careful not to
let the loaves burn.
Let the loaves cool on racks.
To download a copy of the recipe for Challah Bread Three
Ways, click HERE.
So now you can enjoy fresh-baked challah bread, any time you
like!
Hope to see you next week for another delicious home-cooked
recipe! Till then, stay well, keep it about the food, and always remember to
kiss the cook. ;-)
 Real
food is all well and good, but every so often a person has to have cookies.
With that in mind, this week’s recipe for Peach Pie Cookies makes a soft, peach
flavored cookie, seasoned similar to peach pie, bakes them into a miniature pie
shape, and tops it with peach-flavored icing made to look like a lattice top.
(These cookies are not only delicious; they’re fun to make and to eat!)
Real
food is all well and good, but every so often a person has to have cookies.
With that in mind, this week’s recipe for Peach Pie Cookies makes a soft, peach
flavored cookie, seasoned similar to peach pie, bakes them into a miniature pie
shape, and tops it with peach-flavored icing made to look like a lattice top.
(These cookies are not only delicious; they’re fun to make and to eat!)In a saucepan, combine the juice of one lemon, 2 Tbsp water, and a 28 ounce can of sliced peaches (well drained but not rinsed) over medium heat. Bring to a boil, then lower heat to a simmer.
Simmer until the peaches have broken down to a sauce consistency, about 35 minutes, stirring occasionally. (Mash the peach flesh with a spoon or masher if necessary.) This should make about 1 cup of peach puree.
Place the puree in a separate container and let cool a little in the freezer while you preheat the oven to 375 degrees.


In a medium size bowl, mix ¼ cup of granulated sugar, ¼ cup of light brown sugar, and 6 Tbsp of softened butter substitute together until combined and creamy.

Stir in ½ tsp of vanilla and ¾ cup of the peach puree, reserving the remaining puree.

Sift 1 cup of all-purpose flour, ½ tsp baking powder, ¼ tsp baking soda, a pinch of salt, ½ tsp cinnamon and a pinch of nutmeg into the mixture, and stir to combine.

Drop a heaping teaspoon of the mixture into each cup of a medium-size (12 cup/pan) muffin pan that has been lightly sprayed with cooking spray. (You can also drop them onto a baking sheet lined with parchment or a silicon baking sheet, but it’s the muffin tin that gives the cookie its pie-like shape.)
Bake the cookies until golden and the edges are browned, about 10 minutes.


Transfer to a wire rack and allow the cookies to cool completely before applying the glaze as described below.

While the cookies are cooling, make the glaze by combining 1 Tbsp of the reserved peach puree and 1 cup of confectioner’s sugar until thick (but spreadable) and smooth. It’s ok to use a little more of the puree if necessary, but make sure the glaze remains thick; if the glaze is too thin, it will tend to soak into the cookies.
After the cookies have cooled completely, apply the glaze and wait 30 minutes for the glaze to get firm. (As an added touch, you can apply the glaze in a lattice-top pattern!)


