To
download a copy of the recipe for Baked Chicken Croquettes with
Buttermilk White Sauce, click HERE.
 A
healthier version of a diner classic, this chicken croquette – a delicious blend
of chicken, onion, celery, garlic and seasonings – is baked instead of fried,
and crowned with an easy-to-make buttermilk sauce. (If you’ve never had a
chicken croquette, think of a crab cake but made with chicken instead of crab,
and you’ll have the basic idea.)
Chicken
croquettes are meant to be simple to make. Although cooking the chicken is
included in this recipe, if you have left-over chicken or even a store-bought
rotisserie chicken, that can be used instead. Once you get the general method
for making croquettes, there no reason even to limit yourself to chicken.
Some
Cook’s Notes before we begin:
- Croquettes
can be formed into many shapes: balls, elongated sausage-shape, even cones
(formed by using a funnel as a mold). In this recipe I’ve made my croquettes
into flat, thick ovals. There’s a reason for this. Growing up in the 60’s and
70’s, I ate many a dinner of the frozen chicken croquettes Weaver made at that
time. Since those were made in a flat, thick oval shape, that’s how I’ve been
conditioned to visualize a chicken croquette. By all means, make yours whatever
shape pleases you.
- Although
chicken croquettes are normally fried, the ones we’re making are “oven-fried,”
or breaded and baked in a way that’s meant to remind the eater of fried. The
breading mixture I like best for this uses crushed corn flakes for the
breading. Panko works almost as well. I recommend avoiding regular bread
crumbs, which are fine for normally breaded items but don’t give oven-fried
food the texture you’re looking for.
- Many chicken croquette recipes call for putting the chicken through a food processor. I prefer the mouth-feel of biting into a piece of chicken, so in this recipe we'll cut it into small chunks.
- As
part of the buttermilk white sauce, we’ll be making a roux. You might
notice, however, that the 1-to-1 flour-to-fat ratio normally used for a roux is
changed here to a ½ -to-1 ratio. This is because the buttermilk we’ll be using
has its own thickness and texture to begin with, so we need to adjust the
thickening properties of the roux we use.
A
special note, too, about the number of servings we’ll be making. This recipe
makes about 14 good-sized croquettes. How many portions is that? Let’s put it
this way: when I served this at home, my wife’s portion was one croquette, and
mine was two. With that in mind, you make the call for your family or guests.
If it turns out 14 is too many, just reduce all the ingredients in proportion
to each other. Note, however, that the cooked croquettes freeze very well, so
making some extras may turn out to be a good idea after all.
Here’s
what you’ll need:
For the chicken seasoning mix:
2 tsp dried parsley; 1 tsp dried oregano; 1 tsp dried
tarragon; 1 tsp dried thyme; 1 tsp dried rosemary; 1 tsp celery
salt; 1 tsp ground ginger; ¼ tsp white pepper; ½ tsp dried
sage.
For the baked chicken: 6 Tbsp butter substitute; 2
lbs. boneless chicken breast (or two lbs. of pre-cooked chicken)
For the croquette mixture:
1-1/2 cups
fat free, low sodium chicken broth; 1-1/2 cups skim milk; 8 Tbsp butter
substitute, divided; 2 medium stalks of
celery, fine diced; 1 medium onion, fine diced;
4 garlic cloves, minced; 1 cup AP flour; 1 egg substitute egg
For the breading station:
1-1/2 cups
reduced-fat buttermilk; 3 cups crushed corn flakes; 1-1/2 Tbsp garlic powder; 1-1/2
teaspoon kosher salt; ½ teaspoon fresh ground black pepper; 3/4 tsp paprika; cooking
spray
For the buttermilk white sauce:
2-1/2 Tbsp
butter substitute; 4-1/2 Tbsp all-purpose flour; 1-1/2 cup reduced-fat
buttermilk; 1-1/2 tsp dried parsley; ½ tsp dried dill; ¾ tsp kosher salt; ¼ tsp garlic powder; ¼ tsp
fresh ground black pepper
To
make the seasoning you’ll use for the chicken and the croquette mixture:
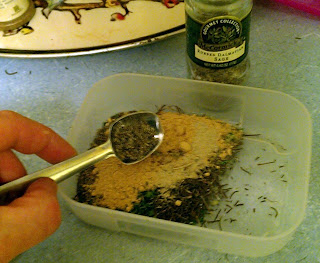
Combine
the Chicken Seasoning Mix ingredients and set aside till needed.
Next,
prepare the chicken. (If you’re using left-overs or other pre-cooked chicken,
you can skip this step.)
 Begin preheating the oven to 350 degrees.
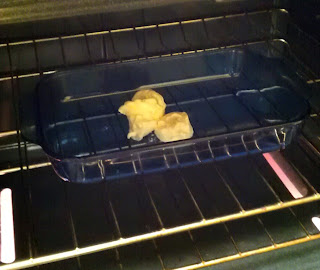
Put
butter substitute in a baking dish and place it in the oven to melt while the oven is pre-heating.
 After
the butter substitute has melted, remove the baking dish from the oven and stir
1 Tbsp of the seasoning mix into the liquid.
 Rinse
the chicken breasts and dry with paper towels. Place the breasts in the baking
dish, coating each side with some of the butter mixture.
 Bake
for 30 – 40 minutes, turning the chicken breasts over half-way.
 When
the chicken has finished baking, remove from the oven and let rest in the
baking dish for about 10 minutes. After
the chicken has rested, cut into small pieces and set aside till needed.
Prepare
the croquette mixture as follows:
Combine
the broth, milk and 1 Tbsp of the seasoning mix in a small saucepan over medium
heat; turn off the heat when the mixture just begins to boil.
While
the broth mixture is heating, melt 6 Tbsp of the butter substitute in a
skillet. Add the celery and onions and cook over medium heat until just tender,
then add the garlic and cook until the garlic is fragrant, about 1 minute.
Reduce
the heat under the skillet to low. Gradually stir in the flour, mixing very
well, and cook until a lightly browned roux forms (about three minutes). Add
additional butter substitute (up to 2 Tbsp) if the mixture appears too dry.
 Add
the broth mixture and stir until thickened and smooth.
Taste to make sure the
floury taste has been cooked out; if necessary, cook for another minute or two.
 Transfer the mixture to a large bowl. Gently
stir in the cooked chicken, and allow to cool fully. Once
the mixture has cooled, stir in the egg substitute egg till combined. (Don’t
try to short-cut letting the mixture cool; if it’s warm, it won’t hold its
shape when you form the croquettes in the next step.)
To
form and bread the croquettes:
 Set
up the breading station by setting the buttermilk in a bowl, and combining the
crushed corn flakes, garlic powder, salt, pepper and paprika in a shallow dish.
In the steps to follow, spoon out, shape, and bread one croquette at a time.
 Spoon
out enough of the croquette mixture to form a flat oval about 2-1/2” long x 2”
wide x 1-1/4” thick. (Before forming the croquette, it’s helpful to compress it
in your hands, similar to packing a snowball.)
Dip
each croquette into the buttermilk, letting the excess drain, then into the
breading mixture. Coat all sides. As
each croquette is breaded, place it on a baking sheet lined with parchment or a
silicon baking pad. Once
all the croquettes are breaded, refrigerate for 1 – 2 hours.
When you're ready to bake the croquettes:
Preheat
the oven to 450 degrees.
Apply
cooking spray to the top and sides of each croquette. After
baking for ten minutes, turn each croquette over, spray the other side, and
bake until golden (about another 8 – 10 minutes).
While
the croquettes are baking, make the buttermilk white sauce as follows:
 In
a pan, melt the butter substitute.
Add
the flour and stir to combine. Cook
over a low heat for about 1 minute till a slightly browned roux forms.
 Gradually
add the buttermilk, stirring constantly, until a thickened sauce forms.
 Add
the dried parsley, dill, salt, garlic powder and black pepper, and stir till
combined. Remove from the heat.
To
serve:
Put
one or two croquettes on each plate and top with some of the sauce, being
careful not to over-sauce the croquettes. Serve with preferred side dishes.
To
download a copy of the recipe for Baked Chicken Croquettes with
Buttermilk White Sauce, click HERE.
And there you have it: classic diner food in the comfort
of your own home.
Please come back next week for another great-tasting
recipe! Till then, stay well, keep it about the food, and always remember to
kiss the cook. ;-)
 Although
I “retired” from posting weekly recipes back in August, it remained my hope to
continue to post recipes on an occasional basis. It took seven months, but this
weekend I once again got to cook with a camera in one hand and a pen in the
other.


