Saturday, June 16, 2012

Fisherman's Pie (A Seafood-Based Version of Shepherd's Pie)

To download a copy of this recipe for Fisherman’s Pie, click HERE!

Several months ago, I posted a recipe for Shrimp Stuffing that was intended for use as a side dish in seafood entrees. Why, I thought at the time, should enjoying stuffing be limited to turkey, chicken and pork?

Sometime later, I was enjoying a Shepherd’s Pie (which some authoritative sources spell “Shepard’s Pie" for reasons I have been unable to determine), and a similar thought came to mind: why should shepherds have all the fun? Why can’t something similar to Shepherd’s Pie, but based in seafood instead of lamb, be made?

The answer was simple: it could be made. By using fish instead of lamb, fish spices instead of lamb spices, fish stock instead of beef stock, and the aforementioned shrimp stuffing for the topping instead of mashed potatoes, classic Shepherd’s Pie can be transformed into a delicious seafood dinner we’ll call Fisherman’s Pie.

Some Cook’s Notes before we begin:
  • Regarding the issue that always seems to come up when people and stuffing get together, this recipe makes a “medium-moist” stuffing. Vary the fish stock to increase or decrease the moisture accordingly.
  • If you ever want to use the stuffing on its own as a side dish instead of making it part of the Fisherman’s Pie, after uncovering the baking dish in the recipe let the stuffing bake further until browned, about 30 minutes more.
  • Instead of baking the entire Fisherman’s Pie in a baking dish as in the recipe, it can also be put into ramekins and baked as individual servings.

This recipe makes 4 servings.

First, let’s make the stuffing for the topping:


Preheat oven to 375 degrees.

Combine the following to make the spice mix: 1 tsp dried oregano; 1 tsp celery seed; 1 tsp dried thyme; ¼ tsp dried sage; 1 tsp dried marjoram; and 1 tsp fresh lemon zest. Divide the mixture into halves and set each aside.

Melt a little butter substitute in a skillet over medium heat. Add ½ cup diced onions, ½ diced celery, and half of the spice mix. Add salt and pepper to taste, and cook for 5 minutes.

Add ¾ cup fish stock; 2 Tbsp dry white wine (chardonnay or similar) and the juice of ½ a freshly-squeezed lemon. Stir to combine and bring to a simmer.

In a large bowl, combine 1 egg-substitute egg and ½ Tbsp dried parsley. Add the 4 cups of stale (or lightly toasted) potato bread cubes; and 8 ounces of thawed, cooked salad shrimp that has been diced. Toss to combine.

Transfer the mixture to a buttered 11”x 7” baking dish and dot with butter substitute. Cover with foil and bake for 30 minutes. Uncover and set aside. When finished, transfer the stuffing to a separate bowl and set aside. Rinse the baking pan for use later.


While the stuffing is baking, make the filling as follows:


Pat one pound of white fish fillets dry with a paper towel, drizzle with a little olive oil, and season with salt and pepper.


Dredge the fillets in corn flour (not corn meal) and cook on a hot grille pan till done.


When the fillets are cooked, about 4 – 5 minutes per side, cut into bit size pieces and set aside.


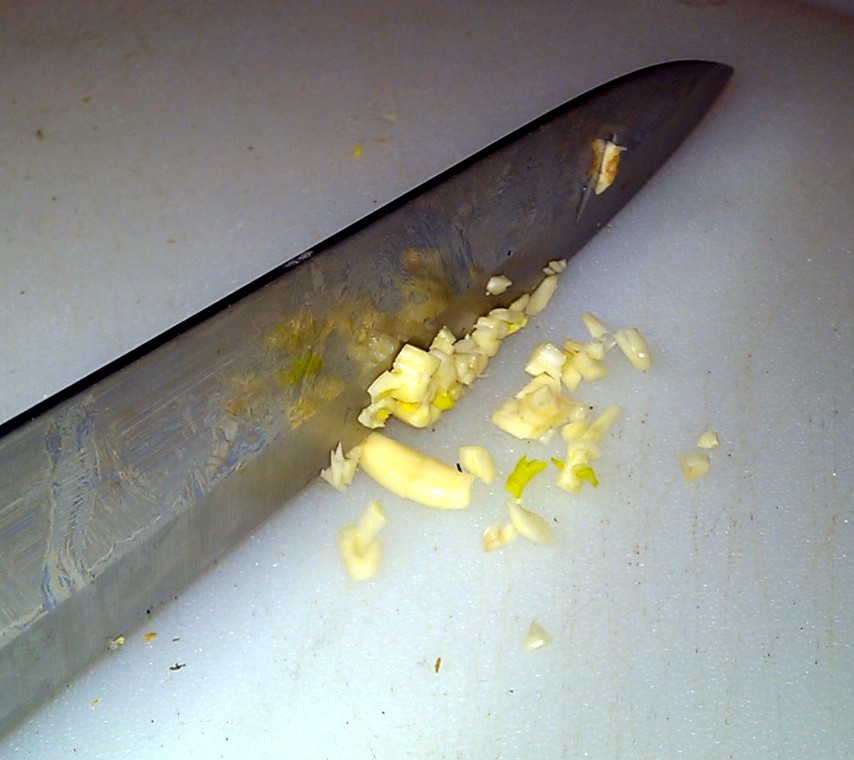
Heat some olive oil in a skillet over medium high heat. Add 1 diced medium onion and 2 peeled, diced carrots and cook until they just start to get some color. Add 2 minced garlic cloves and cook for another minute or two.

Add 2 Tbsp of tomato paste, 1 cup of fish stock, ½ cup of dry wine (chardonnay or similar), a bay leaf, and the other half of the spice mix to the skillet, and mix till combined.

Bring the liquid in the skillet to a boil, then reduce to a simmer. Simmer till the liquid is reduced by half, about 15 minutes.Remove the skillet from the heat, and remove the bay leaf. Add the corn, peas and fish. Stir gently to combine.


To put the Fisherman’s Pie together:


Preheat the oven to 400 degrees.

Transfer the filling mixture to the 11” x 7” baking dish and spread until level.


Top the filling with the stuffing, being sure to get a good seal around the edges.Bake until the top of the stuffing is browned, about 25 minutes.When done, let the baking dish cool on a rack for five minutes before serving.


To download a copy of this recipe for Fisherman’s Pie, click HERE!

Serve with the rest of that white wine we used in the cooking, and you’re all set for a great dinner! (You didn’t think we were going to let the remaining wine go to waste did you?)

Please visit again next week for another tasty, kitchen-tested recipe. Till then, stay well, keep it about the food, and always remember to kiss the cook. ;-)

Saturday, June 9, 2012

“Braised-n-Glazed” Mirepoix Side Dish with Lemon Mushrooms


To download a copy of this recipe for “Braised-n-Glazed” Mirepoix Side Dish with Lemon Mushrooms, click HERE!

Mirepoix (meer-PWAH), the classic French combination of carrots, onions, and celery, is generally used to add great flavor and aroma to soups, sauces, stews, stocks, and other foods. (As a side note, when the French settled in Louisiana, the mirepoix concept they brought with them eventually evolved into the region’s famous “Trinity” – equal parts celery, onions, and peppers – that serves a similar purpose in that local cuisine.)

Such great flavor and aroma, in fact, that it seems a shame to keep it in the background. I believe it’s time to give this time-honored workhorse vegetable combination a more prominent place on your plate as featured - and great tasting - vegetable side dish.

To make mirepoix a side dish we’ll need to modify it a bit. Classic mirepoix is prepared with 1 part-by-weight carrots, 1 part-by-weight celery, and two parts-by-weight onion. In this recipe, those proportions have been adjusted to emphasize the carrots. A bit of garlic was added. The celery and carrots were browned, braised in seasoned vegetable stock, and the braising liquid was then sweetened and cooked down to a glaze. Finally, to add contrast with the sweetness of the glaze, sliced mushrooms sautéed in olive oil and lemon were added. (Note, too, that for the browning and sautéing, I used olive oil in place of the more traditional, but considerably less heart-healthy, butter.)

This recipe makes four side-dish size servings.

First, let’s make the seasoning mix.

Combine the following seasoning mix ingredients and set aside: ½ tsp dried marjoram; ½ tsp dried thyme; ½ tsp dried basil; ½ tsp dried rosemary; ¼ tsp dried sage; and ¼ tsp dried tarragon.

Next, we’ll prepare our vegetables.


Julienne ½ a Vidalia onion.


Mince 6 garlic cloves.


Slice 8 ounces of mushrooms. (Better yet, open an 8 ounce package of sliced fresh mushrooms.)


Peel 1 pound of carrots, and cut on-the-bias into equal size coins.


Slice 4 large celery stalks to equal thickness.


Next, start browning the carrots and cooking the onions:

Heat a small amount of olive oil over medium-high heat in a skillet. Add the carrots in a single layer and cook undisturbed until lightly browned. Turn the carrots over and cook for a few minutes. When done, the carrots should be cooked only about half-way, not cooked through completely. Season to taste.
While the carrots are browning in the skillet, heat a small amount of olive oil over medium heat in a sauté pan and add the onions. Cook until the onions are soft and browned, adding the garlic for the last few minutes of the cooking. Season to taste. When done, set the onions aside onto paper towels.

Next, we cook the celery and add the carrots:

When the carrots are done cooking, set aside in a bowl, reduce the heat to medium, and put the celery and a small amount of olive oil in the pan. 

When the celery is half-way cooked (similar to the carrots), season to taste, reduce the heat to low, and return the carrots to the skillet and mix with the celery. Add about ½ cup of white wine, the seasoning mix, and enough vegetable stock to cover the carrots and celery about half way. (The amount of stock you’ll need depends on your skillet, but will probably be between 1 and 2 cups.) Cover the skillet and allow to simmer until tender but not mushy.

Now for the mushrooms:

While the carrots and celery are braising, add a small amount of oil and the mushrooms to the sauté pan. Sauté until cooked through, adding the fresh-squeezed juice of ½ lemon. After the mushrooms are at least partially cooked, season to taste. (Adding salt too soon can draw needed moisture from the fresh mushrooms.)

To finish the side dish:

When the carrot and celery mixture is cooked, remove the cover, add ½ tablespoon of sugar, mix to combine, and increase the heat to high.


Stirring frequently to avoid burning, leave the skillet uncovered and let the liquid cook down to a glaze.


Combine the carrots and celery with the mushrooms and the onions. Transfer to a serving dish, and garnish with parsley as in the photo at the top. Serve hot as a side dish.


To download a copy of this recipe for “Braised-n-Glazed” Mirepoix Side Dish with Lemon Mushrooms, click HERE!

Serve this with your next entrée, and you’ve got a vegetable side that’s both delicious and healthy!

Please visit again next week for another tasty, kitchen tested recipe! Till then, stay well, keep it about the food, and always remember to kiss the cook. ;-)


Friday, June 1, 2012

Refreshing Cold Fruit Soup with Toasted Reduced-Fat Pound Cake


For a cookbook style copy of the recipe for Refreshing Cold Fruit Soup with Toasted Pound Cake, click HERE!


Last week, we started a refreshing summer food theme with Shrimp Rolls with Drawn Butter on Herbed One-Hour Bread. I’m pleased to continue that theme this week by offering an easy, delicious recipe for Refreshing Cold Fruit Soup with Toasted Reduced-Fat Pound Cake.

The idea is simple: prepare a full-bodied, tasty cold fruit soup and, on the top, float some freshly made reduced-fat pound cake that has been gently toasted, coated with a thin layer of apricot preserves, and garnished with fat-free yogurt, a sprinkling of chopped walnuts, and a bit of small fresh fruit. Delicious individually, but when combined on the same spoon it’s an explosion of refreshing flavors and textures that’s sure to please.

Some Cook’s Notes before we begin.
  • When making the pound cake, the importance of making sure your ingredients are at room temperature cannot be over-emphasized. It’s the difference between the cake having the proper texture, and having a texture that’s just a bit heavy. (If, for any reason, the pound cake does come out a little heavy, however, don’t fear; once you place it on top of the Fruit Soup, it will absorb some liquid and soften, and will taste great anyway!)
  • For baking the pound cake, I used a large (15” x 10”) baking dish. If your pan is too small, the pound cake will come out too thick. We’ll slice it to half-thickness for putting on top of the soup.

This recipe makes about three quarts of fruit soup with enough pound cake to accompany that.

First, let’s make our pound cake.

Preheat the oven to 350 degrees.

Using an electric mixer, mix 2 cups of sugar and ¾ cup of room temperature butter substitute until creamy.


Slowly add the following ingredients and continue mixing till combined: 1-1/2 cup AP flour; ½ cup pastry flour; 2 tsp baking powder; 1-1/2 tsp each vanilla extract; juice and zest of 1/2 lemon; 1 cup fat-free room-temperature yogurt; and 5 egg substitute eggs at room temperature.

Pour the batter into a large baking pan. Bake for about 1 hour, turning the pan half-way for more even baking. (You can make the fruit soup while the pound cake is baking.)
When done, set the pound cake aside to cool.


To make the fruit soup:

Bring 8 cups of water to a boil in a large pot.

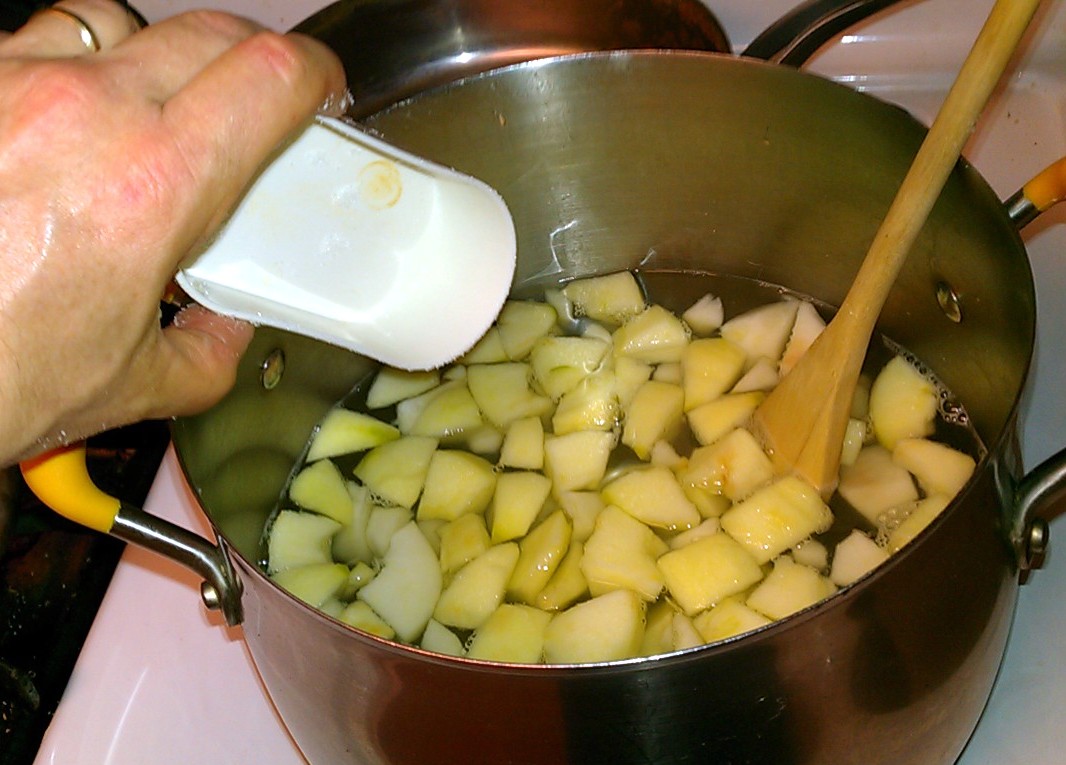
Add 1 cup of sugar, 2 Granny Smith apples, peeled, seeded and rough chopped; 1 lb. pears, peeled, seeded and rough chopped; and the juice of ½ lemon. Simmer for 15 minutes.

Add 2 lbs. peaches, peeled, pitted and rough chopped; and ½ small cantaloupe, removed from rind and rough chopped. Simmer for 10 minutes.


Add 1 large sliced banana, 1/4 tsp cinnamon and 1//4 tsp nutmeg, and simmer for 5 minutes.


Using an immersion blender, puree the fruit mixture for about five minutes to create a smooth liquid.


Mix 2 Tbsp of cornstarch with ¼ cup of cold water to form a slurry. Add the slurry to the fruit mixture and let simmer for another 5 minutes.


When finished set the soup aside to cool, then refrigerate till ready to serve. (Serve cold or room temperature.)


To serve the soup:

Pour each serving of soup into a bowl.

Using a large cookie cutter (round, heart-shaped, or any other desired shape), cut a piece of pound cake that will fit on top of the soup in the bowl. Slice the piece you cut into two pieces, each half the thickness of the full piece. Lightly toast the pound cake slices, apply a thin layer of apricot preserves to each.

Garnish the pound cakes with a dollop of fat-free yogurt, some chopped walnuts, and a few small fruit pieces.


For a cookbook style copy of the recipe for Refreshing Cold Fruit Soup with Toasted Pound Cake, click HERE!

Hope you enjoy this easy, refreshing summer treat!

Please visit again next week for another great-tasting, easy-to-make recipe! Till then, stay well, keep it about the food, and always remember to kiss the cook. ;-)


Friday, May 25, 2012

Shrimp Rolls with Drawn Butter on Herbed One-Hour Bread


To get a copy of this Shrimp Roll recipe, just click HERE.
 
With the start of summer due to arrive at any moment, it seems a good time to look at a recipe that’s perfect for the season: Shrimp Rolls on Herbed One-Hour Bread.

The classic Maine Lobster Roll, a tangy lobster mix served warm or room temperature on a toasted hot-dog style bun. If you’ve had one, you know a classic Maine Lobster Roll is a truly beautiful thing. Unfortunately, unless you live in some fortuitously located coastal area with a large lobster population, it’s also a truly expensive thing. Necessity (which, in this case, is the need to keep paying off my sons’ college loans)  being the mother of invention, this led me to put a version together based on shrimp; it’s still a bit of a luxury but not nearly as dear as the original lobster.

Some Cook’s Notes:
  • Although the current “tradition” in lobster rolls is to use mayonnaise, the origins of the dish use drawn butter. Use mayonnaise if you prefer, of course, but in the recipe below we’ll be using fresh-made drawn butter. (This is a rare case where a Kissing the Cook recipe uses real butter instead of butter substitute.)
  • Traditional Lobster Rolls are also often served on hot dog buns. Folks, I love hot dogs as much as anyone, but if we’re cooking lobster or shrimp and preparing drawn butter with which to serve it, are you really going to want to put that on a packaged hot dog bun? This recipe includes an easy, and very tasty, herbed one-hour roll that goes perfectly with your hand-crafted filling. (One hour dinner rolls, which, truth be told, sometimes can require more than an hour to make, require much less time than most breads for a very simple reason: there’s more yeast in proportion to the other ingredients.)
  • Speaking of the rolls, the recipe below shows them being made after the shrimp filling is made. You can make the rolls first if you like, but I’m recommending using the roll preparation time as a chance to let your shrimp filling ingredient flavors blend as the filling chills.

This recipe makes three servings.

 First, we’ll brine our shrimp. (You’ll recall we also did this back when we made Reduced Fat Fettuccini Alfredo. )
Place 1 to 1-1/4 pounds of uncooked shrimp, ½ cup of kosher salt and the juice of ½ lemon in a bowl of 2 quarts of water and let brine for 30 minutes. (The amount of water is important; if you use more or less, increase or decrease the salt and lemon proportionately.)

While the shrimp are brining, prepare the drawn butter as follows:
Place 1/2 pound of unsalted butter in a small saucepan over medium heat. (Note: In general, when you make drawn butter you’ll end up with about ¾ of the amount of the original butter you started with. In other words, if you start with 1 cup of butter, you should end up with about ¾ cup of drawn butter.) As seen in the photo, when I made this I used a pound of butter and made a double-batch, to have some left over for future use.

Let the butter melt, then bring to a simmer and let simmer for about a minute. The butter will begin to separate into a thin layer of frothy milk solids on top, clear liquid in the middle, and whey on the bottom.

The layers, illustrated.


Skim the frothy top layer of milk solids from the melted butter. Carefully pour off and retain the clear liquid underneath, separating it from the creamy whey at the bottom. Discard the milk solids and the whey.

To prepare the shrimp:
Drain and dry the brined shrimp, toss lightly with a little of the drawn butter and cook on a grille pan until done. (Using water-soaked bamboo skewers makes things much easier when it’s time to turn the shrimp over or to remove them from the grille pan without overcooking.)

Rinse with cold water to stop the cooking.


Dry the shrimp, remove the tails and shells, and cut into ½” pieces. Combine in a bowl with 6 Tbsp drawn butter; 1/4 cup finely chopped celery; ¼ cup finely chopped fresh chives; juice of ½ lemon; and a pinch cayenne pepper. Set aside in the refrigerator to chill while we make the rolls.

To make the rolls:
Begin preheating the oven to 200 degrees.

In a small bowl, dissolve 1 packet of yeast (1/4 ounce) and 1-1/2 Tbsp sugar in ¼ cup of very warm (110 degree) water and let stand for 5 minutes. The mixture should become frothy.

Mix 1-1/2 cups of the flour, baking soda and salt together in a large mixing bowl. Add the yeast mixture, ½ cup skim milk, ½ Tbps dried thyme and 1 Tbsp of drawn butter. Mix while adding an additional ½ cup of flour, 1/4 cup at a time, to form a dough.

When all of the flour is incorporated, knead the dough for 5 minutes, adding some of the remaining dough flour if necessary for a smooth texture.


Turn off the oven. Cover the bowl and place it in the warm oven till doubled in size, about 25 minutes.


After the dough has risen, press it down to deflate it. Turn the dough onto a floured surface, and divide it into three equal parts. Pat each part into the shape of a hot dog roll. Place the dough portions on a baking sheet lined with parchment and cover with oiled plastic wrap. Let proof at room temperature for another 20 minutes.

While the bread is proofing, preheat oven to 425 degrees. (The top of the stove while the oven is preheating is a good place to proof the loaf.)

Bake for 10 - 15 minutes at 425 degrees until the rolls are browned and cooked through, turning half-way.


Let the rolls cool on the baking sheet for 5 minutes, then place on a rack to cool.

To serve the shrimp rolls:
Split the rolls from the top and brush with drawn butter.


Toast on the grille pan over moderate heat until browned.


Fill the toasted buns with the shrimp filling and serve!

To get a copy of this Shrimp Roll recipe, just click HERE.


Hope you  like serving this delicious treat at your next cookout. Come to think of it, why wait till then? Serve it to your family this week; it tastes just as good indoors!

Visit again next week for another recipe to enjoy! Till then, stay well, keep it about the food, and always remember to kiss the cook. ;-)