Showing posts with label Italian. Show all posts

Saturday, July 21, 2012

Tomato-Basil Risotto with Roasted Red Pepper

To download a copy of the recipe for Tomato-Basil Risotto with Roasted Red Pepper, click HERE.


I recently had the good fortune of attending a gathering of friends who love to cook. Some are professionals, some devoted home cooks; all contributed their talents (and, being human, no doubt a bit of competitive spirit too) to a spread of good food more expansive than any banquet I could imagine. One of the many great dishes there was a delicious shrimp risotto that reminded me of two things: that I really love risotto, and that it has been far too long since I’ve made it. Today’s recipe corrects that.

Risotto, for anyone not familiar, is a rich and highly addictive rice dish with a unique, al dente yet creamy texture. That texture, without which risotto is just not risotto, comes from the fact that it is made from any of several special short-grain rices that readily absorb liquid and release starch, instead of the long-grain rice used in most other rice dishes. The other essential part is the constant stirring (and occasional agitation of the pan itself) necessary for the rice to release its starch. Once started, the preparation of risotto is not usually something you can walk away from to let cook on its own. (For that reason, good mise en place – having everything measured, chopped, etc., before you start – is especially important here.) If you give the preparation the attention it deserves, you – and your family or guests - will be amply rewarded.

Within the basic risotto structure - rice, onion, garlic, oil or butter, wine and parmesan – many treatments are possible, This recipe is for Tomato-Basil Risotto with Roasted Red Pepper. It’s shown in the photo above topped with cornmeal-crusted codfish nuggets and surrounded by marinated grilled zucchini and yellow squash. (The fish is based on a recipe posted here previously; if you’d like a copy of that recipe, just let me know and I’ll be happy to send it. The grilled, marinated vegetables are from a recipe published by Bobby Flay in his “Grilling for Life” cookbook. It generally consists of grilling the vegetables, then marinating them.)

Hope you enjoy this take on an Italian classic! This recipe makes four servings.

Begin by warming 4 cups of vegetable broth in a saucepan over low heat.


While the broth is warming, roast a red bell pepper on the stove burner. After the entire skin is blackened, wrap the pepper in foil and set aside to steam in its own moisture. When it has cooled enough to handle, cut the roasted pepper into small pieces and set aside.

At this point, you’ll want to check your e-mails, go to the rest room, or do anything else you might otherwise be tempted to do while the risotto is cooking. The Risotto Show is about to start, and it’s performed with no intermissions!

Put 2 Tbsp of olive oil in a sauté pan and sauté the one small onion and 4 garlic cloves, all finely chopped, over medium heat. (I used a red onion just because it was what I had on hand, but any preferred kind of onion will work.)

When they are cooked through, add one cup of Arborio rice (not regular long-grain rice!) and cook for 2 – 3 minutes, stirring constantly to coat the rice lightly in the oil.

Add ¾ cup of dry white wine (Chardonnay or similar) to the sauté pan and cook until the liquid is absorbed, stirring constantly.


Increase the heat to medium-high. Add ¼ cup of chopped, fresh basil and 1 Tbsp of fresh thyme.


Immediately after, add the broth, ½ cup at a time, stirring occasionally and waiting till the liquid is absorbed before adding more.


When all the broth is absorbed, add a 14.5 ounce can of diced tomatoes (very well drained but not rinsed) and the roasted red pepper. Cook long enough to heat through.

Add ½ cup of fresh grated parmesan.
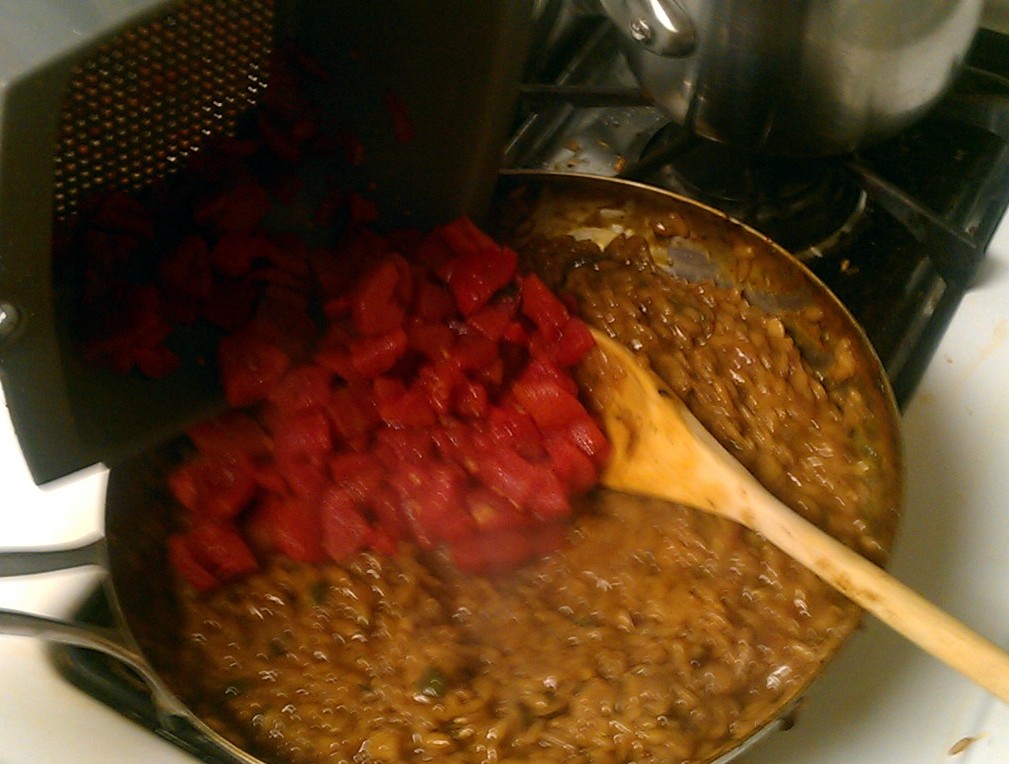


Stir until combined, and add salt and pepper to taste. Serve immediately.


To download a copy of the recipe for Tomato-Basil Risotto with Roasted Red Pepper, click HERE.

Enjoy! And please come back next week for another delicious, family-friendly recipe. Till then, stay well, keep it about the food, and always remember to kiss the cook. ;-)


Saturday, December 10, 2011

Easy, Fresh Italian Bread

A warm welcome to new subscriber Margot!

As part of last week’s recipe for a delicious spaghetti and homemade meatballs dinner with an easy-to-prepare no-cook tomato sauce, I promised to come back with directions for the fresh-baked Italian bread I served on the side. Today I keep that promise.

What’s that you say? Baking bread is difficult? Not at all! Although we’ll be making ours by hand, remember that some people make bread by putting the ingredients in a bread machine, walking away, and coming back later when the bread is finished, with the machine having done all the work; how much thinking could be involved? This is especially true of Italian bread, which is usually kept simple because one of its main purposes is mopping that delicious sauce from the entrée plate, and you wouldn’t want embellish it with herbs or other savory flavors that might conflict with your sauce. (That said, it’s also mighty good gently dipped in a small dish of either plain or herbed extra virgin olive oil. I like a dash of vinegar too, but that’s just me.)

If you’re concerned that bread takes hours to make, I have more good news. While it’s true that several hours will pass between the time you start to the time you have fresh, warm bread to serve, for almost all of it the dough is doing the work while you’re off living your life. In the culinary world, this is known as “inactive time.”

Among the few simple ingredients this recipe uses is bread flour. That’s not the same thing as all-purpose flour, but it’s easy to find right next to it in the baking aisle at any supermarket. For a quick description of what the difference is, here’s a link to a recipe for Savory Crust Pizza posted here previously.

This introduction to bread-making would be incomplete without this bit of wisdom I read in a wonderful book call, “How I Learned to Cook” by Kimberly Witherspoon and Peter Meehan. It's a compilation of early experiences related by a collection of well-known chefs. One of the chapters was from Nancy Silverton, co-founder (and bread expert) of a number of high-level restaurants in California. What she said, which I simply loved, included this:

"I realized I couldn't think about bread the way I thought about pastry or pasta or any other typical culinary undertaking. Bread is alive. Minor inconsistencies are a fact of life, not a mark of failure. The tiny variation in the loaves from day to day made them unique, not imperfect. And the relationship of a baker to her bread is like any other kind of serious relationship you have with anybody in life. It's never perfect. It takes so much work. And every time you think that you've mastered it, the next day you're brought back to reality and it needs some more work."

Let’s bake some fresh bread! This recipe makes four 4 loaves.

Dissolve 1 package (1/4 oz.) dry yeast and ½ teaspoon of sugar in 2 cups of 110 degree F water and let it rest for about five minutes. (The mixture should foam while resting.)

Sift 1-1/2 pounds of bread flour, setting another ¼ pound aside for adding later if needed for texture. (It’s easier to add flour to a dough that’s too moist than it is to add liquid to a dough that’s too dry.)

Add 1 tablespoon of salt and mix well, since direct contact with the salt will kill the yeast in the next step.)


Add water-yeast mixture and mix to form dough.

Knead for 8-10 minutes until the dough becomes smooth and elastic, and just a bit sticky. (You can do this by hand, but it’s easier with a stand mixer fitted with the dough hook attachment.)

Place dough in a well oiled bowl and let stand until about double in size. (Usually 1-2 hours.) The stove top or the top of the refrigerator are good places for this.


After the dough has doubled in size, pressing down with hands to deflate it, then turn it out onto your counter and divide it into four portions.


Press each portion into an oval.


Fold the long sides toward the center. Press out again and repeat.


Using palms, roll each into a cylinder 12 inches long. (Start with palms in the middle and work toward the ends to make the cylinders longer. Don’t pull the dough, which will toughen the gluten in the flour.)

Place each cylinder on a baking sheet dusted with cornmeal. Cover loosely with oiled wrap and “bench-proof” until doubled, about 45 minutes – 1 hour. While the loaves are proofing, pre-heat the oven to 500 degrees.

When the loaves have finished proofing, make three lengthwise cuts on top of each loaf. Place each loaf in oven and bake until browned, about 10 minutes.

Lower the temperature of the oven to 400, and continue baking for another 20-25 minutes until well-colored. Let the loaves cool a bit on racks.

Happy bread-making!

See you next week with another delicious, kitchen-tested recipe made from easy-to-find ingredients. Till then, stay well, keep it about the food, and always remember to kiss the cook. ;-)

Friday, January 7, 2011

Breaded Baked Italian Style Fish Fillets

Ciao amici!

This week’s recipe is a little unusual in that it’s the first of a two part combination. Like a good movie, a well-made dish has both a star and high-quality supporting players. My offering today is the star of the dish – a breaded Italian style baked fish fillet – and next week we’ll continue with a delicious (and just a bit unusual) brown rice side dish that goes especially well with it.

I’ve made this twice: once with scrod and once with pollock. Both worked equally well, and I expect any other white fish would too. I’ve not prepared other types of fish this way, but I have every reason to believe it would be successful as well. (I also might give this a try with chicken breasts some time soon.)

You'll see that the recipe is simple, and the result is delicious. A couple of notes before we begin will fill out some of the recipe’s details:
  • Before coating the fish with the seasoned bread crumb mixture, I seasoned the fish itself with a bit of olive oil, and a mix of salt, pepper and garlic powder. I like this much better than having all the seasoning in the breading since it distributes the flavor throughout the entire bite, rather than relying only on the breading.
  • Instead of plain bread crumbs, I like to give the breading a more varied texture by using a mixture of plain crumbs and panko. (Panko, for anyone unfamiliar with it, is made from bread without crusts and has a texture that is crisper than plain bread crumbs. Originally used in Japanese cooking, panko is now in common use all over and can usually be found at the supermarket right next to the plain breadcrumbs.) For me, plain breadcrumbs, while very good, seem to say, “Good evening. I’m your breaded coating and I’m going to help make eating this fish a pleasurable experience for you.” Using panko adds a bold crispness that grabs you by your collar and says, “Yeah, I’m the breading. You got a problem with that?”
To make four servings:
Preheat the oven to 450 degrees.

Dry the surface of four fish fillets using paper towels, then brush both sides of each fillet lightly with extra virgin olive oil. Make the fish seasoning by mixing 1 tablespoon of  kosher salt, ½ teaspoon of fresh ground pepper, and 1teaspoon of garlic powder, and apply it generously to both sides of each fish filet. (Any remaining seasoning mixture can be reserved to season whatever vegetables you’re serving with the fish.)
You’re now ready to bread the fish fillets. An easy way to do this without making a mess is to put the flour, seasoned bread crumb mixture and, if you like, even the egg substitute (or beaten eggs) into large sealable plastic food storage bags.
Place three pans (or the sealable bags) on the counter. In the first, put 1 cup of all purpose flour. In the second, put two egg substitute eggs (or two regular egg, well beaten). In the third, combine the following ingredients to make the seasoned bread crumb mixture: ½ cup panko bread crumbs, ½ cup plain bread crumbs, 2 tablespoons  of  dried basil, 2 tablespoons of dried oregano, 1 tablespoon of dried parsley, 1 teaspoon of dried thyme, 1 teaspoon of dried rosemary, and the zest of 1 lemon or orange.

Working one fillet at a time, put each fillet in the flour and coat well, then in the egg, then in the seasoned bread crumbs. Be sure both sides are well coated. As you finish breading each fillet, place it on a baking sheet lined with parchment.

Once all the fillets are coated, bake them until the fish is cooked and flaky, about 10-12 minutes, turning them over half way. To serve, drizzle each fillet with a little olive oil and garnish each plate with a lemon wedge to serve. (A glass of white wine won't hurt, either!)
So there you have part 1 of our delicious Italian-style dinner. Coming up next week in part 2: a special side dish I call “Brown Rice Rizzuto.”

As always, if you’d like a cookbook style, notebook ready copy of this week’s recipe, just let me know in a comment or an e-mail and I’ll send it along.

See you next week for part 2! Till then, stay well, keep it about the food, and always remember to baci il cuoco. ;-)